
Schedules#
Sync scheduling#
Sync scheduling involves scheduling actions to take place at a specified time, or to repeat.
Currently, the action is to execute.
Single or multiple actions can be executed on one or more resources:
Data Sync
Script
Provisioning Workflows
A schedule can be created during the Bulk Load process. Bulk loaded files that are not set to Execute Immediately can be scheduled by Execution Date, -Time and -Timezone. A scheduled bulk load is shown on the Schedule as a Single Execution schedule type and with the Resource Type as data/BulkLoad.
Care should be taken when transactions are scheduled. For example, data syncs should be scheduled outside of peak times. The size and scope of the transactions that run determine the length of the time that they need to run. This therefore impacts on the start time. The number of clusters on the system and their size need to be considered as part of a data sync approach.
Related topics
Best practice for scheduling syncs#
Avoid too many overlapping syncs at a given time. The system already blocks multiple syncs against a given device.
The best practice is to not have more than five syncs running at a given time.
To avoid load and issues with concurrency, schedule syncs carefully and at intervals when they are really required. For example, do not run nightly syncs unless it is necessary. Since syncs generally cover the case where information is changed on the UC apps outside Automate, the level of third party integration or direct configuration tasks should play a role in the decision to schedule. For details, refer to the topics on Cisco UCM, CUC and LDAP below.
Since it is possible to limit the number of records processed with a given sync, more predictability can be obtained with scheduling.
Enable a scheduled data sync#
This procedure enables the scheduled data sync so that it executes regularly.
Note
Setting up a Cisco UCM or CUC device in Automate:
Creates a full pull data sync instance, which will perform the initial sync of all data from the device. It is recommended that you manually run the full pull data sync only when necessary.
See Manually run the default data syncCreates a Change Notification Sync type (on the Data Sync page). Manually running the change notification sync is not supported.
Creates a scheduled data sync (disabled by default) to execute a data sync every 14 days. This topic describes how to enable this regular sync.
Enable the scheduled data sync
Log in as provider administrator.
Go to the Scheduling page.
Choose the schedule instance that matches this naming convention:
HcsSync-<ip_address>-<device_name>-SCHEDFor example:
HcsSync-192.0.2.24-CUCM01-SCHEDSelect the Active checkbox.
On the Multiple Executions tab, update the interval, as required.
Click Save.
The full data sync executes immediately, and executes again according to the schedule.
Add or edit a schedule#
This procedure displays and edits existing schedules, and adds a new schedule.
Note
Automate also provides a tool to deactivate and reactivate schedules in bulk, if required.
See Bulk Schedule Activation / DeactivationLog in to the Admin Portal and select the relevant hierarchy.
Go to Sync Scheduling to open the list view.
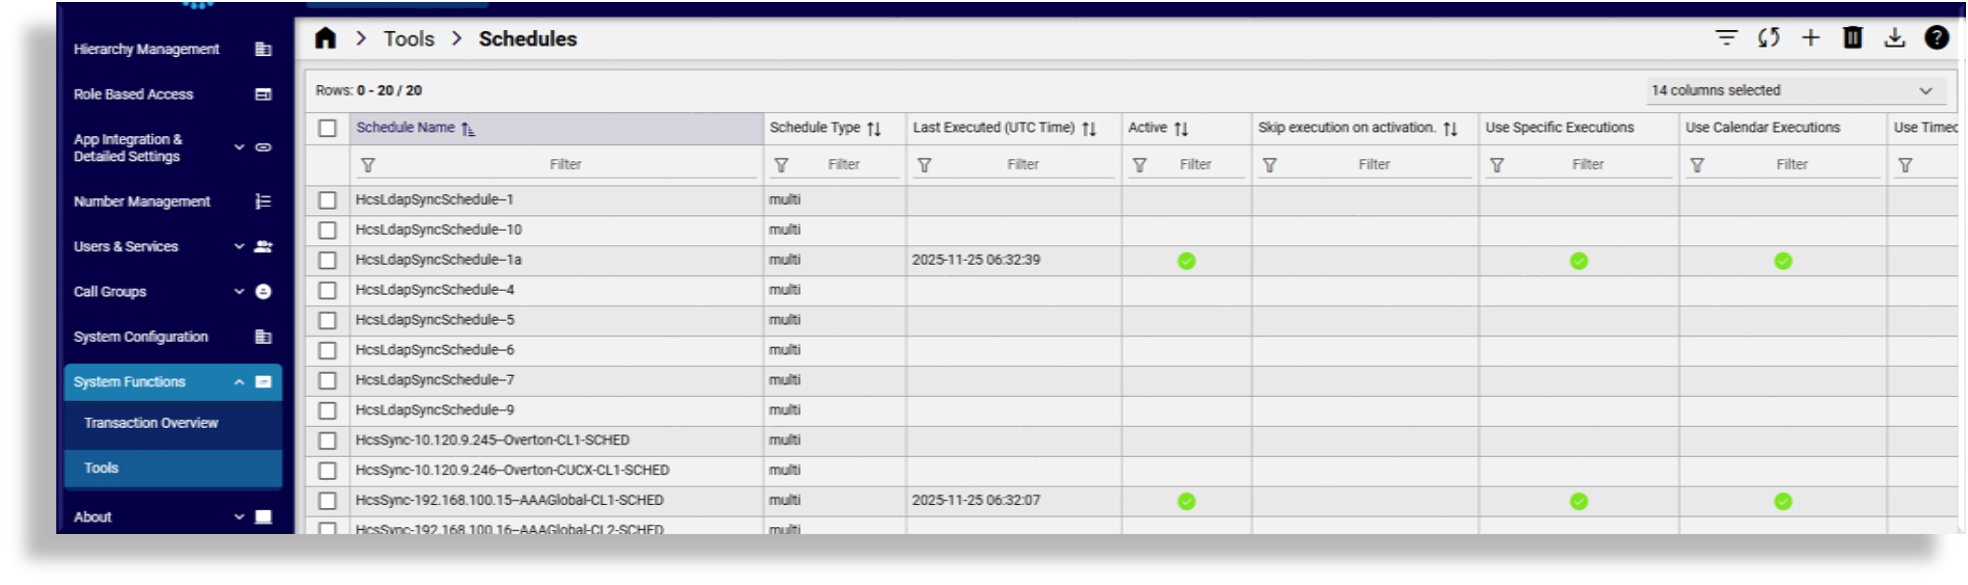
View existing schedules in the summary list view, which includes a number of attributes for each schedule.
Note
Resource attributes are used for filtering when you want to choose a resource.
Choose an option:
To edit a schedule, click on the relevant schedule to open its configuration page. Make the changes you require, then click Save.
To add a new schedule, click the Plus (+) icon to add a new record. Go to the next step to configure the schedule.
Configure the schedule.
The table describes sync schedule settings on the Details tab/panel:
Setting
Description
Schedule Name
The name of the schedule.
Last Executed (UTC Time)
Read-only. Displays the last time this schedule executed.
Owner
The schedule owner. The user who created this schedule. Read-only for existing schedules.
Schedule Type
Mandatory. Select the schedule type. Either Single Execution or Multi Execution.
See below for the configurable settings for either single execution or multi execution.
Active
This checkbox defines whether the scheduled sync is enabled (active) or disabled.
Clear the checkbox to disable the sync schedule.
If you’re enabling the sync schedule and there is a “next execution” in the past, the sync executes immediately when you save. To prevent the execution of this past sync schedule, select Skip execution on activation.
Skip execution on activation
Prevents the execution of a “next execution” in the past if you’re choosing to enable the schedule now.
Selecting this option prevents a situation where, for example, you wish to pause the execution of scheduled syncs for a period, perhaps to perform an upgrade. Post-upgrade, when activating the schedule, a number of pending syncs may execute immediately. This setting clears pending scheduled syncs so that the schedule executes again only at the next scheduled execution time, after the schedule is set to “active”.
Scheduled resources
Mandatory. Displays only when Active is selected.
Adds one or more scheduled resources. Configure the following:
Click the Plus icon (+) to add a scheduled resource.
Select the action, typically, Execute.
You can schedule one or more actions or one or more resource types, and choose resource attributes for each.
Choose the resource type (resources that can be executed, for example,
data/DataSync).Choose the resource attribute to filter on when choosing the resource type, which is typically
name.At Resource, select the value of the resource attribute. For example, if the attribute is
name, then the name of the resource.At Perform Action, define whether to enable or disable the resource scheduled action.
The table describes sync schedule settings on the Multiple Executions or Single Execution tab/panel. The tab/panel that displays depends on the option selected for Schedule Type:
Schedule Type
Settings
Single Execution
At Execution Date and Time, choose a date and time from the calendar date/time picker.
Choose the execution timezone.
Multiple Executions
Choose one or more of the following options:
Use Specific Executions
Use Calendar Executions
Use Timed Executions
Configure settings for the options you selected.
When choosing two or more options, the first scheduled time takes priority.
If a schedule is in a state where the last executed and next execution time are equal, the next execution time is recalculated to ensure its execution.
Click Save to create (or update) the schedule.
The schedule you added (or updated) displays in the Scheduling list view.