
Add Automate over an existing Webex organization#
Add Automate over an existing Webex organization (configuration already in place)#
This procedure adds Automate over an existing Webex organization with configuration already in place:
The Webex organization has been previously configured in the Webex Control Hub.
Webex Calling configuration is in place (including locations; may also include additional configuration, such as for numbers, users, and devices).
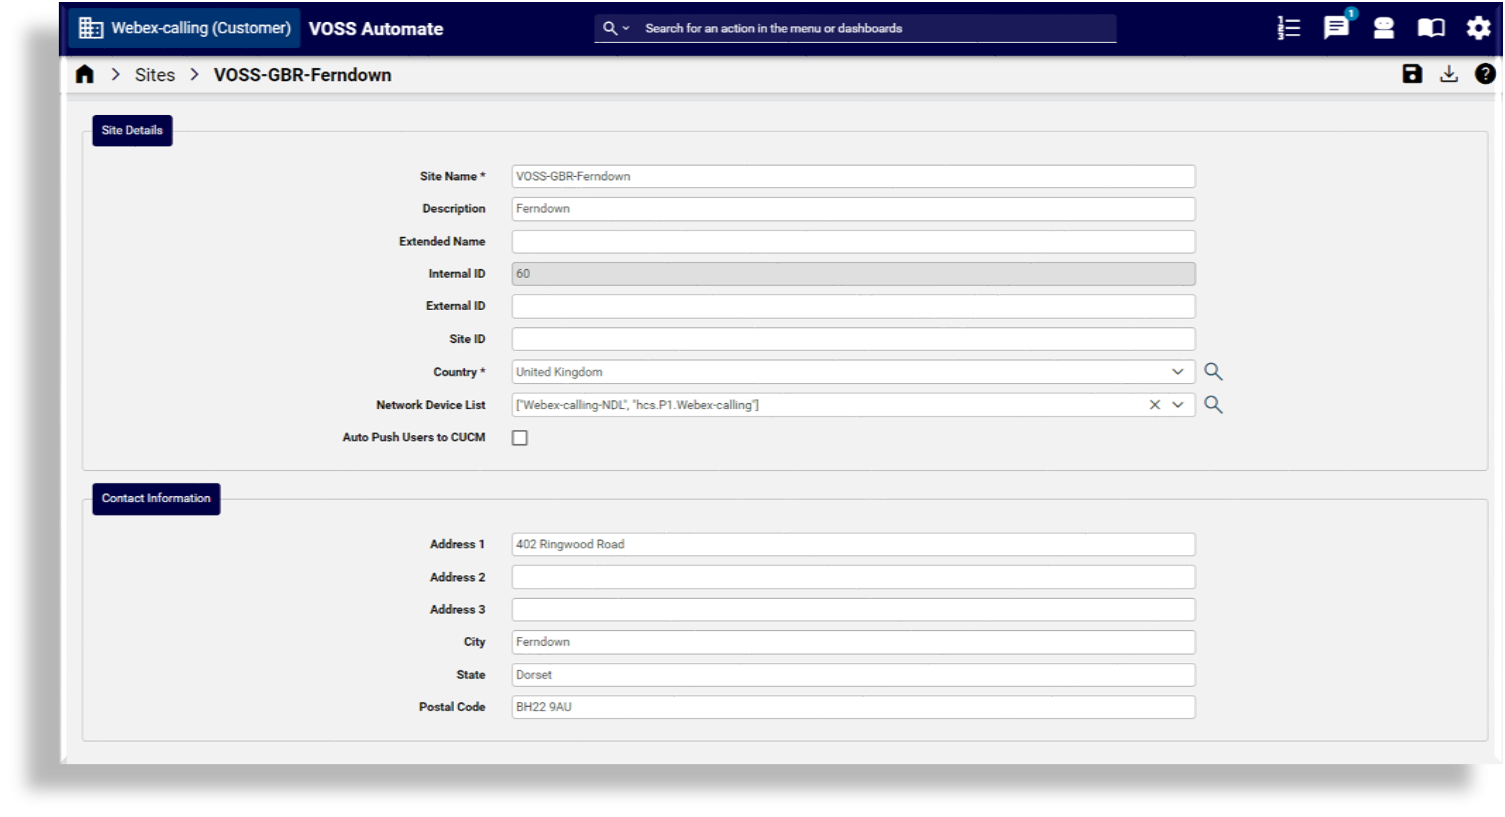
Automate syncs in the configuration and automatically creates the required sites. Users, numbers, and devices are automatically moved to the appropriate sites.
In the Automate Admin portal:
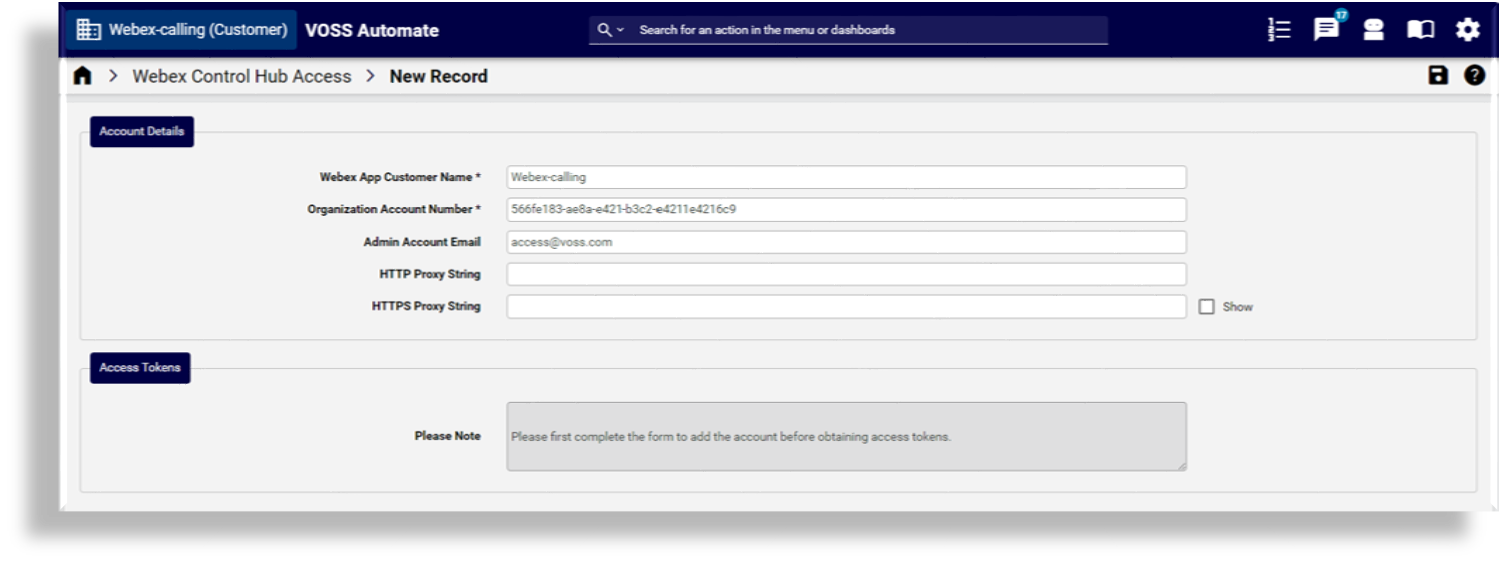
Add the Automate customer.

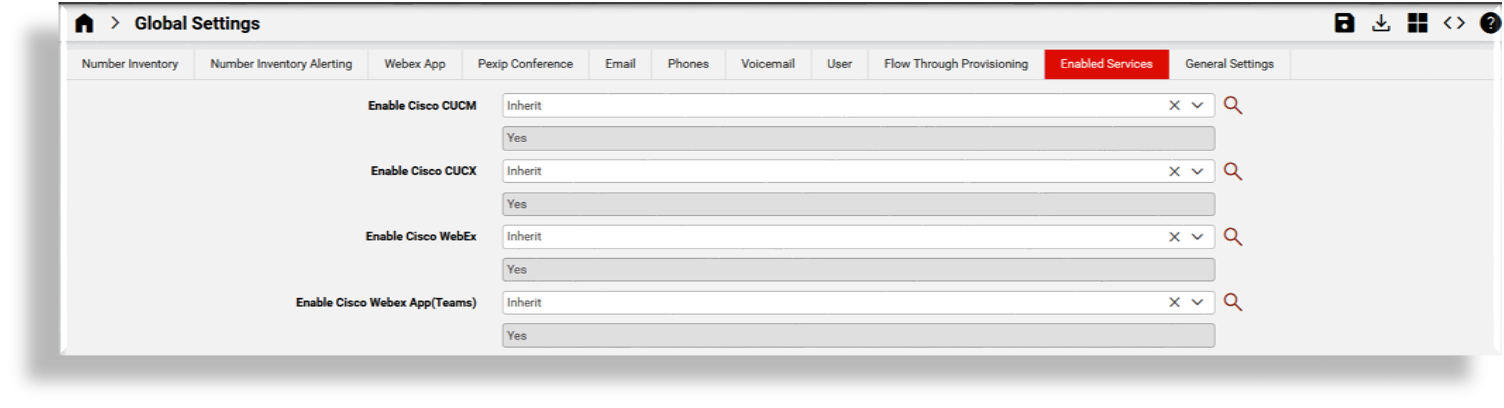
In Global Settings:
Disable HCS rules for the customer to allow Webex Calling number management without the restrictions of the Cisco HCS dialplan.

Ensure that Webex App (Teams) is enabled for the customer to allow the display of conditional menu items.
Optional. Create intermediate nodes, if required.
Note
This step allows sites to be grouped under intermediate nodes (divisions), which is useful where there are a large number of sites and/or the administration of those sites should be available to groups of administrators, each of whom are responsible for a subset of those sites.

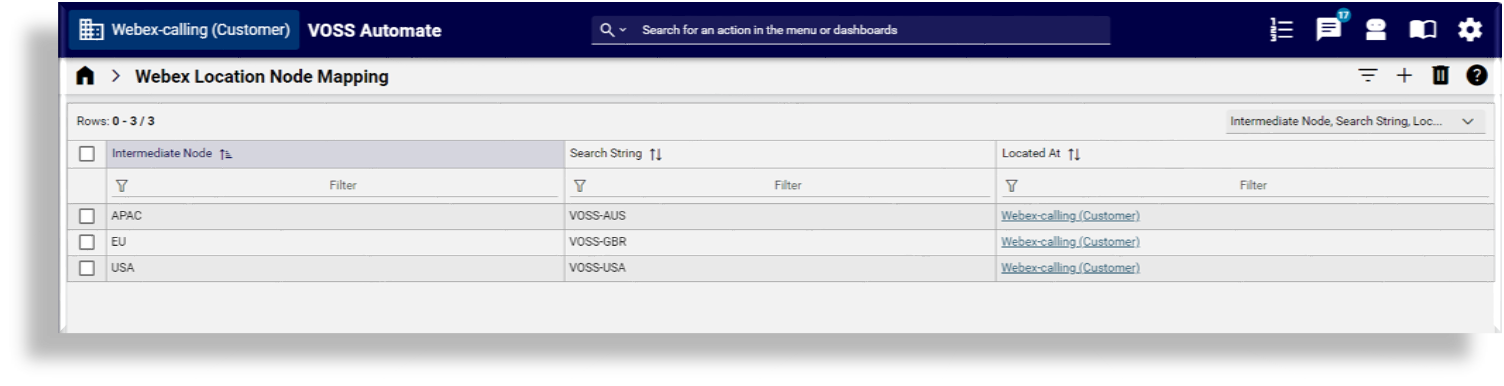
Create Webex Location Node mapping, if required.
Note
This step allows the mapping of partially matched location names to match to the intermediate nodes created in the previous step.
When syncing in locations from the Webex Control Hub, sites are automatically created under their appropriate intermediate nodes. Location names that don’t match these rules are created under the Customer hierarchy.
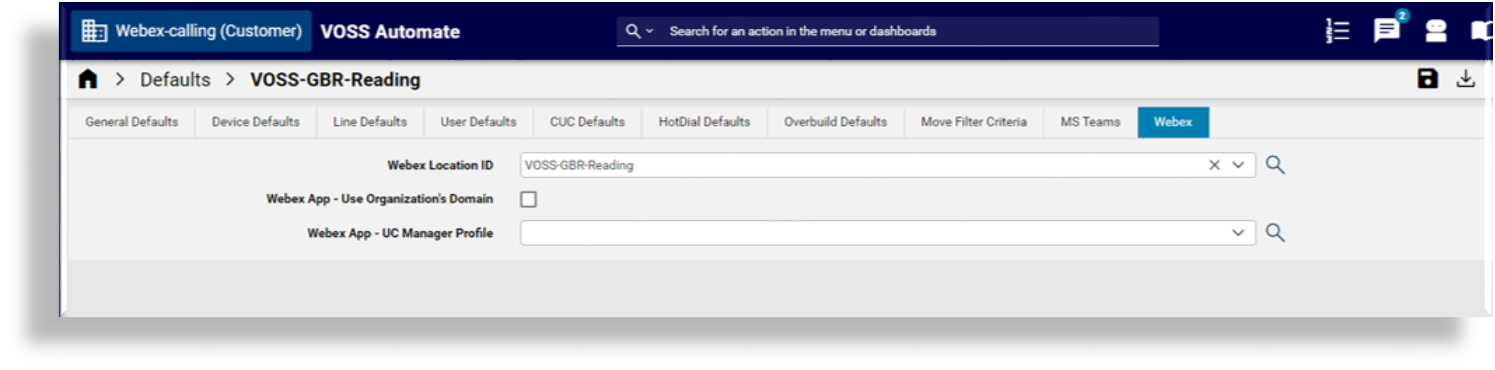
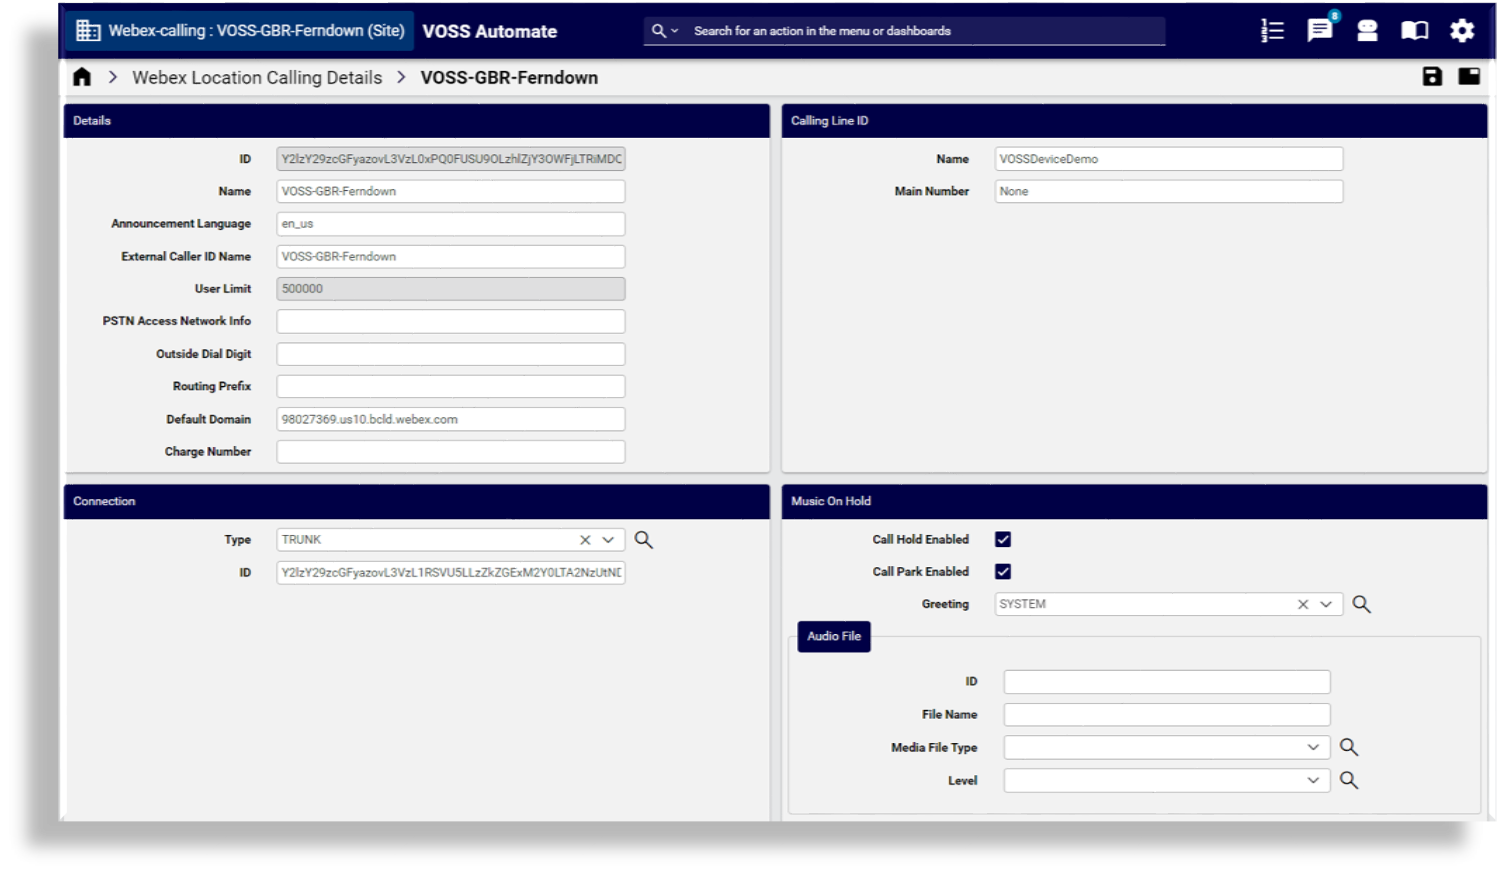
In each site’s Site Defaults, add or update the Webex Location ID field to prevent the automatic creation of new sites.
Note
In some cases, sites may already exist in Automate, typically, where Automate already provides managed services using different vendor technologies. In this case, update the existing Site Defaults Doc (SDD) parameter, Webex Location ID, for each site, prior to connecting Automate to the Webex Control Hub. Location names and Automate site names do not need to match.
Adding the Webex Location ID to the SDD prevents the creation of new sites.
In the Webex Control Hub:
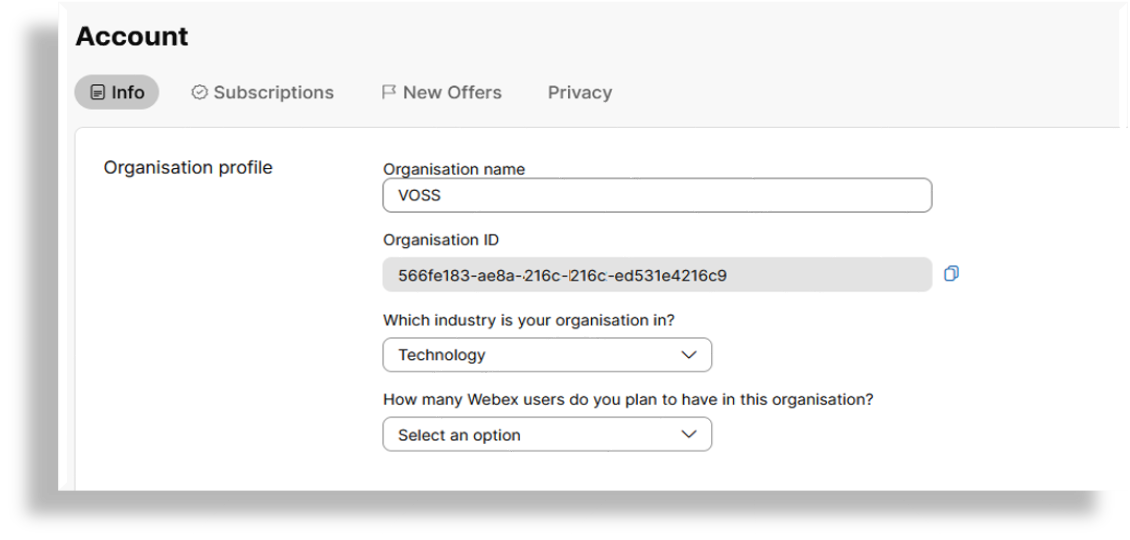
On the Account page, obtain the Organization ID.
Note
The Organization ID will be required when connecting Automate to the Webex Control Hub.
Add an admin user that Automate can use to access the Webex Control Hub, and ensure that the correct roles are assigned.

In the Automate Admin Portal:
Add the Organization ID you obtained from Webex Control Hub.
If an HTTP(s) proxy is in use for internet access, fill out a value for HTTP Proxy String / HTTPS Proxy String.
Save your changes.
Re-open the form you saved, then click the Connect to Webex Control Hub link to open Webex Control Hub.
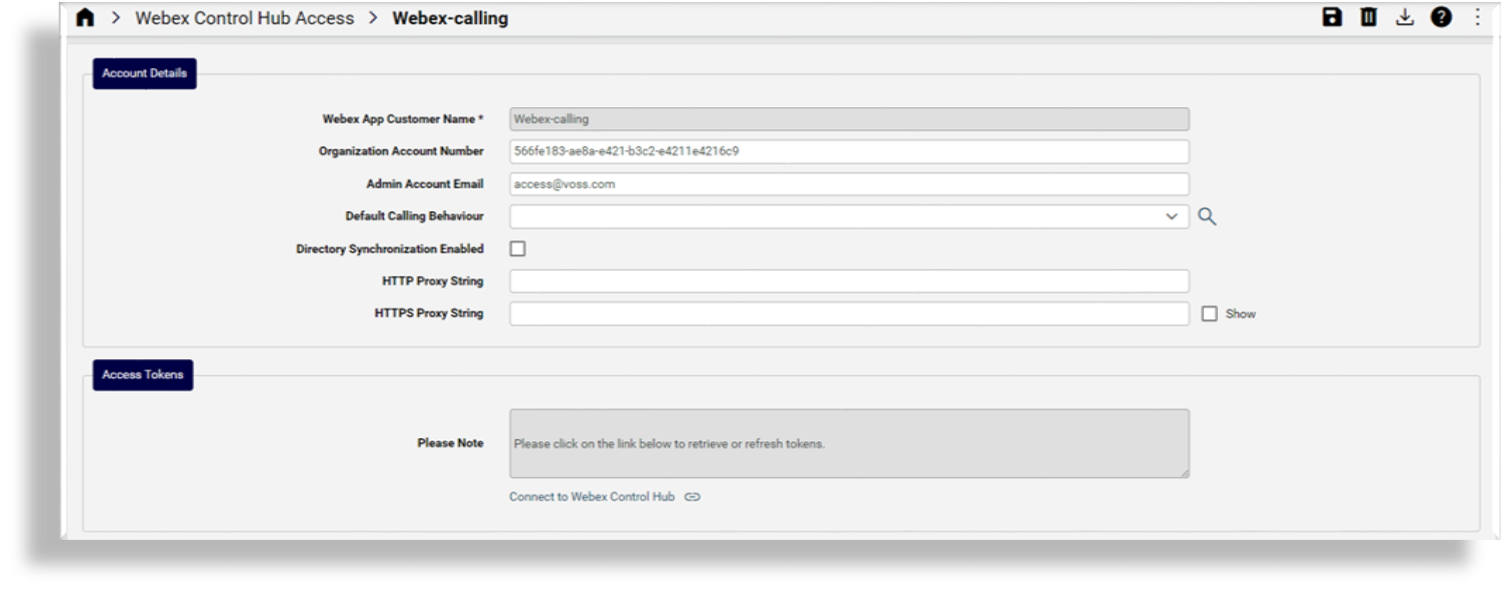
Log in to Webex Control Hub with the user credentials to be used for Control Hub access.
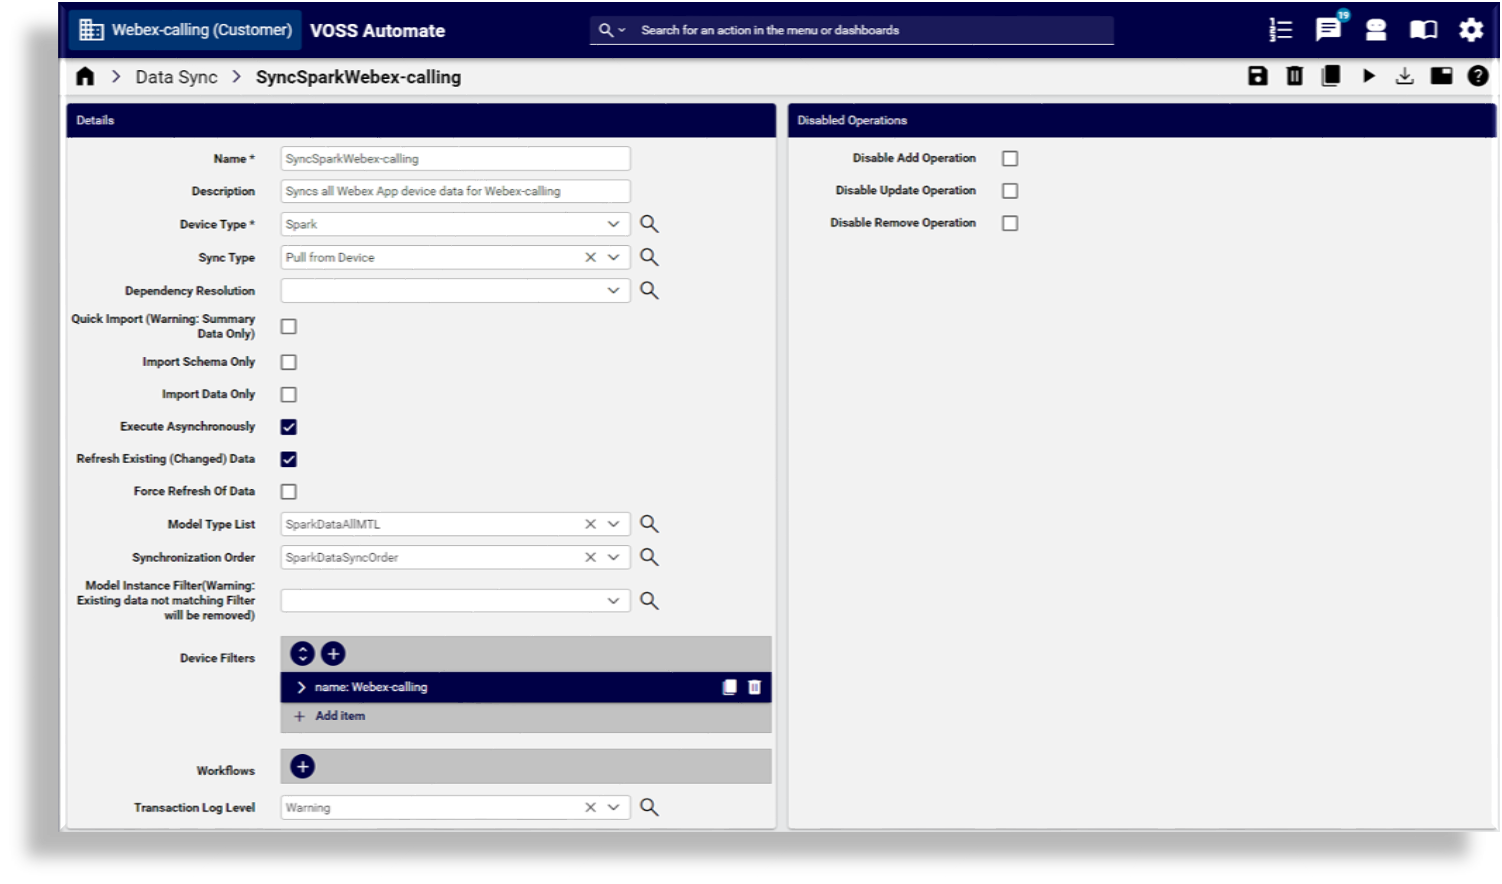
In the Automate Admin portal, execute the full sync to pull in all Control Hub data. Site-specific data is automatically moved to the sites created.
The initial configuration and import of the Webex customer is now complete.
Add Automate over an existing, un-provisioned Webex organization#
This procedure adds Automate over an existing, un-provisioned Webex organization:
The Webex organization has been previously created in the Webex Control Hub.
Webex Calling configuration does not yet exist.
Automate will be used to create and manage Webex Calling configuration.
Note
At the time of writing (25.1), some configuration must be managed via the Webex Control Hub. This topic does not include details for Webex setup outside of Automate, such as LDAP integration and Organization settings. Refer to the Webex documentation for these details.
In the Automate Admin portal:
Add the Automate customer.
In Global Settings:
Disable HCS rules for the customer to allow Webex Calling number management without the restrictions of the Cisco HCS dialplan.
Ensure that Webex App (Teams) is enabled for the customer to allow the display of conditional menu items.
Optional. Create intermediate nodes, if required.
Note
This step allows sites to be grouped under intermediate nodes (divisions). This may be useful where there are a large number of sites and/or the administration of those sites should be available to groups of administrators, each of whom are responsible for a subset of those sites.
Manually add new Automate sites.
Log in to the Webex Control Hub, then:
Obtain the Organization ID from the Account page.
Note
The Organization ID will be required when connecting Automate to the Webex Control Hub.
Add an admin user that Automate can use to access the Webex Control Hub, and ensure that the correct roles are assigned.
In the Automate Admin portal:
Add Webex Control Hub access:
Add the Organization ID you obtained from Webex Control Hub.
If an HTTP(s) proxy is in use for internet access, fill out a value for HTTP Proxy String / HTTPS Proxy String.
Save your changes.
Re-open the form you saved, then click the Connect to Webex Control Hub link to open Webex Control Hub.
Log in to Webex Control Hub with the user credentials to be used for Control Hub access.
In Automate:
Execute the full sync to pull in all Control Hub data.
Add locations to the Control Hub:

In Webex Control Hub, set up calling connection:
Go to Locations.
Select the required location.
On the Calling tab, add the PSTN connection type.
Note
This is reserved for future development in Automate.
In Automate:
Execute a full pull sync to pull location calling settings from Webex Control Hub into Automate. Location calling settings can now be managed from Automate.
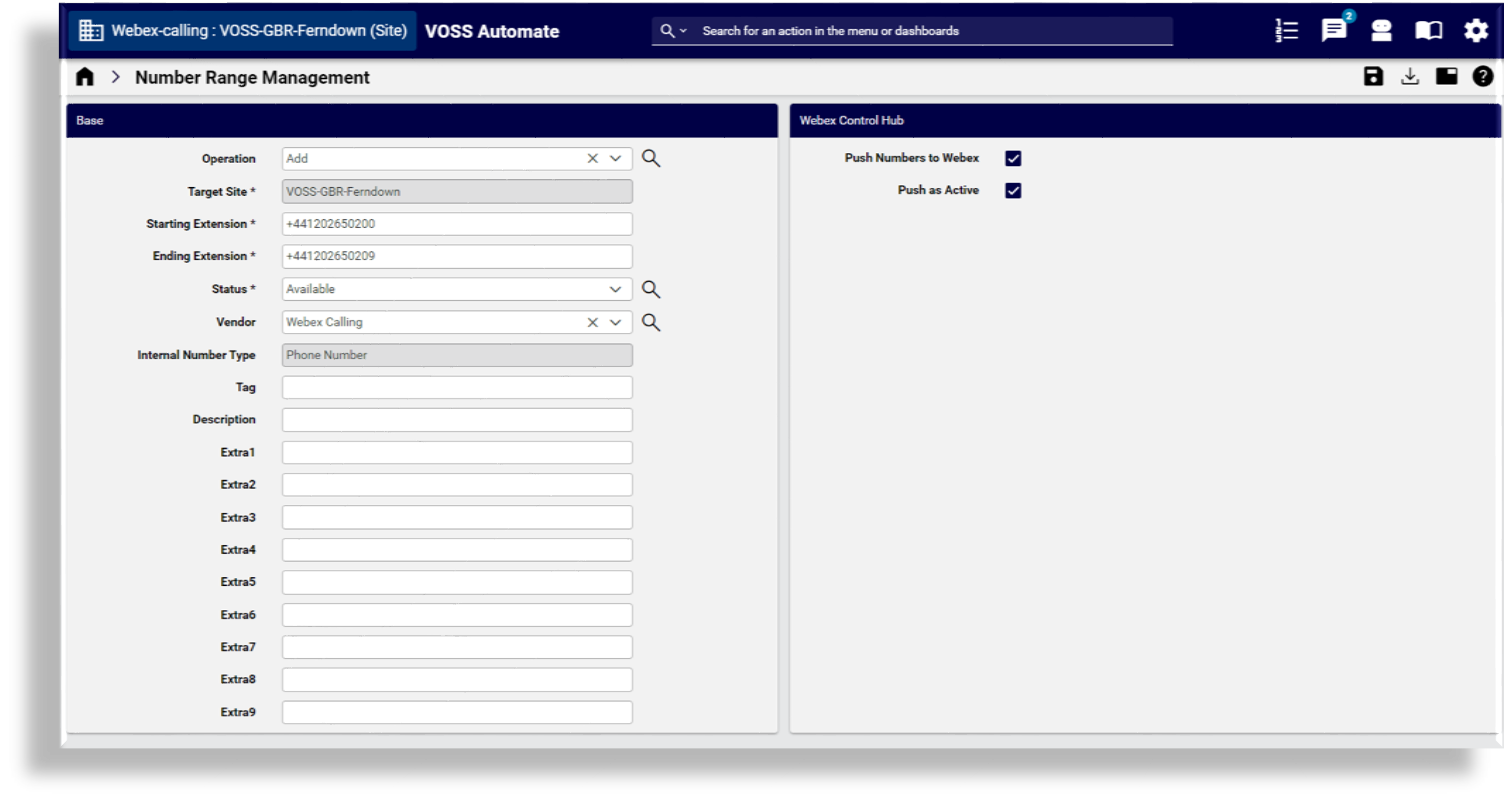
Add numbers into the Automate inventory, and then push those numbers into the Control Hub.
The initial configuration and import of the Webex customer is now complete.
Sync Webex data from the Control Hub#
To keep data up to date, use schedules to sync Webex data from the Webex Control Hub:
SyncSparkXXXX: An automatically created data sync (XXXis the customer name). Schedule this sync to run at suitable intervals where it is interleaved with other Webex syncs.SyncSparkUsersXXXX: A data sync that syncs only users. Recommended where flow through provisioning is used. This user sync may run more frequently than the full sync in order to reduce delays in provisioning or removing users.
In the case where numbers are updated frequently outside of Automate, a data sync to sync only numbers should run more frequently. This will be required not just for adding and deleting numbers, but also to update their usage status if numbers are allocated and de-allocated outside of Automate.
Webex Control Hub rate limiting#
The Webex Control Hub may rate limit API calls to manage load on the Control Hub. Webex rate limit details are described at https://developer.webex.com/docs/basics .
In the event of rate limiting, the Control Hub will respond with a 429, and include a Retry-After
header, defines the time that Automate should wait before retrying the API call.
Rate limiting is applied to all customers that were granted access via any one admin account. Therefore, a service provider using a single account to manage multiple customers will have the rate limit applied across all customers.