
Insights Assurance Arbitrators#
Overview#
Managing Insights Arbitrators in Automate requires the following:
A License Mode for Insights Collaboration Assurance - see: Manage your Automate product license.
Set up Arbitrators
Set up host connection details and credentials (the admin user and password from the Arbitrator)
Note
See the Insights documentation for Arbitrator setup.
Add a connection to the Arbitrator server#
This procedure provides connection details to the Arbitrator server to integrate Automate with the Arbitrator server.
Note
Once the integration is complete:
The Arbitrator is available to onboard and offboard assets that are added or are available in Automate.
For example, if a MS Tenant is managed in Automate (Microsoft tenant setup), the corresponding MS tenant is shown and managed on the associated Arbitrator. The image shows an example where a tenant displays on the Arbitrator (API Config tab):
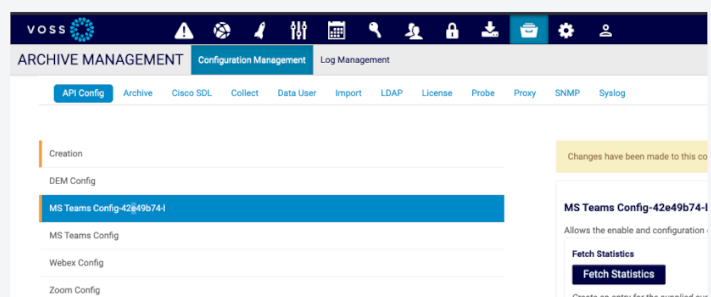
Also verify that the MS Tenant configuration includes a secret set up - see Microsoft tenant setup.
If Assurance is selected as Data Source to manage dashboard widgets, options are available to choose it as a Data Source Instance, since multiple instances can be configured. See: Chart widgets and Table widgets.
Add a connection to the Insights Assurance Arbitrator:
In the Automate Admin Portal, go to Insights Assurance Arbitrators.
Click the Plus icon (+) to add an Arbitrator.
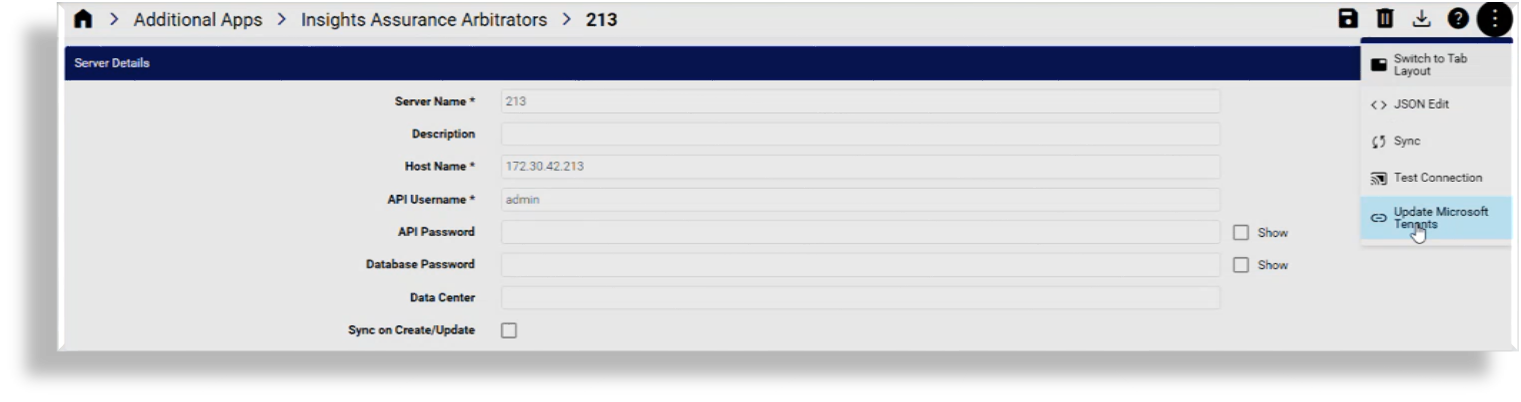
Fill out Arbitrator details:
Server Name
Name of the Insights Arbitrator server in Automate. Alphanumeric characters, allows spaces, dashes, underscores (for example, ARB-US-001).
Description
Optional. Provide a description.
Host Name
Host name or IP address of this Arbitrator server, which is used to connect to the Arbitrator.
API Username
Username for a valid admin account; an admin user allowed to log in to the Arbitrator server.
API Password
Password credential of a valid admin account; an admin user allowed to log in to the Arbitrator server.
Database Password
The Arbitrator database password (this password can be changed from the default on the Arbitrator CLI -
Data Center
The name of the data center where the Arbitrator server is deployed. Used as the location when Arbitrator assets are created.
Sync on Create/Update
When enabled (selected) Arbitrator server (based on Host Name) data is synced in to Automate (pull sync).
Click Save.
A data sync instance is created:
SyncAssuranceArbitrator__<arbitrator-name>A data sync instance is created:
PurgeAssuranceArbitrator__<arbitrator-name>A test connection is automatically carried out when saving the arbitrator details and it can also be used to manually verify input details and connection to the Arbitrator host (via the Action menu).
The new Arbitrator server is added to the list of Arbitrators displayed on the Arbitrator summary list view.
Note
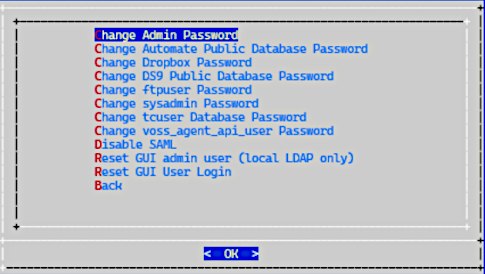
The Arbitrator default database password for Automate can be managed from the Arbitrator on the Change Passwords CLI menu on the Arbitrator. For details on the Arbitrator command line menus, refer to the Arbitrator Install Guide and Dashboard and Arbitrator Maintenance and Upgrade Guide.
To carry out this task, choose: Change Automate Public Database Password from the menu.
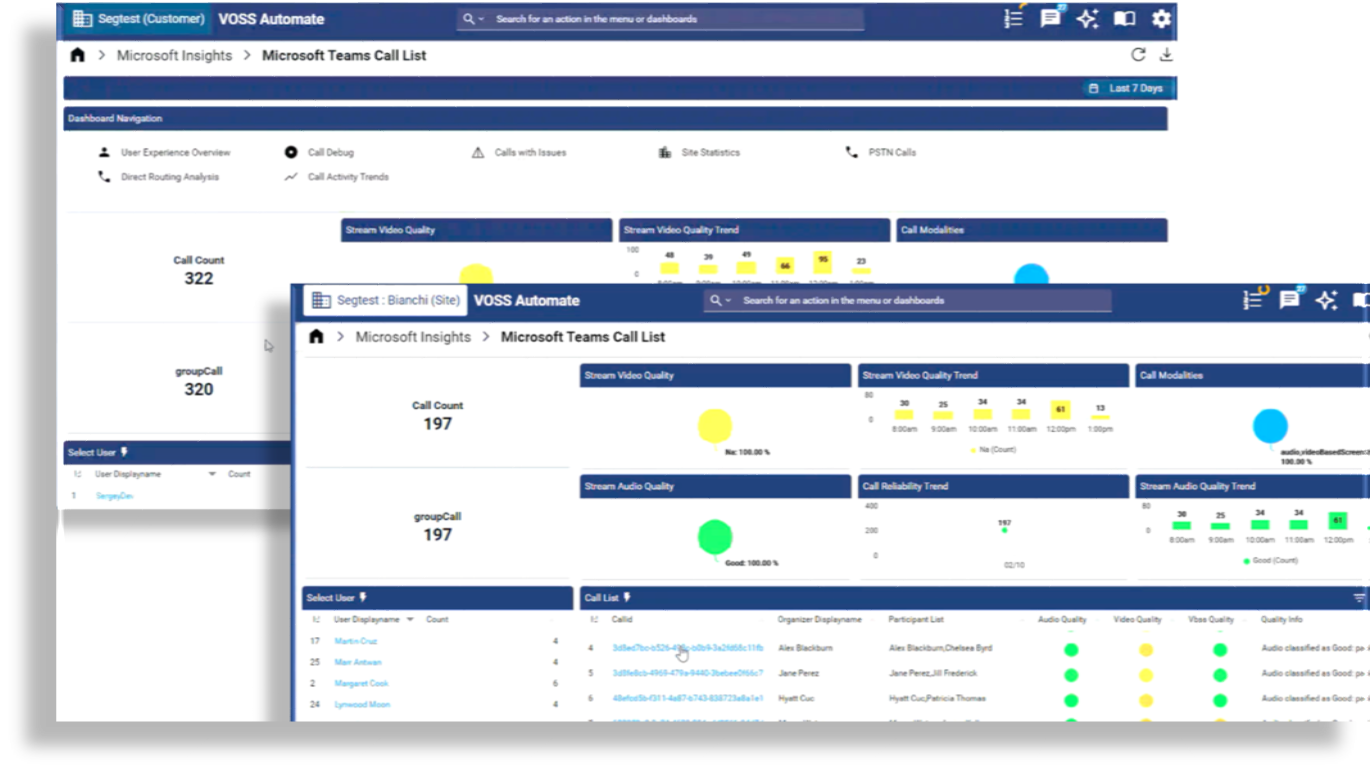
If Global Settings, Enabled Services shows Enable Microsoft as true, then Microsoft Tenant hierarchies can be synced in to the Arbitrator hierarchy via the Sync in Microsoft Tenants menu. Such a sync would then also allow for Digital Experience Monitoring (DEM) from the Microsoft Insights menu / dashboard. This sync should be repeated for any new Microsoft Tenants added under the hierarchy. For details, refer to Digital Experience Monitoring (DEM) in Introduction to Microsoft Insights.
Next Steps
CUCM and CUC servers can now be onboarded and enabled for monitoring. See Onboard assets.
Related topics
Push hierarchy details to Arbitrator’s call data#
This procedure pushes Automate’s user hierarchy paths into Arbitrator’s call records from the Microsoft tenant on Automate to update the Arbitrator.
Pushing Automate’s user hierarchy paths into Arbitrator, particularly when new sites are added, allows new calls to be stamped with the correct hierarchy, enabling segmentation of Microsoft Teams call data, role based access control (RBAC), and filtering in Insights dashboards.
Microsoft Teams call data (collected by Arbitrator) is segmented to match the user hierarchies defined in Automate so that admins can view this data in the correct business context. This allows the Microsoft Insights dashboards in Automate to display accurate call details at selected hierarchies, at a particular customer or site for example.
Existing call records are excluded. New calls (after the update) will have their hierarchy stamped - based on their user principal name (UPN) in the call record, matched to the correct hierarchy - as they’re brought into Automate from Microsoft.
Prerequisites:
Microsoft tenant set up and added to the Network Device List (NDL)
Arbitrator connection set up in Automate.
Note
The Microsoft tenant pushes its configuration data (including hierarchy information) to the Arbitrator so that you won’t need to add these details for the tenant on the Arbitrator. The call records on Arbitrator can then be stamped with hierarchy details from the tenant.
You will need to perform this procedure whenever you’re adding a new tenant at the Provider level so that the Arbitrator is updated with data from all Microsoft tenants.
Push hierarchy paths to Arbitrator
In the Admin Portal, go to Insights Assurance Arbitrators.
Click on the arbitrator.
From the overflow Action menu, select Update Microsoft Tenants to Arbitrator to push tenant configuration data to the Arbitrator.
Note
If you’re at Provider level, tenant config data from all tenants at this hierarchy is pushed to Arbitrator.
Related topics
Remove an Arbitrator server#
This procedure removes an Arbitrator server from the list of Arbitrator servers configured for integration with Automate.
In the Automate Admin Portal, go to Arbitrator (Insights).
View the summary list of available Arbitrators set up for integration with Automate.
Select the relevant Arbitrator, then click Delete.
The Arbitrator server is removed from Automate app servers (Unified CM, Unity Connection).
The integration details for this Arbitrator server is removed from Automate.
On the Monitoring group of the UC app server publisher form, the Insights Arbitrator checkbox is removed.
Created pull/purge data syncs on Automate are removed.