
Sites#
Overview#
Sites (locations) are a node on the hierarchy (organization) structure of Automate and are created under customers.
Related topics
Add a site#
This procedure adds a site.
Note
The system no longer automatically creates cloned roles when you add a hierarchy node. Automate
roles are now all managed via the data/Role model and can be assigned directly without
being cloned across hierarchies. See also Role-based dashboards and menus
If you have custom bulk loaders and need to carry out this automatic cloning task, add a new boolean field to the bulk load sheets and set to TRUE:
"name": "clone_admin_role"
"title": "Clone Admin Role"
To add a site:
Log in as either provider, reseller, or customer admin.
Set the hierarchy to the customer where you’re creating the site.
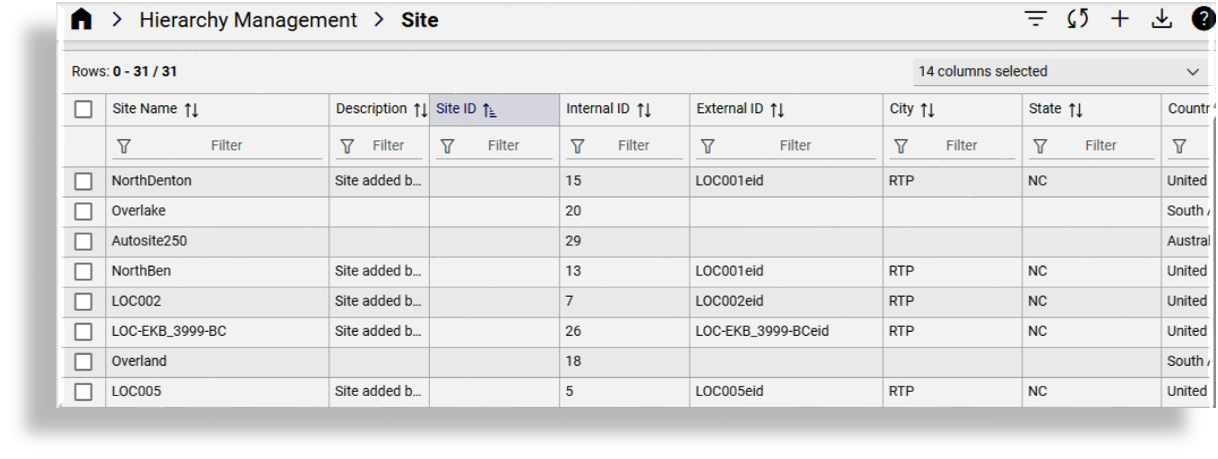
Go to the Site page.
Click the Plus icon (+) to add a new record, then fill out site details and contact information:
Field
Description
Site Name
Mandatory. The name of the site.
Note:
Any spaces in the site name are converted to underscores in the site local administrator name and email, if the Create Local Admin check box is selected.
You can’t migrate a customer location to a site if the customer for the site is different than the customer associated with the customer location.
When migrating a customer location to a site, an NDL is not selected for the site. You can set the NDL for the site later.
Description
The site description.
Extended Name
Provider deployments.
External clients can use the extended name of the site if needed. This field is not used by other components within Cisco HCS.
Field
Description
Internal ID
Read only. Internal ID of the site.
External ID
Provider deployments.
External clients can use the External ID of the site if needed. This field is not used by other components within Cisco HCS.
Site ID
Unique identifier for the site.
Country
Mandatory. The selected country determines the dial plan to download to the site when the dial plan is configured on the site.
Network Device List
Choose the network device list (NDL) containing the UC applications and Webex to be used by the site. Once an NDL is set for the site, it can’t be removed from the site, nor can the NDL be changed to another NDL.
Auto Push Users to CUCM
Disabled by default.
When enabled, users are automatically pushed to the CUCM associated with the NDL at the site.
You can also edit the site after it’s been created:
To automatically push users at the site to the CUCM
To execute auto push to CUCM when an NDL (with a CUCM) is added to the site
To execute auto push to CUCM when a CUCM is associated with the NDL at the site
Click Save to create the site hierarchy node and location.
If Auto Push Users to CUCM is selected:
All users associated with the NDL, provided they are user type End User, are pushed to the CUCM associated with the NDL
A user’s surname is required by the CUCM and must be set for that user to be successfully pushed to the CUCM
A Cisco user is created when onboarding Cisco users but not when onboarding Microsoft or Webex users (for sites with this setting enabled)
Add custom fields to site configuration forms#
Automate allows you to add up to ten custom string fields and up to 10 custom boolean fields to the field display policy you apply to the site model (relation/HcsSiteREL). This provides flexibility to add additional details for a site, if required.
The summary attributes in the Sites list view always display three boolean fields and three string fields, regardless whether they’ve been included in the FDP. If you wish to change the title of these fields in the summary attributes you can add a field override entry in the FDP.
When configuring a site (add or update), you may specify field values or use named macros to populate values for these fields.
Macros for custom string fields for relation/HcsSiteREL:
macro.BaseSiteDAT_custom_string_1
macro.BaseSiteDAT_custom_string_2
macro.BaseSiteDAT_custom_string_3
macro.BaseSiteDAT_custom_string_4
macro.BaseSiteDAT_custom_string_5
macro.BaseSiteDAT_custom_string_6
macro.BaseSiteDAT_custom_string_7
macro.BaseSiteDAT_custom_string_8
macro.BaseSiteDAT_custom_string_9
macro.BaseSiteDAT_custom_string_10
Macros for custom boolean fields for relation/HcsSiteREL:
macro.BaseSiteDAT_custom_boolean_1
macro.BaseSiteDAT_custom_boolean_2
macro.BaseSiteDAT_custom_boolean_3
macro.BaseSiteDAT_custom_boolean_4
macro.BaseSiteDAT_custom_boolean_5
macro.BaseSiteDAT_custom_boolean_6
macro.BaseSiteDAT_custom_boolean_7
macro.BaseSiteDAT_custom_boolean_8
macro.BaseSiteDAT_custom_boolean_9
macro.BaseSiteDAT_custom_boolean_10
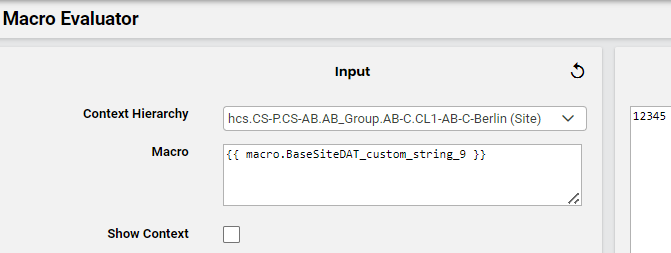
The macros can be applied in workflows and configuration templates to reference the custom field values. For example, executing macro.BaseSiteDAT_custom_string_9 will return the value in the field where the macro is used.
Expose custom fields for “relation/HcsSiteREL”#
Log in to Automate as provider admin or higher.
Create or update the customers data model field display policy:
Go to the Field Display Policies page.
Locate the entry for target model type
relation/HcsSiteREL.Click on the default field display policy (FDP) for the model (the FDP named default).
Clone (copy) the default FDP for the model, and give the clone a new name.
Note
You can’t modify default FDPs that ship with the system. This allows you to refer to or revert to a system default at any time, if required.
Modify the new FDP (the clone).
Note
You can add a new group of fields containing only the new custom fields, or add fields to existing field groups.
You can also create field overrides, which allow you to define that a custom field value will be referenced in place of an existing field.
Save your changes.
Update the menu layout to apply the field display policy:
Go to Menu Layouts.
Locate the Provider admin menu layout (HcsProviderMenu).
Click on HcsProviderMenu, and create a clone with a new name.
Note
You can’t modify default menu layouts that ship with the system. This allows you to refer to or revert to a system default menu layout at any time, if required.
Modify the clone (copy) of HcsProviderMenu:
Open the Sites .
Click in the Field Display Policy cell, then select the FDP you configured to add the custom fields.
Save your changes.
Log out, then log in again as Provider admin.
This allows the access profile changes to refresh so that you can view the updated menu layouts and field display policies you applied, including new custom fields.