
VOSS Automate App Registration in Azure
Overview
This procedure registers VOSS Automate as an application object in Azure Active Directory (AD), adds a client secret and/or a certificate (for authentication with the Microsoft identity platform), configures API permissions, creates, exports, and uploads a self-signed certificate, and adds VOSS Automate to the Exchange administrator role.
Note
The application object describes VOSS Automate to Azure AD, allowing the Azure AD service to issue authentication tokens to the VOSS Automate service.
Prerequisites
The table describes the tasks involved in this procedure:
Azure or PowerShell? |
Task |
|---|---|
Azure portal |
Step 1: Register VOSS Automate application Step 2: Configure Microsoft Graph authentication method (certificate and/or client secret) Step 3: Add MS Graph API and application permissions |
Azure & PowerShell (Optional) |
(Optional - Exchange Online only) Step 4: Setup for managing Exchange Online Note that steps 4 through 8 are only required if you’re using VOSS Automate to manage Microsoft Exchange. |
Azure portal |
(Optional - Exchange Online only) Step 5: Configure manifest and update API permissions |
PowerShell Proxy server |
(Optional - Exchange Online only) Step 6: Create, install, and export the self-signed certificate |
Azure portal |
(Optional - Exchange Online only) Step 7: Upload certificate and add application to Exchange administrator role |
PowerShell Proxy server |
(Optional - Exchange Online only) Step 8: Test the connection from PowerShell server to Microsoft Exchange |
Important
When performing this task, take note of the following values, which you’ll need to set up the tenant connection in VOSS Automate:
Directory (tenant) ID (Tenant ID field in VOSS Automate)
Application (client) ID (Client ID field in VOSS Automate)
Client secret (Secret field in VOSS Automate)
You can retrieve your Tenant and Client IDs from your Azure Active Directory portal at any time. But you’ll need to save your client secret in a secure location because it will be exposed only once. From a security perspective, treat these values as if they were administrative login credentials.
Step 1: Register Application with Azure AD
This step registers your application (VOSS Automate in this case) as an application in Azure Active Directory. This will allow Microsoft Graph to access Azure AD.
Use your Global Administrator credentials to sign into the Azure portal .
Choose the tenant in which you want to register the VOSS Automate application.
Note
If you have access to multiple tenants, use the Directory + Subscription filter in the toolbar to choose the relevant tenant.
Select Azure AD service.
Note
Locate the service via Favorites > Azure Active Directory, or locate it in All services.
Go to Manage, select App registrations > New registration.
Enter a name for your application, for example “VOSS Automate”.
Note
Your application users may see this name. You can change it later.
Select Accounts in this organization only.
You can ignore the Redirect URI section.
Click Register.
Step 2: Configure Microsoft Graph Authentication
There are two authentication methods available for Microsoft Graph:
Client secret
Certificate
Note
You can use either of these authentication methods, or both. Microsoft’s recommendation is to use certificate authentication for Microsoft Graph. A client secret takes precedence, if used; else, the certificate authentication is used (if available).
Add Client Secret Authentication
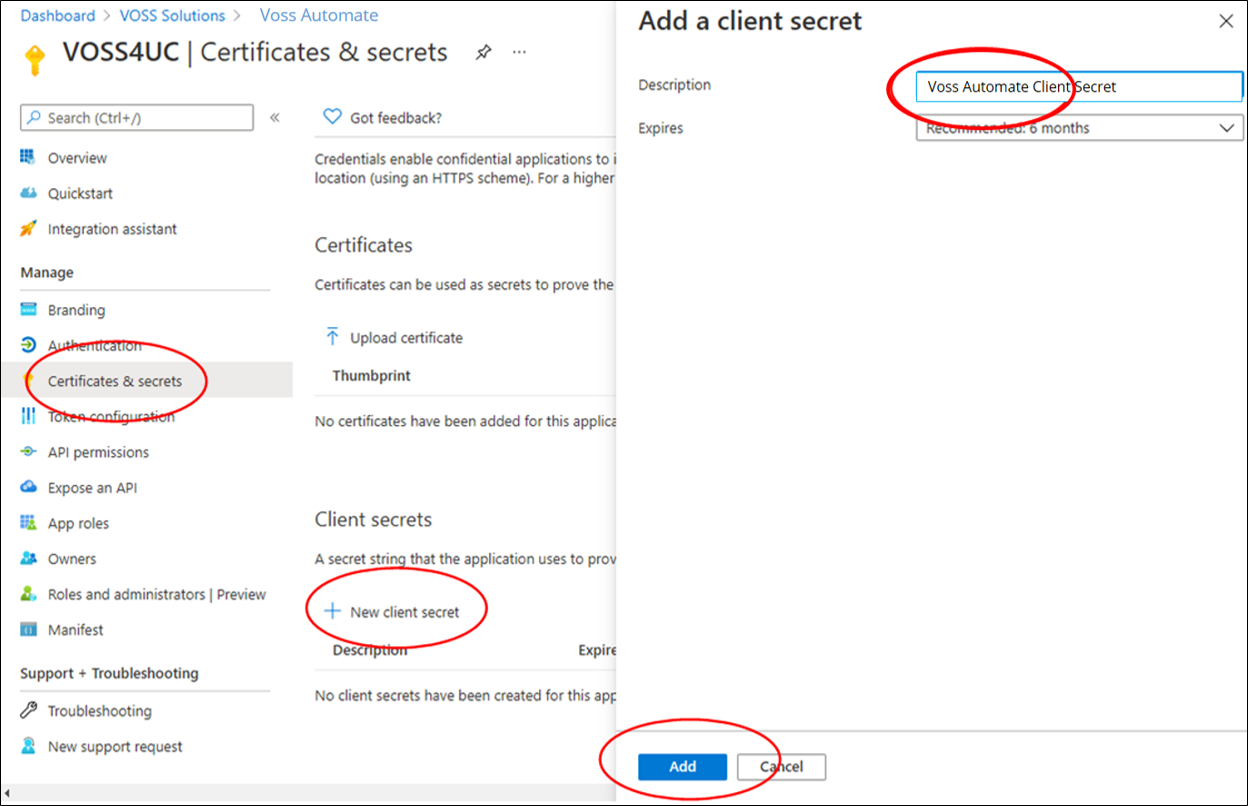
In Azure portal, go to Manage > Certificates & secrets > New client secret.
On the Add a client secret form, add a description, and choose an expiry option.
Click Add.
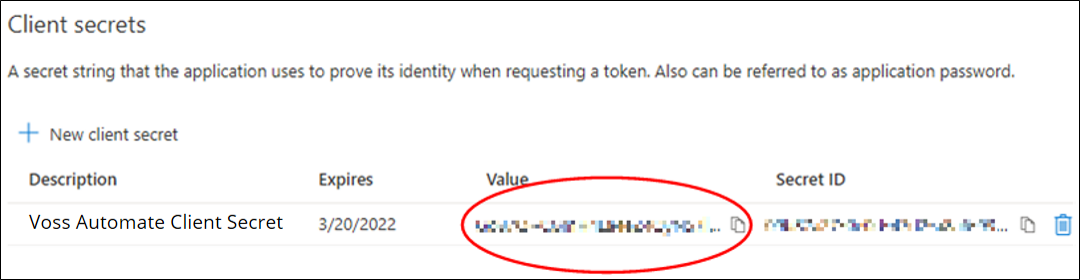
Important
Make a note of the client secret and keep it in a safe location. You won’t be able to retrieve it if you lose it, and you need this value to set up VOSS Automate.
If you lose the client secret you’ll have to delete it and repeat the steps for creating a new one.
Add Certificate Authentication
This procedure adds and exports a self-signed certificate public key in VOSS Automate, and uploads the certificate to Azure.
Log in to the Admin Portal as a Customer administrator or higher.
Go to (default menus) Administration Tools > Certificate Management.
Click Add; then, fill out certificate details.
On the Base tab:
Fill out a name and a description for the certificate.
Ensure the following checkbox is clear to ensure the certificate is self-signed: Generate Certificate Signing Request
In Valid To specify a value, in seconds, to define the validity period of the certificate from the time from generation. The default value is
315360000seconds (10 years).In Serial Number, choose a value or leave the default.
In Key Length, input a value of
2048or greater for Azure to accept the certificate for authentication.
On the Certificate Information tab, fill out details for the certificate, including the name of the host being authenticated by the certificate, country code, state, city, organization, and organization unit.
Note
All fields are mandatory.
Save the certificate.
Click Action > Export Public Key to export a file containing the public key.
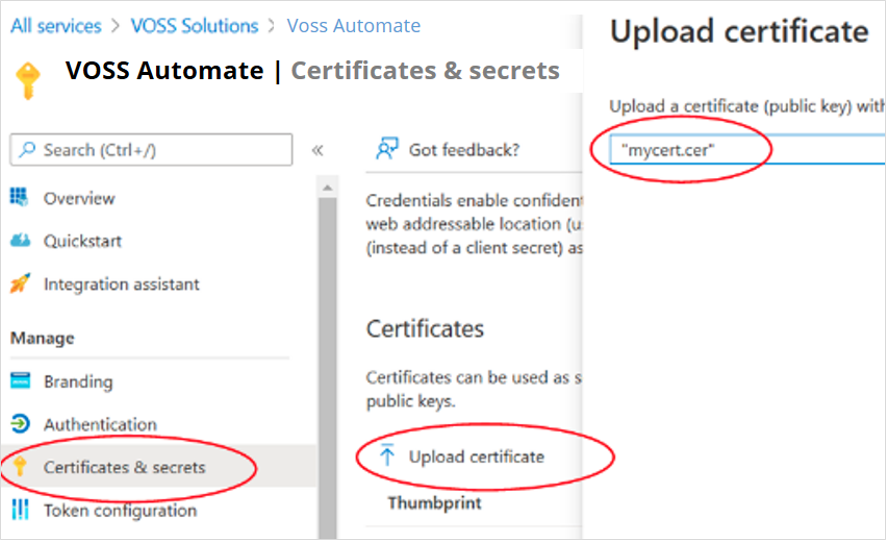
Log in to the Azure portal, then go to Certificates & secrets.
On the Certificates tab, click Upload certificate, then browse to the certificate you exported from the VOSS Automate Admin Portal.
Copy the certificate thumbprint. You will need the certificate thumbprint (along with the tenant ID and client ID from Azure) to configure the Microsoft tenant connection parameters.
Step 3: Add Microsoft Graph API Permissions
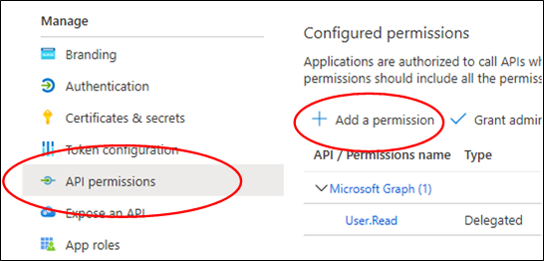
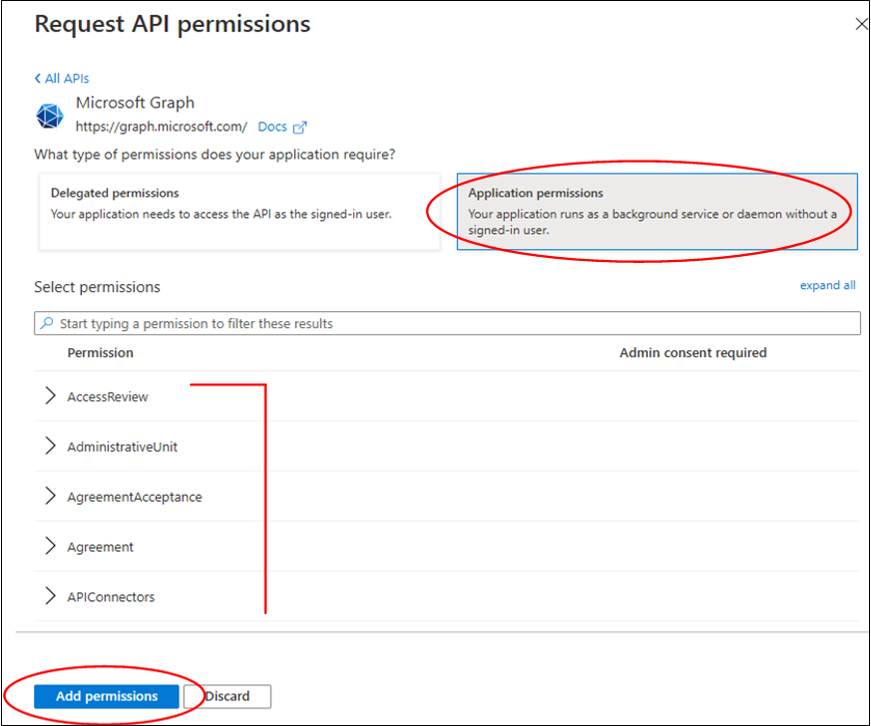
In Azure portal, go to Manage > API permissions > Add a permission.
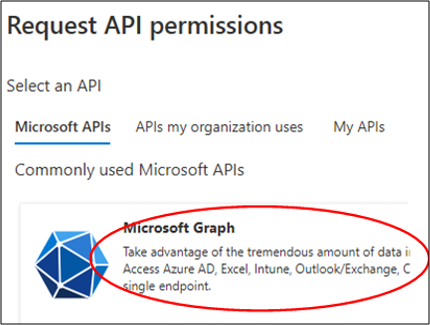
Select Microsoft Graph.
Select Application permissions.
Choose relevant permissions.
The table describes Azure Active Directory, Minimum Required Permissions. Choose only the permissions required to enable VOSS Automate management:
Management use case |
Required permission |
List Azure AD users |
User.Read.All |
Retrieve Azure AD user properties |
User.Read.All |
Retrieve Azure AD user license details |
User.Read.All |
Update Azure AD user properties |
User.ReadWrite.All |
Update Azure AD user license assignment |
User.ReadWrite.All |
List subscribed SKUs (subscribed, used, and available licenses) |
Organization.Read.All |
Retrieve subscribed SKU details, including service plans included in the SKU |
Organization.Read.All |
Click Add permissions.
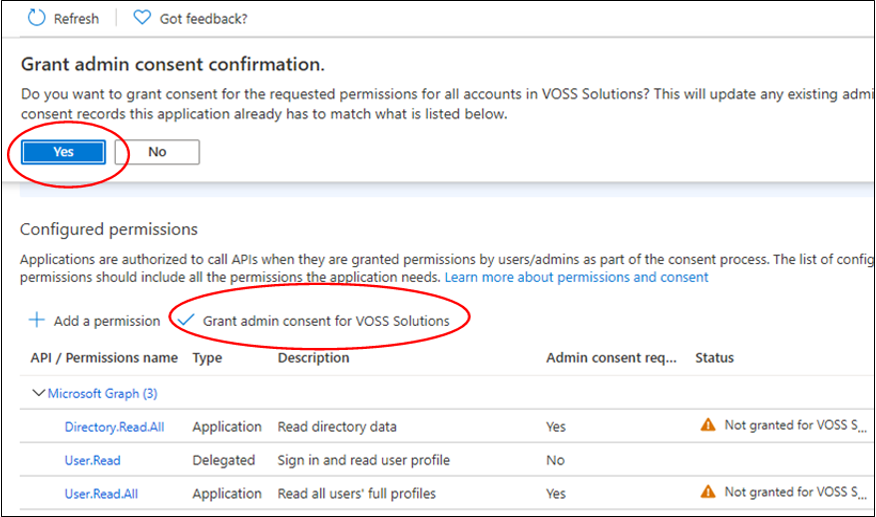
Go to Configured permissions > Grant admin consent for <your tenant>.
Click Yes to confirm.
The status of each of the listed permissions changes from Not granted to Granted.
Go to Step 4: (Optional - Exchange Online only) Setup for Managing Exchange Online
Step 4: (Optional - Exchange Online only) Setup for Managing Exchange Online
Note
Steps 4 (this step) through 8 (Test the connection) are only required if you’re using VOSS Automate to manage Microsoft Exchange.
Step 5: (Optional - Exchange Online only) Configure Manifest and Update API Permissions
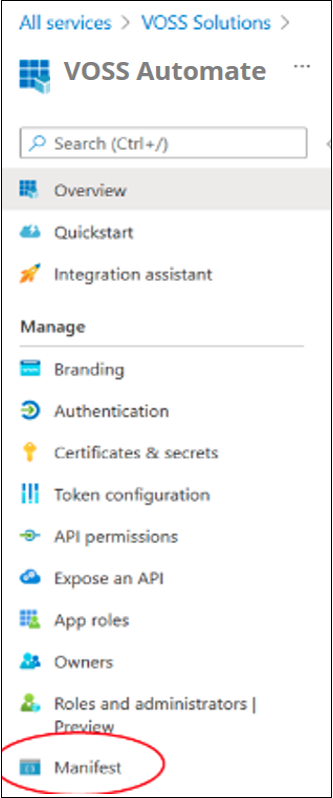
In the Azure portal, go to All services > Azure Active Directory.
Go to Manage > App registrations.
On the Owned applications tab, choose your application.
Go to Manage > Manifest to open the Manifest page.
On the Manifest page, scroll down until you locate the line containing the following text:
requiredResourceAccess.Place your cursor at the beginning of the next line, then paste the following text at that location:
{
         "resourceAppId": "00000002-0000-0ff1-ce00-000000000000",
         "resourceAccess": [
                {
                   "id": "dc50a0fb-09a3-484d-be87-e023b12c6440",
                   "type": "Role"
                }
         ]
},
The image shows the change after you paste the text:
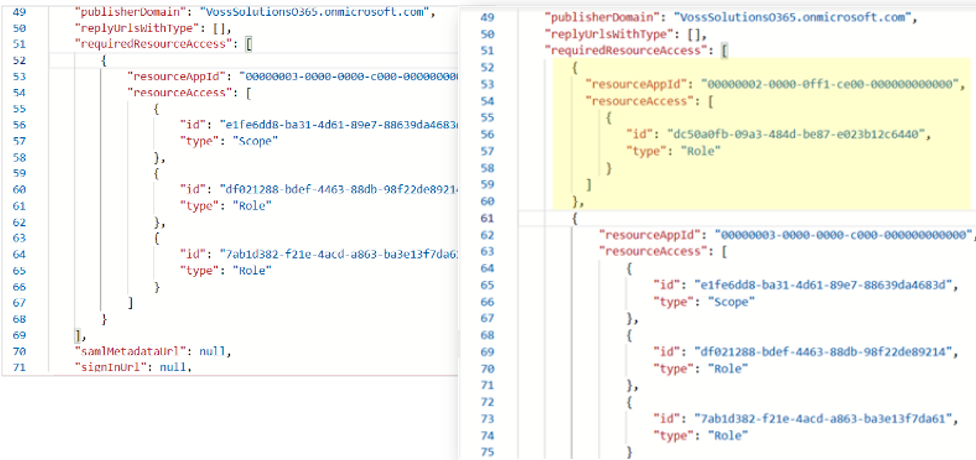
Click Save.
Verify and update API permissions:
Go to Manage > API permissions.
Verify the following:
Check that the Microsoft Graph permissions you configured are still present.
Check that Exchange.ManageAsApp now appears.
Note that the status of Exchange.ManageAsApp is Not granted for…
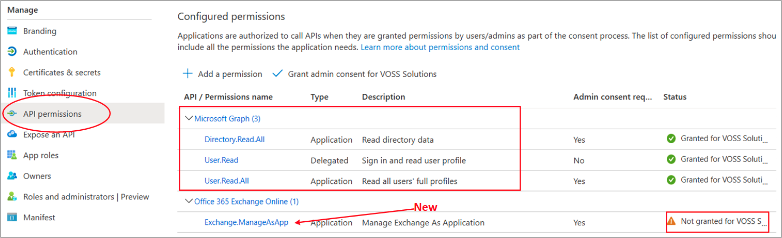
Select Grant admin consent for <your tenant>, and click Yes.
Confirm that the status of Exchange.ManageAsApp has changed to Granted for…”.

Go to Step 6: (Optional - Exchange Online only) Create, install, and export the self-signed certificate
Step 6: (Optional - Exchange Online only) Create, install, and export the self-signed certificate
On the PowerShell Proxy, you will need to create and install a self-signed certificate with a private key, and then export the certificate without its private key.
Sign into the PowerShell Proxy ensuring that you use the service account you created for VOSS Automate (e.g. WSMan-svc). (This ensures the certificate is created and stored in the right account.)
Open an elevated PowerShell window.
Use the following PowerShell commands:
To create the certificate and install in the current user store:
$mycert = New-SelfSignedCertificate -DnsName 'your public domain' -CertStoreLocation 'cert:\CurrentUser\My' -NotAfter (Get-Date).AddYears(1) -KeySpec KeyExchange
Note
In place of ‘your public domain’, update the text with your ‘public domain’
Example:
$mycert = New-SelfSignedCertificate -DnsName 'voss-solutions.com' -CertStoreLocation 'cert:\CurrentUser\My' -NotAfter (Get-Date).AddYears(1) -KeySpec KeyExchange
To export the certificate to a .cer file:
$mycert | Export-Certificate -FilePath "$($env:USERPROFILE)\mycert.cer"
To extract the certificate thumbprint:
$mycert.Thumbprint
Note
The PowerShell command to extract the certificate thumbprint displays the certificate thumbprint. You will need this value when setting up the connection parameters in VOSS Automate, so copy it, and save it for later.
Step 7: (Optional - Exchange Online only) Upload certificate and add application to Exchange administrator role
This procedure uploads the certificate you exported previously, to Azure, and adds the VOSS Automate application to the Exchange administrator role.
In Azure portal, ensure the the
.cerfile you created is accessible, then go to Azure Active Directory > Manage.Select Certificates & secrets > Certificates.
Select Upload certificate.
On the Upload certificate page, navigate to your exported certificate.
Click Add.
Add your application (e.g. VOSS Automate) to the Exchange administrator role:
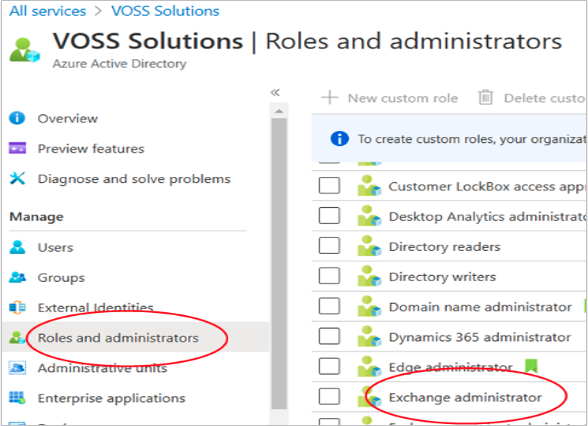
Go to All services > Azure Active Directory to open the Overview page.
Under Manage, select Roles and administrators.
From the list of roles, click on the Exchange administrator role name.
On the Assignments page, select Add assignments.
On the Add assignments page, locate and select your application.
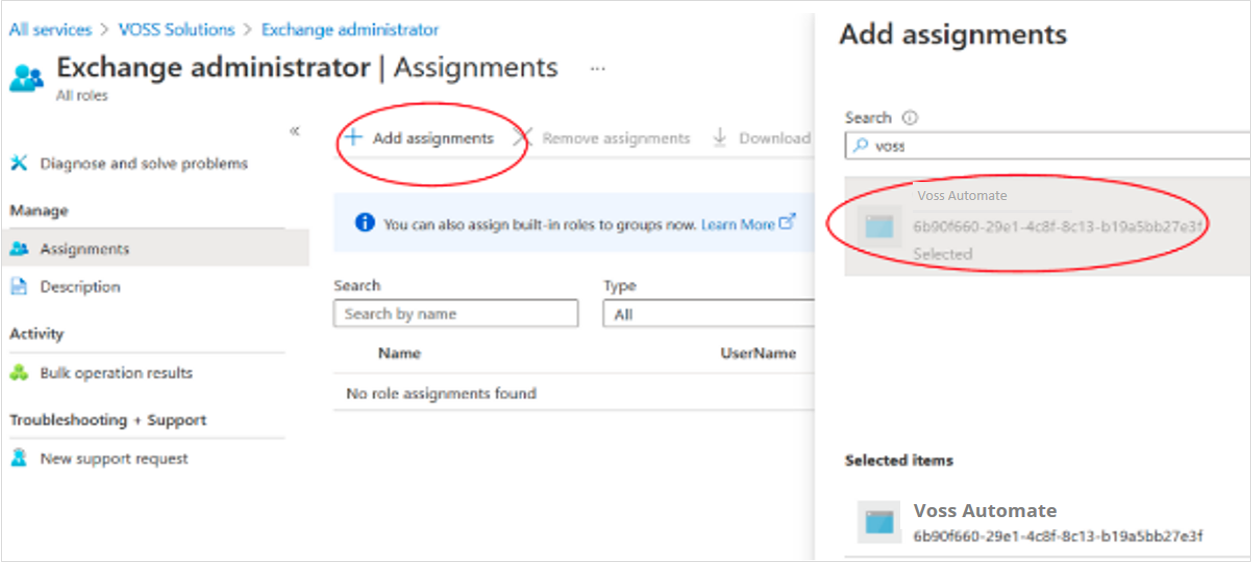
Click Add.
Step 8: (Optional - Exchange Online only) Test the connection from PowerShell server to Microsoft Exchange
Use the following command to test the connection:
Connect-ExchangeOnline -CertificateThumbPrint $certificate_thumbprint -AppID $client_id -Organization $online_admin_domain
Note
You will use your
certificate_thumbprint,cient_idandonline_admin_domain, as in the following example:Connect-ExchangeOnline -CertificateThumbPrint A2DEF024C59B4969A30A8892F832F418DF09F6 -AppID 5ff3dc33-c8db-48ba-b86e-642d84d42ae0 -Organization VossSolutionsO365.onmicrosoft.com
Use the following command, then confirm that you can see a user mailbox:
Get-EXOMailbox -ResultSize 1