Menu Layouts
Overview
Menu layouts define the content and structure of menus in the Admin Portal, based on your user role at the hierarchy where you log in.
VOSS Automate allows an administrator (with appropriate permissions) to customize menu layouts for different user roles and hierarchy levels. For example, the menu layouts at Provider level of the hierarchy can be different to menu layouts at Customer or Site level. Customizing menu layouts for different user roles at each hierarchy allows you to hide or show resources appropriate for different roles.
Note
This topic describes functionality as displayed in the Admin Portal. The look and feel of landing page and menu layout configuration options may differ in the legacy Admin GUI.
Related Topics
- Navigation - Menu and Landing Pages
- Advanced Configuration Guide
- Fixed and Configurable Filters in Menus and Landing Pages
- Macros in VOSS Automate
- Custom Icon Names Reference
- Landing Pages
- Custom Components
Menu Layouts, FDPs, and CFTs
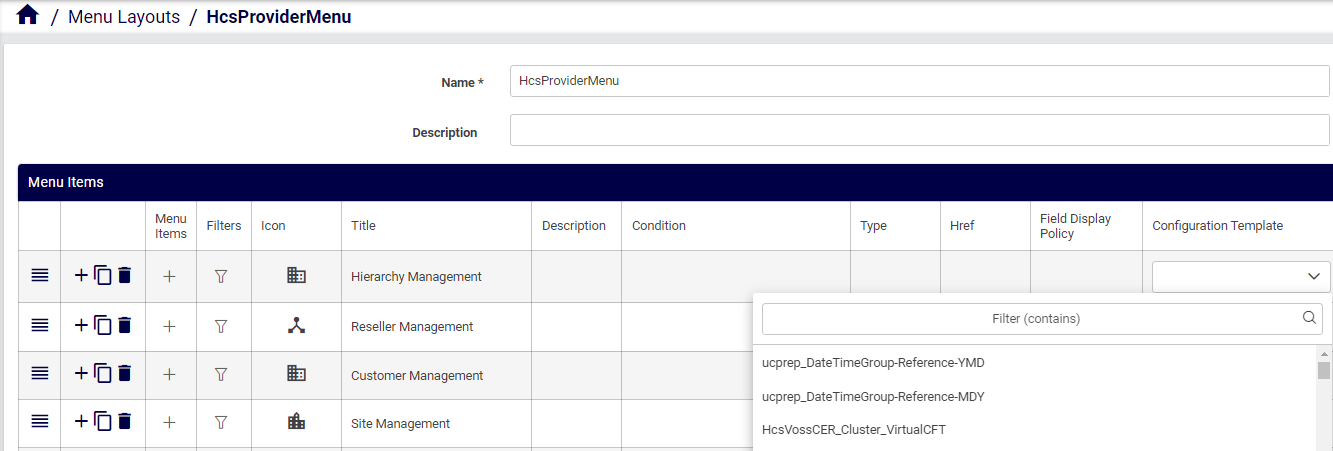
When creating or editing a menu layout, you can (optionally) apply a field display policy (FDP) and configuration template (CFT) to refine the view of model entities for the user role. In this way, the FDP and CFT for a specific model is applied as part of the menu layout (in the menu structure); the FDP and CFT are attributes of the specific model entry for that menu layout. This means:
Different FDPs and CFTs for a specific model can define menu layout variations for that model.
The required FDP and CFT should be available before you create new menus.
Fixed and Configurable Filters
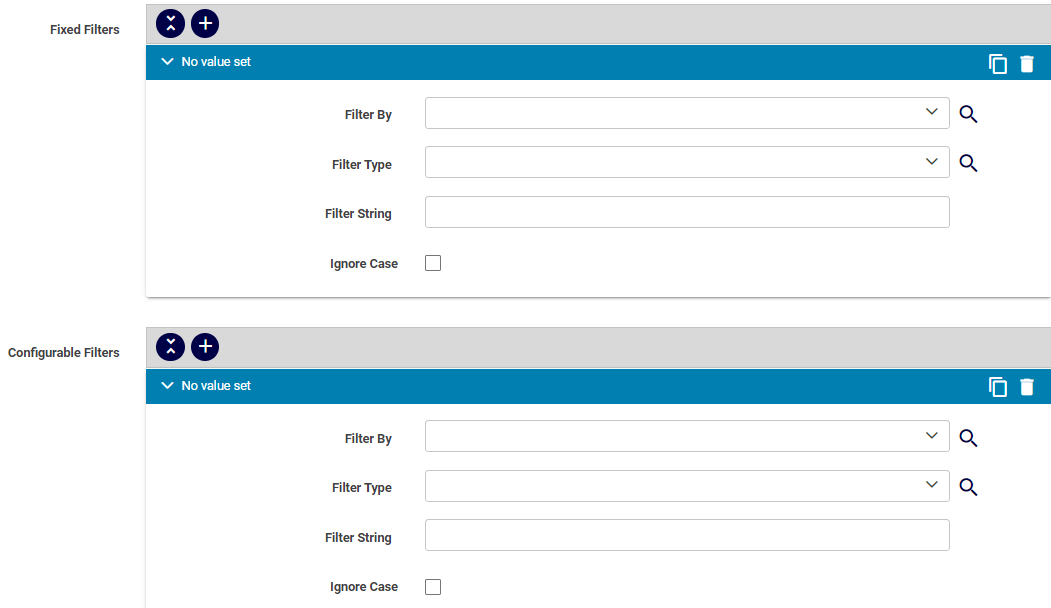
If a menu layout applies to the list view of a model, this list can be filtered by means of a number of filter options that apply to the displayed list. Only instances where the values of a model attribute that match the filter, are then shown. For details, see Fixed and Configurable Filters in Menus and Landing Pages
Default Menu Layouts
VOSS Automate ships with a number of default menu layouts for the following, hierarchy-based administrator user roles:
System administrator
Provider administrator
Reseller administrator
Customer administrator
Site administrator
If you wish to create a new menu layout, you can create a copy (clone) of a default menu layout, edit the settings, and save it as a new menu, custom, menu layout.
You can also export a menu layout, edit it externally, and re-import it. For example, you can apply an alternative FDP or CFT, or change the order and grouping of items on the menu layout. Designers with access to tag or version tag can apply these to a menu layout so that it can be uniquely identified to track changes.
Note
The VOSS Automate documentation is based on the default, predefined menu layouts that ship with the system.
To work with menu layouts in the Admin Portal (via the default menus):
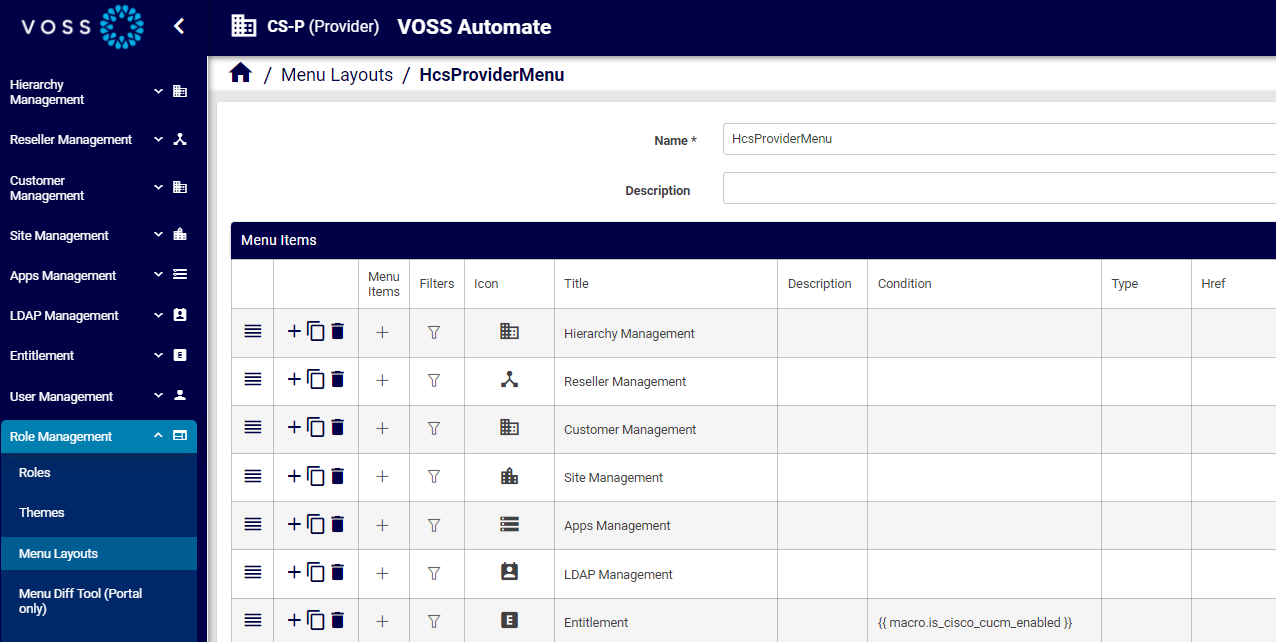
Go to Role Management > Menu Layouts to view and edit menu layouts.
Go to Role Management > Roles to view the menu layout assigned to a particular role, then click on a role and view the value in the Menu Layout field (which displays the menu layout for users with this role).
Best Practice Menus
In addition to the default menu layouts, VOSS Automate provides best practice menus for Provider and Customer administrators, including the associated access profiles and landing pages.
The best practice menus are more business-oriented, and include additional options based on best practice adaptations that may also be included in VOSS Automate.
The table describes the key features of the best practice menus:
Feature |
Description |
|---|---|
Structure mapped to business use case |
A menu order, nesting and naming convention based on common business use. Menus are ordered ‘top-down, following the logical order of tasks and the system hierarchies that perform these tasks. Example: For Provider admins, the Cisco UC App Management menu has menus only for these devices, while SMTP server and other settings that Provider admins use are arranged under a menu called Provider Configuration. In a similar way, the Cisco Subscriber Services menu has sub menus for all the functionality associated with Cisco subscribers in VOSS Automate. |
Naming convention |
First word capitalized for menu names where the menu is for a form view (input or edit). For example ADD Internal Number Inventory Where such menu names start with abbreviations or acronyms, for example, E164, HCS, or LDAP, the capitalization rule applies to the next word in the name. |
Menus for URLs |
Included in the structure are menus that provide links to other VOSS Automate portals, allowing you to launch a another portal directly from a menu. For this to work, you must update these URLs to match your configuration. |
Considerations when Customizing and Assigning a Best Practice Menu
If you wish to modify a best practice menu and then assign the customized best practice menu to a user role, consider the following:
To add or update menu layouts, see Add or Edit a Menu Layout
Note
A Menu Diff Tool allows you to easily modify menus. See the Advanced Configuration Guide for details.
To view or configure FDPs (field display policies) associated with menu items, see Add or Edit a Field Display Policy.
To view or configure CFTs (configuration templates) associated with menu items, see Configuration Templates.
For details around access profiles available for the best practices menus, see the list in the Access Profiles menu. To modify any access profiles to align with a modified mene, see Access Profile Permissions and Operations.
Note the landing pages available for the best practices menus. See the list under the Landing Pages menu.
Menu Items Requiring Adaptations
The table lists the menus for specific adaptations:
Note
Not all adaptations may be available on your system. If you wish to use any of these menus, please contact the VOSS team.
Menu |
Sub Menu |
3rd level menu |
Adaptation |
|---|---|---|---|
VOSS Phone Server Management |
VOSS Phone Server VOSS Phone Adaptive Dial Plan |
VOSS Phone Server |
|
Customer Management |
Contact Centre Services |
|
ContactCentre-VoiceRecording User |
HCS Dial Plan Management |
HCS Dialplan Additions HCS Group CLI |
|
Dialplan Additions Group CLI |
Site Management |
Advanced Site Functions |
SameDialplanOB 8XData |
Overbuild Same Dialplan AddSite |
Number Management |
(N to 1) DN to E164 Associations with Update |
N to 1 E164 Association Update Support |
|
Number Management |
ADD Multi-step Number Inventory |
Number Inventory Mgmt - Multi-Step |
|
Cisco Subscriber Services |
Add Lines to Pickup Group |
Pickup Group Membership |
|
Cisco Subscriber Services |
|
Change Line |
|
Cisco Subscriber Services |
Line Recording |
Line Recording |
Menu |
Sub Menu |
3rd level menu |
Adaptation |
|---|---|---|---|
Cisco MACD Functions |
|
Enhanced ForceAuthenticationCode Support |
|
Multi- Vendor Services |
VOSS Phones |
VOSS Phone Server |
|
Audit Tools |
VOSS Day 2 Customer Audit Tool |
Audit Tool |
|
Overbuild Tools |
RUN EM-User Overbuild |
Audit Tool |
|
Overbuild Tools |
E164 TPs AND TRANSFORM Move Tool |
DN Overbuild |
Add or Edit a Menu Layout
This procedure adds new menus and updates existing menus. You can create a new layout for your system, or update the default menu layout.
Log in to the Admin Portal as a Provider or Reseller administrator (or higher).
Choose the hierarchy for the new menu layout, for example, Customer.
Go to (default menus) Role Management > Menu Layouts.
Choose an option:
To create a new menu layout based on settings in an existing menu layout (recommended), click on a menu layout you want to copy. On the menu layout editing screen, click the toolbar Clone icon. A new record is created with pre-populated settings. Go to the next step to edit the settings for the clone to create the new custom menu layout.
To create a new menu layout as a new record (without existing settings), click the toolbar Plus icon (+) to open the Menu Layouts/New Record page. Go to the next step to set up the new menu layout.
To edit an existing menu layout, click on the menu layout you wish to edit, make your changes, and save. Updates display only once you’ve logged out and logged in again.
At Name and Description, fill out a name and description for the new menu layout.
At Menu Items, configure the main menus and sub menus. You can make the following changes:
Re-order menus
Add, clone, or delete rows for main menus and nested sub menus.

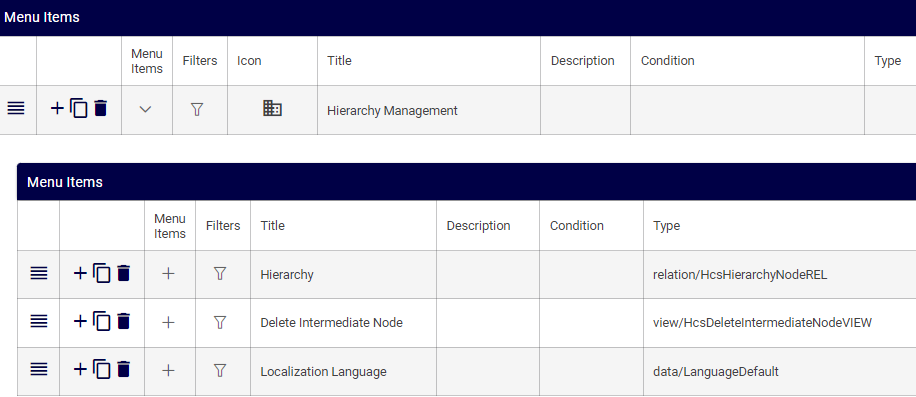
Add, clone, or delete sub menus (click the Plus icon in the Menu Items column to display nested sub menus)
Configure fixed and configurable filters
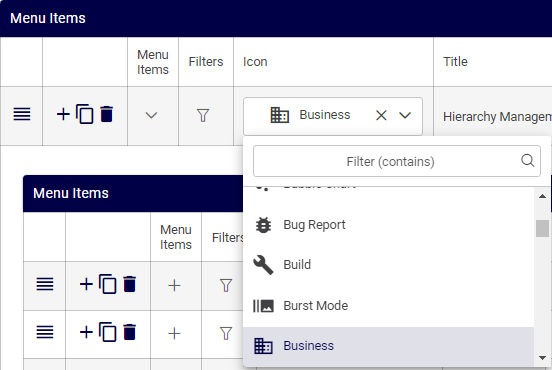
Choose a menu icon (for main menus only)
Add or edit a menu title
Provide a menu description
Specify a condition that defines when the menu displays
Choose a model type
Create internal or external href links
Choose a FDP (field display policy) and/or a CFT (configuration template)
Choose a custom component
Choose the landing page to associate with the menu item
Choose how a menu or sub menu displays, for example, list, form, or landing page
Note
You can click in a row to edit a value (either type in the field or select an option from a drop-down)
Rows with nested menu items or links contain a chevron (>) instead of a Plus icon (+) so that you can see which items have child lists.
An asterisk indicates required values.
For details around each of these configuration options, see Menu Layouts Field Reference.
Click Save to add the new menu layout.
Assign the menu layout to the appropriate roles.
Menu Layouts Field Reference
This section describes menu layout configuration options:
Note
You can view, add, and edit menu layouts in the Admin Portal via (default menus) Role Management > Menu Layouts. See Add or Edit a Menu Layout
Field |
Description |
|---|---|
Name |
Mandatory. The menu layout name. |
Description |
A description of the menu layout. |
Menu Items |
This section displays the menus and sub menus in an editable table layout. |
Menu Items
The table describes configuration options the Menu Items rows on the Menu Layouts page:
Column |
Description |
|---|---|
Reorder |
Click on the reorder icon in the relevant row to change the location of a menu. |
Add, clone, or delete row |
Click an icon to either add a row, clone (copy) a row, or to delete the row. |
Menu Items |
Click the Plus icon to expand nested menus. Click the chevron to collapse expanded menus. |
Filters |
Click the filter icon in the relevant row to display a dialog where you can choose fixed and configurable filters for a menu item. Fixed filters cannot be removed. The following options are available for configurable filters:
|
Icon |
The icon to use for the menu item. Click in the cell to choose an icon. Icons display in the drop-down with a descriptive name. |
Title |
Click in the cell to add or edit the name (title) of a menu item. |
Description |
Click in the cell to add or edit the menu description. |
Condition |
Click in the cell to add or edit a macro that allows you to display/hide a menu and its sub menus, based on a condition specified in the macro. If the macro evaluates to true, the menus and sub menus display, else, when false, the menu and its sub-menus are hidden. The default is true (menus and sub menus you add on this page display by default). See the Advanced Configuration Guide for more information about using macros. |
Type |
Click in the cell and choose a model type to associate with the menu item. Note The model type defines the available custom components. |
Column |
Description |
|---|---|
Href |
Click in the cell to specify a path as a direct reference to a model type used for the menu item. Links can be external or internal. Hrefs are generally recommended for external links. For backwards compatibility, hrefs can be used for links within the application, to link directly to a form. For example, the Add Phone page would have the following href value: api/relation/SubscriberPhone/add In this case, you will need to use JSON format menu import, or bulk load, to add any associated FDPs (field display policies) and CFTs (configuration templates) for the menu item. It is recommended that you do not use hrefs to reference view/ type models. |
Field Display Policy |
Click in the cell to choose a FDP (field display policy) to associate with the menu. Note FDPs cannot be used with custom components. |
Configuration Template |
Click in the cell to choose a CFT (configuration template) to associate with the menu. |
Custom Components |
Click in the cell to choose an Admin Portal custom components. Options in the drop-down depend on the model you choose in the Type field. For example, when choosing model type view/AddPhone, the custom component available for selection is Add Phone. The custom components allow you to display GUI content (such as landing pages, lists, and forms) in the same layout as they appear in the Business Admin Portal. Custom components are also available for multi vendor environments and for Microsoft-only environments. This feature is only available in the new VOSS Automate Admin Portal. |
Column |
Description |
|---|---|
Landing Page |
Click in the cell to choose a landing page to display, when the Display As option for the menu item is set to Landing Page. This option is only available in the new VOSS Automate Admin Portal. Note that sub menus cannot be selected as landing pages, and landing pages do not have context-sensitive help. |
Display As |
Click in the cell to choose how the menu item should display. The default is List. Options are: List, Landing Page, Form, External Link, Tree
{
  "type": "view/QuickSubscriber",
  "display": "form",
  "title": "Quick Add Subscriber"
}
|
Related Topics
