Microsoft Dial Plan Models#
Overview#
VOSS Automate supports the ability to predefine dial plan templates for Microsoft data models, and to push the dial plans, on-demand, for a specific customer or site.
Microsoft Dial Plan Models Workflow
To use this feature:
Ensure you have the Dial Plan Management Tool menus exposed in the Admin Portal:
In the Global Settings, ensure Enforce HCS Dialplan Rules is set to No.
Log in with an access profile that has permissions to the Dial Plan Management Tool menus.
Note
The Dial Plan Input Data menu is relevant only for Cisco dial plans.
For Microsoft dial plans, include the Microsoft Dial Plan Models menu and Microsoft models in your menu layout.
At of VOSS Automate version 21.4-PB1, the following Microsoft data models and corresponding device models (Microsoft dial plan elements) are supported:
Device Model |
Menu |
|---|---|
device/msteamsonline/CsTenantDialplan |
Tenant Dialplan |
device/msteamsonline/CsOnlinePstnGateway |
SBC Gateways |
device/msteamsonline/CsOnlinePstnUsage |
PSTN Usages |
device/msteamsonline/CsOnlineVoiceRoute |
Voice Routes |
device/msteamsonline/CsOnlineVoiceRoutingPolicy |
Voice Routing Policies |
device/msteamsonline/CsTeamsTranslationRule |
Translation Rules |
As of VOSS Automate version 21.4-PB3, additional Microsoft device models have been added to offer providers a one-step in the customer onboarding process: pushing provider-specific dial plan elements as well as Teams polices to the customer’s tenant.
The following Microsoft device models are supported. The equivalent data models have names that match the device model name as follows:
DP_msteamsonline_<device model name>
For example, DP_msteamsonline_CsOnlineVoicemailPolicy.
Device Model |
Menu |
|---|---|
device/msteamsonline/CsCallingLineIdentity |
Calling Line Identity [1] |
device/msteamsonline/CsOnlineVoicemailPolicy |
Online Voicemail Policies |
device/msteamsonline/CsTeamsCallingPolicy |
Calling Policies |
device/msteamsonline/CsTeamsCallParkPolicy |
Call Park Policies |
device/msteamsonline/CsTeamsEmergencyCallingPolicy |
Emergency Calling Policies |
device/msteamsonline/CsTeamsEmergencyCallRoutingPolicy |
Emergency Call Routing Policies |
device/msteamsonline/CsTeamsEnhancedEncryptionPolicy |
Enhanced Encryption Policies |
Related Topics
Create the Dial Plan Name#
Go to Dial Plan Management Tool > Dial Plan.
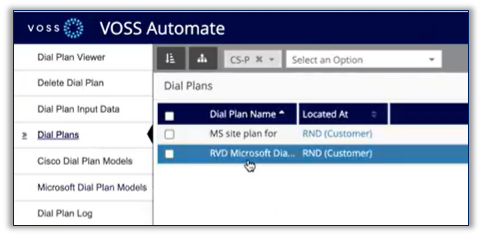
Click Add.
Fill out a dial plan name, and a description.
At Dial Plan Type, choose an option, either Global, Site, or Multi-tenant / Shared Architecture.
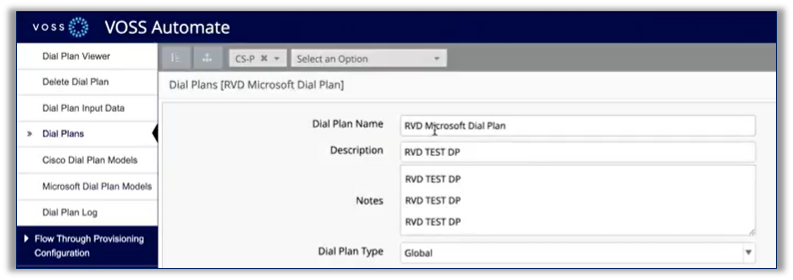
Save.
Next steps: Create the data models, with their data.
Create Data Models#
Once you have a dial plan name you can create the data models with data in them.
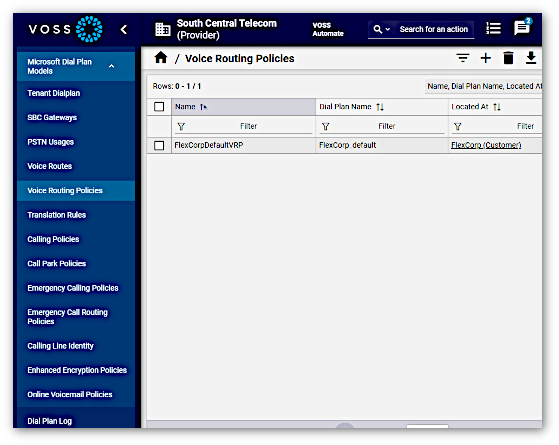
Go to Dial Plan Management Tool > Microsoft Dial Plan Models.
Click on the relevant model.
Click Add.
Fill out data for the model:
Choose the dial plan name.
Configure data for the model.
Note
You can also use macros to add values in some fields.
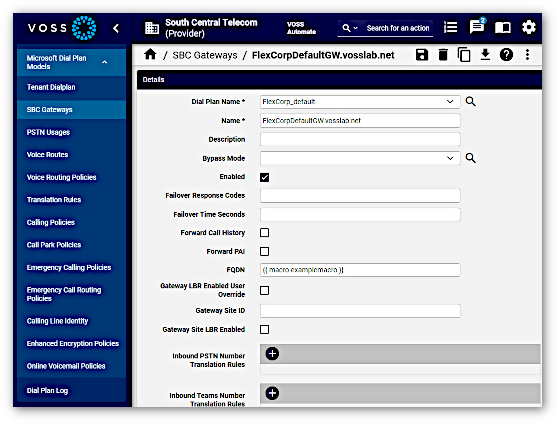
Save.
The details you provided goes to the data model.
Next steps: Repeat this procedure to fill out data for any other models (if required) to build out your dial plan, then preview the dial plan you configured.
Preview a Configured Dial Plan#
You can preview dial plans via the Dial Plan Viewer, which provides a read-only view of all data model entries added to a selected dial plan name.
Note
The Dial Plan Viewer displays read-only data. You cannot add or update any model entries via the Dial Plan Viewer. You can modify your data entries via the menus, then return to the viewer to see your changes, if required.
If you have data model entries added to a dial plan name for both Cisco and Microsoft dial plan models, these are all accessible for inspection in the tabs of the Dial Plan Viewer.

Go to Dial Plan Management Tool > Dial Plan Viewer.
In the Dial Plan Viewer summary list, click on the relevant dial plan name.
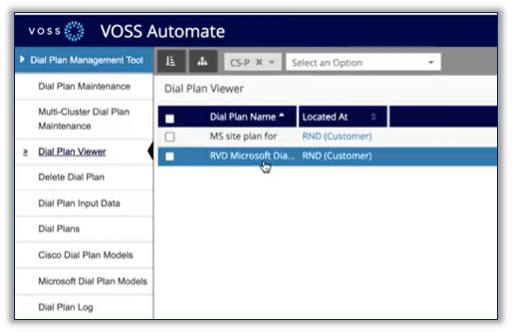
The tabs of the Dial Plan Viewer display the data for each data model entry created for the selected dial plan name.
Note
A dial plan can contain entries for both Cisco and Microsoft dial plan models, allowing you to push dial plans to both CUCM clusters and to the Microsoft tenant (for Microsoft Teams).
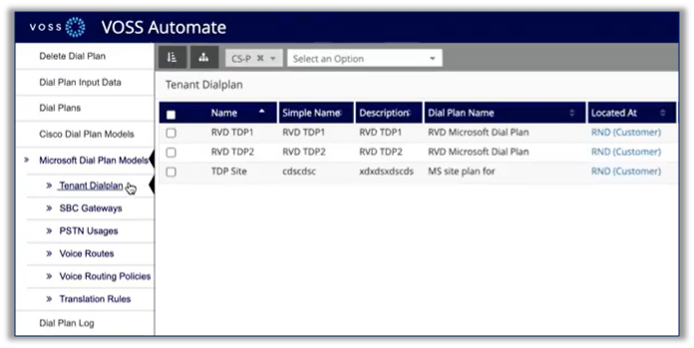
Next steps: Push the dial plan, to a customer or to a site.
Push a Dial Plan to Customer or Site#
The Dial Plan Management Tool can push dial plan data to a customer or to a site, to the Microsoft tenant and to CUCM clusters, depending on the hierarchy where you created the dial plan, and on the data model entries included in your dial plan.
Important
If your dial plan is configured at a specific customer hierarchy, you’ll need to push it from that hierarchy. If a dial plan is added at a site, it must be pushed to the site at that hierarchy.
Choose the hierarchy where you added your dial plan (a customer or site).
Go to Dial Plan Management Tool > Dial Plan Maintenance.
At Dial Plan Name, select the name of the dial plan you wish to push to the site or customer.
Note
The Dial Plan Name drop-down lists dial plan names added to the current hierarchy.

From Target Call Manager Cluster and Target Microsoft Tenant, choose the relevant target destination for the dial plan, either a CUCM cluster or a Microsoft tenant, or both, provided you have these added to your system.
From the Operation drop-down, choose an option, either Push Dial Plan or Remove Dial Plan. To push your dial plan, select Push Dial Plan.
Click Save.
The relevant workflows are triggered to determine the content of the dial plan you defined. The dial plan data is pushed to the target (CUCM cluster or Microsoft tenant, as applicable).
For Microsoft, the dial plans are added to the Microsoft Tenant in VOSS Automate (accessible via the default menus as MS Teams Dial Plan Management > Tenant Dialplan), and the dial plan details are also updated to the Microsoft Teams cloud portal.
