Call Queues#
Overview#
Microsoft Teams call queues allow you to manage incoming callers as they arrive in a call queue, and for the duration of their wait in the call queue, until they’re connected to an agent. For example, you can set up a call queue to play a greeting message as a caller arrives in the queue, or play a music file while they’re waiting to route to a call agent.
Note
Call queues support the following audio file types: .MP3, .WAV, .WMA Call queues updated in VOSS Automate will copy the audio files to the Microsoft Admin Portal using SCP. This can be seen in the transaction logs.

Automate administrators may configure all call queue related configuration within the Automate Admin Portal without requiring additional configuration in the Microsoft Admin Portal.
You can set up a call queue to efficiently route callers out of the queue, to the first available agent, for example. If no agents are signed in or when all agents have opted out of the queue, you can also define, from within Automate or from the Microsoft Admin Portal, how new incoming calls are managed. In this case, you can choose to add new incoming calls to the queue, or disconnect, or redirect the call.
Note
Visit the Microsoft documentation for more information around the recommended call queue configuration, including some options that you can set up in VOSS Automate (https://docs.microsoft.com/en-US/microsoftteams/create-a-phone-system-call-queue).
Microsoft’s recommended settings for call queue are as follows:
Enable Conference mode (Call answering tab in VOSS Automate)
Set Routing method to Round robin or Longest idle (Agent selection tab in VOSS Automate)
Enable Presence-based routing (Agent selection tab in VOSS Automate)
Set Agent alert time to a minimum of 20 seconds (Agent selection tab in VOSS Automate)
Changes you make to call queues from within VOSS Automate updates call queues in the Microsoft cloud portal, and changes made in the Microsoft cloud also syncs to the relevant call queues in VOSS Automate.
View and Manage Microsoft Teams Call Queues#
This procedure displays, edits, and deletes existing Microsoft Teams call queues, and adds new call queues, from within the Automate Admin Portal.
In the Automate Admin portal, go to (default menus) Subscriber Management > Call Queues to open the Call Queues summary list view.
View existing call queues, which may have been added either from VOSS Automate or from the Microsoft Teams Admin Portal.
Note
From the list view you can choose to update, delete, move, or export existing call queues, or add new call queues, and your changes will sync to the call queue details in the Microsoft Teams Admin Portal.
Choose an option:
Update an existing call queue:
Click on a call queue in the list view to open the Call Queues management page.
Click through the tabs on the page to update the configuration.
Save your changes. Updates are synced to the Microsoft Teams cloud portal.
Add a new call queue:
In the list view, click the toolbar Plus (+) icon.
Choose the customer or site hierarchy where you’re adding a call queue.
On the configuration page, click through the tabs to configure the call queue:
Save your changes.
A new call queue is added to the Microsoft Teams Admin Portal with the settings you configured. Any changes made to update an existing call queue are synced to the Microsoft Teams Admin Portal. Any changes you make to these settings on the Microsoft Teams Admin Portal sync to Automate to update the call queue in Automate.
Call Queues Page#
You can select the following tabs on the Call Queues configuration page (once you select a call queue in the summary list view):
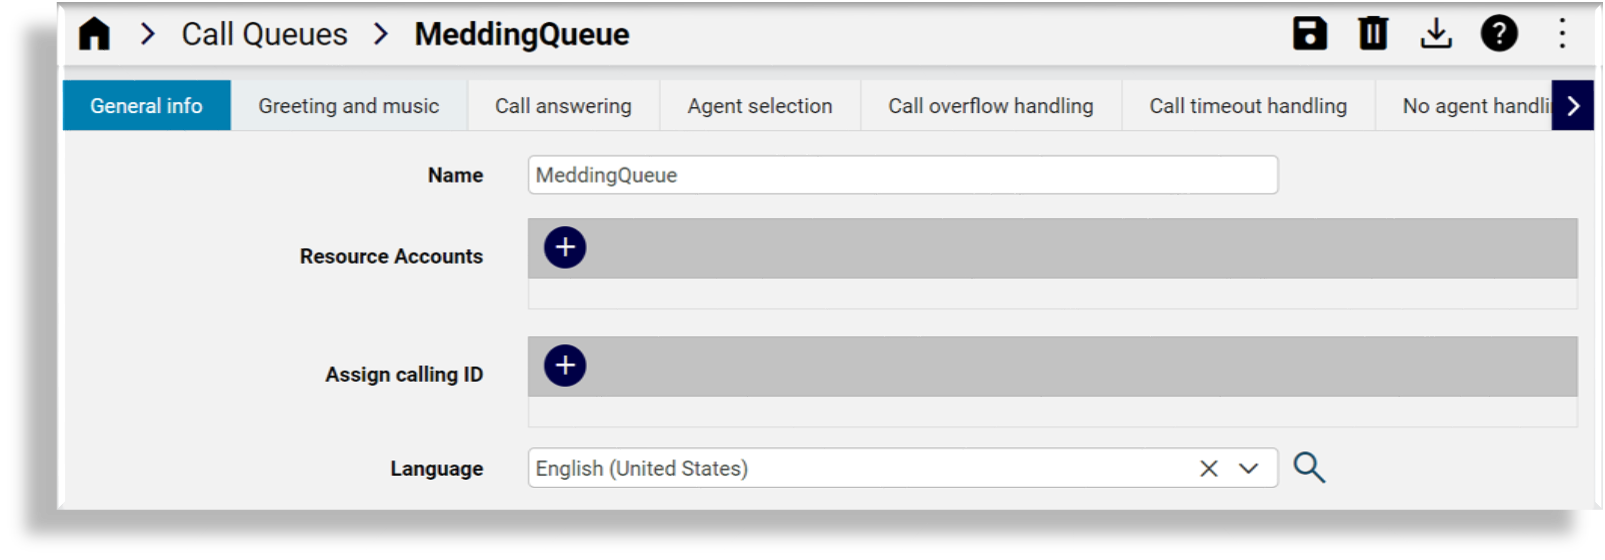
General Info#
This tab/panel configures the call queue name, adds resource accounts and calling IDs (optionally), and allows you to choose the language that will be used for transcribing voicemail messages and to play system prompts.
Note
When resource accounts (resource users) are added to call queues and auto attendants, deleting a call queue or auto attendant triggers a system workflow that first disassociates any associated resource accounts, then deletes the call queue or auto attendant.
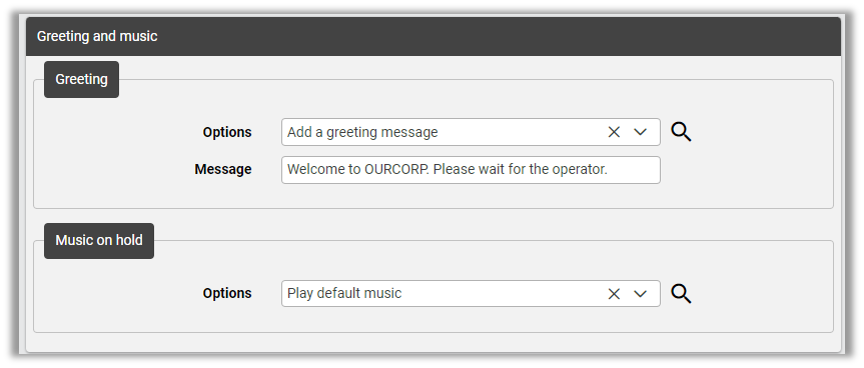
Greeting and Music#
This tab/panel configures greeting and music on hold options.
The table describes configuration options on the tab/panel:
Field |
Description |
|---|---|
Greeting > Options |
Choose a greeting option, either of the following:
|
Greeting > Music on hold |
Choose an option for playing music while the caller is on hold. Options are:
|
Note
VOSS Automate supports the following audio file formats for call queues: .MP3, .WAV, .WMA
Microsoft Teams provides a default MOH file to play to callers while they’re on hold in a queue. You can choose to play the default file, or choose a file you uploaded (custom files). Custom files are uploaded via File Management to the relevant sites in VOSS Automate.
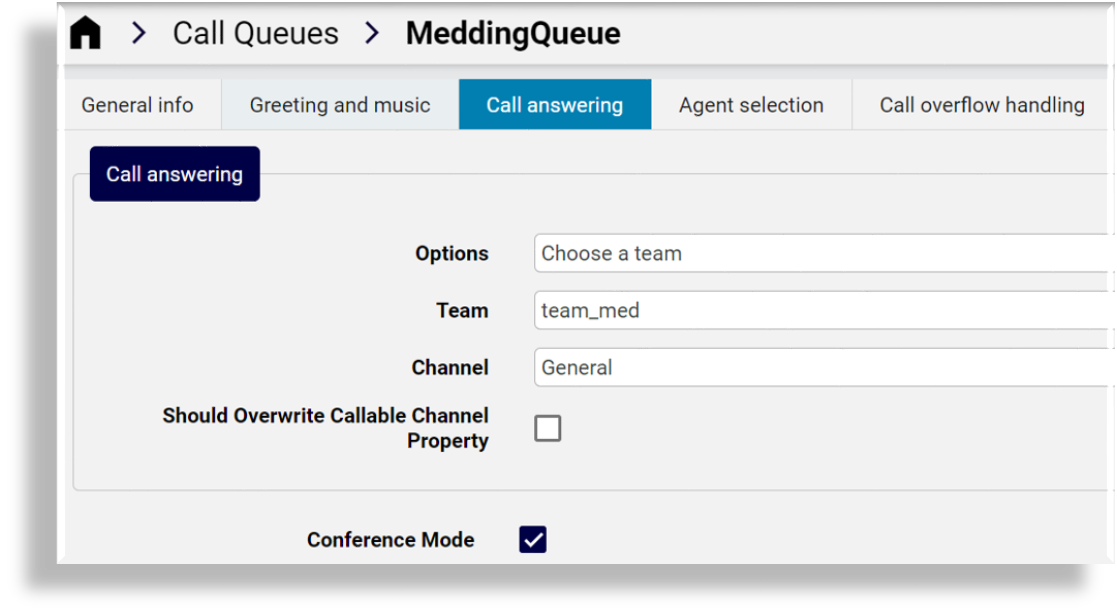
Call Answering#
This tab/panel defines how incoming calls in the call queue are answered.
The table describes configuration options on this tab/panel:
Field |
Description |
|---|---|
Options / Team / Channel |
Defines whether to have a specific MS Team and channel answer calls in the queue or choose to assign specific call agents, distribution lists, and groups. Assigning a MS team to call answering must be configured on the MS Teams portal and synced to VOSS Automate. The ability to set this up from within VOSS Automate is reserved for future development. |
Should Overwrite Callable Channel Property |
A Teams channel can only be linked to one call queue at a time. To force reassignment of the Teams channel to a new call queue, set this to value to True. |
Conference Mode |
Enables or disables conference mode. The recommended setting is Enabled. Enabling conference mode reduces the time it takes for the caller to connect with an agent. Conference mode enabled requires that the agent answering calls is using Microsoft Teams desktop client or a Microsoft phone. |
Note
An edge case scenario exists where deleting a user or a group that is referenced by a call queue causes invalid data to display for the call queue. Typically, this is visible when opening the call queue in the Automate portal and the group or user ID is shown under call answer settings instead of a name.
This is due to MS Teams still including the deleted resource(s) in the call queue settings response that VOSS Automate retrieves. This case has the most impact if the group or user that was deleted is the only resource left in the call queue. The pkid of the resource (user or group) is seen instead of the proper name in the dropdown and if you save the call queue, it may error out as MS Teams will then yield an error for those resources being invalid.
As a workaround, you can remove the resource(s) that appear as pkids from the call queue before saving the call queue. This will ensure the call queue update that happens only includes valid data.
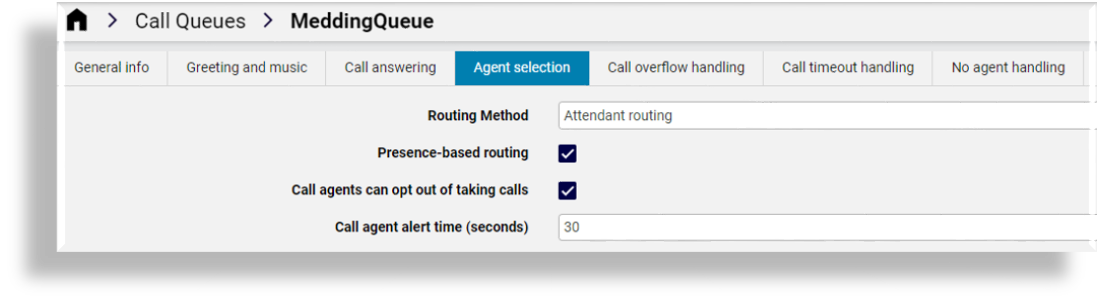
Agent Selection#
This tab/panel defines the agents available to answer calls, and how calls are distributed and routed to agents.
The table describes configuration options on the Agent selection tab/panel:
Field |
Description |
|---|---|
Routing method |
Defines how calls are routed: Options are:
|
Presence-based routing |
Recommendation is Enabled. However, this setting can’t be enabled for routing option Longest idle. Disable to send calls to agents who choose to receive calls, regardless of their presence status. Enable to send calls only to agents with their presence status set to Available. |
Call agents can opt out of taking calls |
Recommendation is enabled. Disable to ensure agents accept a call routed to them. Enable to allow agents to choose not to answer a call. |
Call agent alert time |
The time, in seconds, to wait before redirecting the call to the next agent. The recommendation is a minimum of 20 seconds. The minimum alert time is 15 seconds, and the maximum alert time is 180 seconds. |
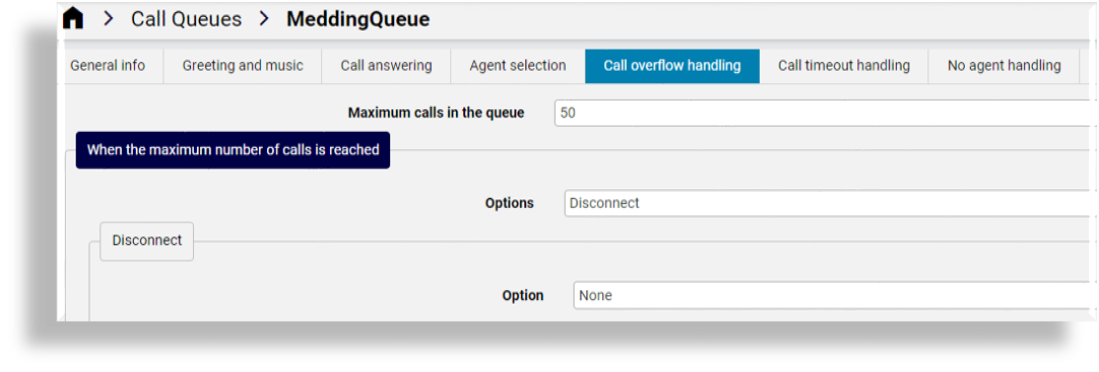
Call Overflow Handling#
This tab/panel defines the maximum number of calls that may be in the queue, and how the system handles calls that exceed the maximum.
The table describes configuration options on the Call Overflow Handling tab/panel:
Field |
Description |
|---|---|
Maximum calls in the queue |
Defines the maximum number of incoming calls you want to allow in the call queue. The default maximum number of incoming calls allowed in a call queue is 200 calls. |
When the maximum number of calls is reached |
This fieldset defines the system behavior once the number of incoming calls in the call queue reaches your defined maximum. Two options are available:
|
Call Timeout Handling#
This tab/panel defines the maximum wait time (in seconds) that an incoming call can remain in the call queue. Once you’ve set up the maximum wait time, you can configure what happens to the call, that is, disconnect the call, or redirect it (and configure redirect options).
Note
The default maximum wait time is 2700 seconds (45 minutes). The call is dropped or redirected after the predefined wait time threshold is reached.
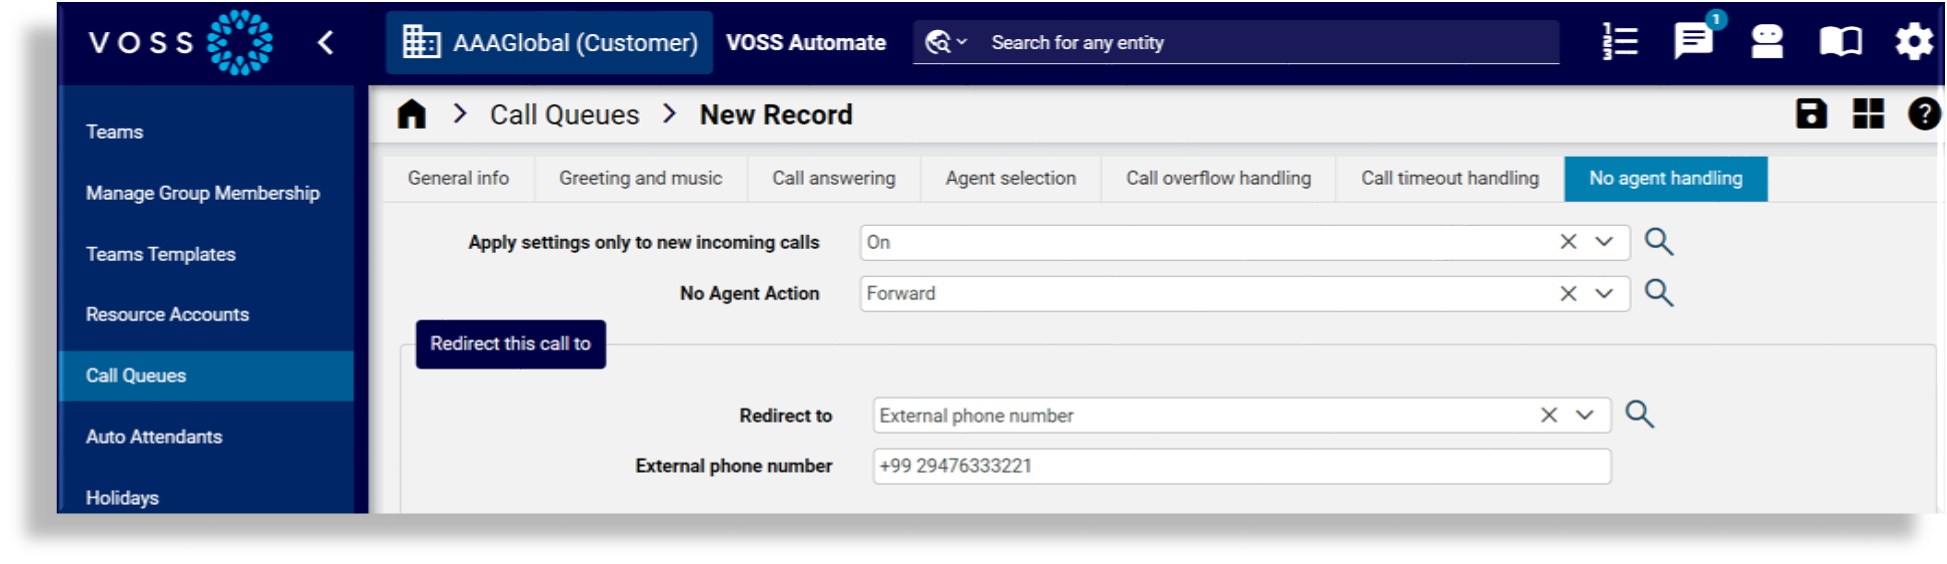
No Agent Handling#
This tab/panel defines how to manage new incoming calls when no agents are signed in or when all agents have opted out of the queue.
The table describes configuration options on the tab/panel:
Field |
Description |
|---|---|
Apply settings only to new incoming calls |
Defines whether to apply the settings you’re configuring to new calls coming in to the call queue. Either Yes or No. Default is No. |
No Agent Action |
Defines the action to take when no agents are signed in or opted in to handle new incoming calls. Options are:
The following file formats are supported for audio files: MP3, WAV, and WMA. The maximum file size is 5 MB. |
Authorized Users Tab#
This tab adds and edits authorized users for the call queue. Authorized users are Teams users who have been authorized by a Teams admin center administrator to make configuration changes to Auto attendants and Call queues. This user does not require access to the Teams admin center portal or the assignment of any administrative roles. They can manage Call queues and Auto attendants settings using their Teams client or web portal, for example, Music on hold, Voicemnail greeting for Call queues, or Busness hours greetings for Auto attendants.
The users allowed to become authorized users must be have A Voice Application Policy assigned to them in MS Teams. However, this policy is not (currently) shown in VOSS Automate and therefore the dropdown of users available to be authorised users in Automate are for users with Enterprise Voice enabled.
When adding an authorized user, you choose the user from the dropdown list.
