Auto Attendants#
Overview#
VOSS Automate allows you to add, update, and delete auto attendants for Microsoft Teams users from within the VOSS Automate GUI, and to have these changes update on the Microsoft Teams portal. Changes you make on the Microsoft Teams portal online also update the auto attendants in VOSS Automate.
Note
Auto attendants allow people who call in to your organization to self-navigate a menu so that they can be correctly routed to the required department, person, or operator. When setting up an auto attendant for your system, you can choose a greeting, set up menus, and choose how calls are redirected.
View and Manage Auto Attendants#
To work with auto attendants for Microsoft subscribers in VOSS Automate, go to (default menus) Subscriber Management > Auto Attendants to open the Auto Attendants page.
The list view displays all auto attendants that exist for your organization, whether added in VOSS Automate or in the Microsoft Teams online portal. On this page, you can:
Click on an auto attendant in the list view to open its editing page, where you can view its details, or update it.
Select an auto attendant in the list to delete it.
Click the Plus icon (+) to add a new auto attendant.
You can select the following tabs on the Auto Attendants page in VOSS Automate:
Note
Voicemail options you choose on the tabs of the Auto Attendants page are your MS Exchange service data synced in to the Microsoft tenant you have set up in VOSS Automate, from the Microsoft Teams online portal.
Only users enabled for Enterprise Voice can be used as the answer or redirect options in call flows for auto attendant.
If you wish to use audio files for the auto attendant, to play a message or greeting for example, note the following:
VOSS Automate supports the following file types: .MP3, .WMA, .WAV Auto Attendants updated in VOSS Automate will copy the audio files to the Microsoft Admin Portal using SCP. This can be seen in the transaction logs.
To have the audio files available for selection when choosing for the audio attendant, you will need to upload them to VOSS Automate, via (default menus) Administration Tools > File Management.
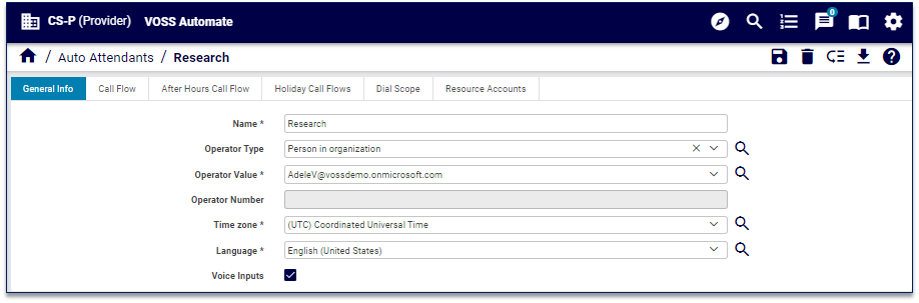
General Info Tab#
The table describes the fields on the General Info tab:
Field |
Description |
|---|---|
Name |
Mandatory. The name of the auto attendant. |
Operator Type |
Optional. Options are:
|
Operator Value |
Mandatory. Field is hidden when operator type is No operator. When operator type is Voice app, operator values are call queues or auto attendant resource accounts. |
Operator Number |
Field is hidden when operator type is No operator. |
Time zone |
Mandatory. |
Language |
Mandatory. |
Voice Inputs |
Optional. Defines whether the auto attendant uses voice input. |
Call Flow Tab#
This tab defines the call flow for the auto attendant. On this tab you can set up greeting and routing options, and menu options for call routing.
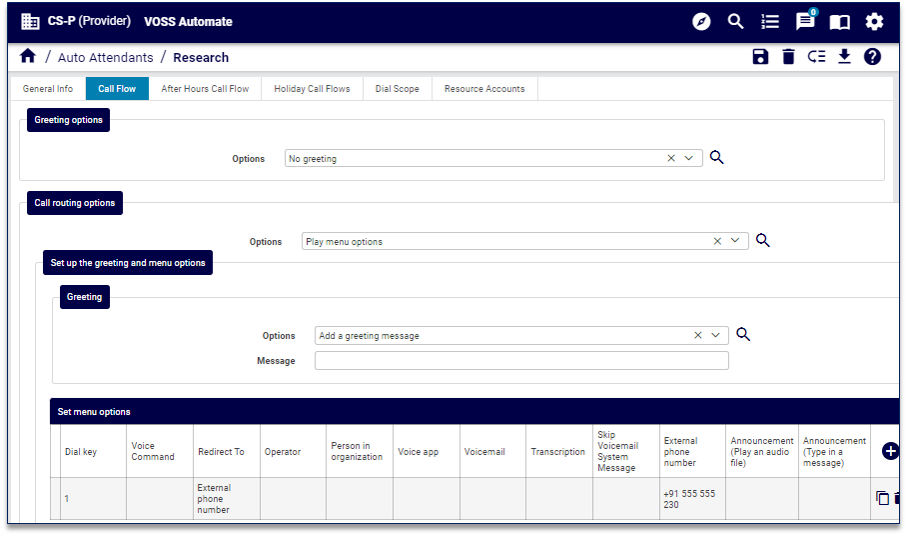
The table describes the fields on the Call Flows tab:
Field |
Description |
|---|---|
Greeting options |
Defines whether there is a greeting, and if so, choose the greeting, for example, play an audio file or add a greeting message. |
Call routing options |
Defines the system behavior for call flow, for example, play menu options, disconnect the call, or redirect the call. |
Set up the greeting and menu options |
Choose greeting options, a message, and set up the dial keys that define the behavior for how a call is routed via the menu, for example, to send a call to voicemail, or to a person in the organization, or play an announcement. Depending on the options you choose, you can define options for the redirect, for example, to choose a number for voicemail, or choose the voice app, or set up the external phone number to redirect the call. |
Note
Audio files required for the auto attendant must be either .MP3, .WMA, or .WAV files, and must be uploaded to VOSS Automate via (default menus) Administration Tools > File Management.
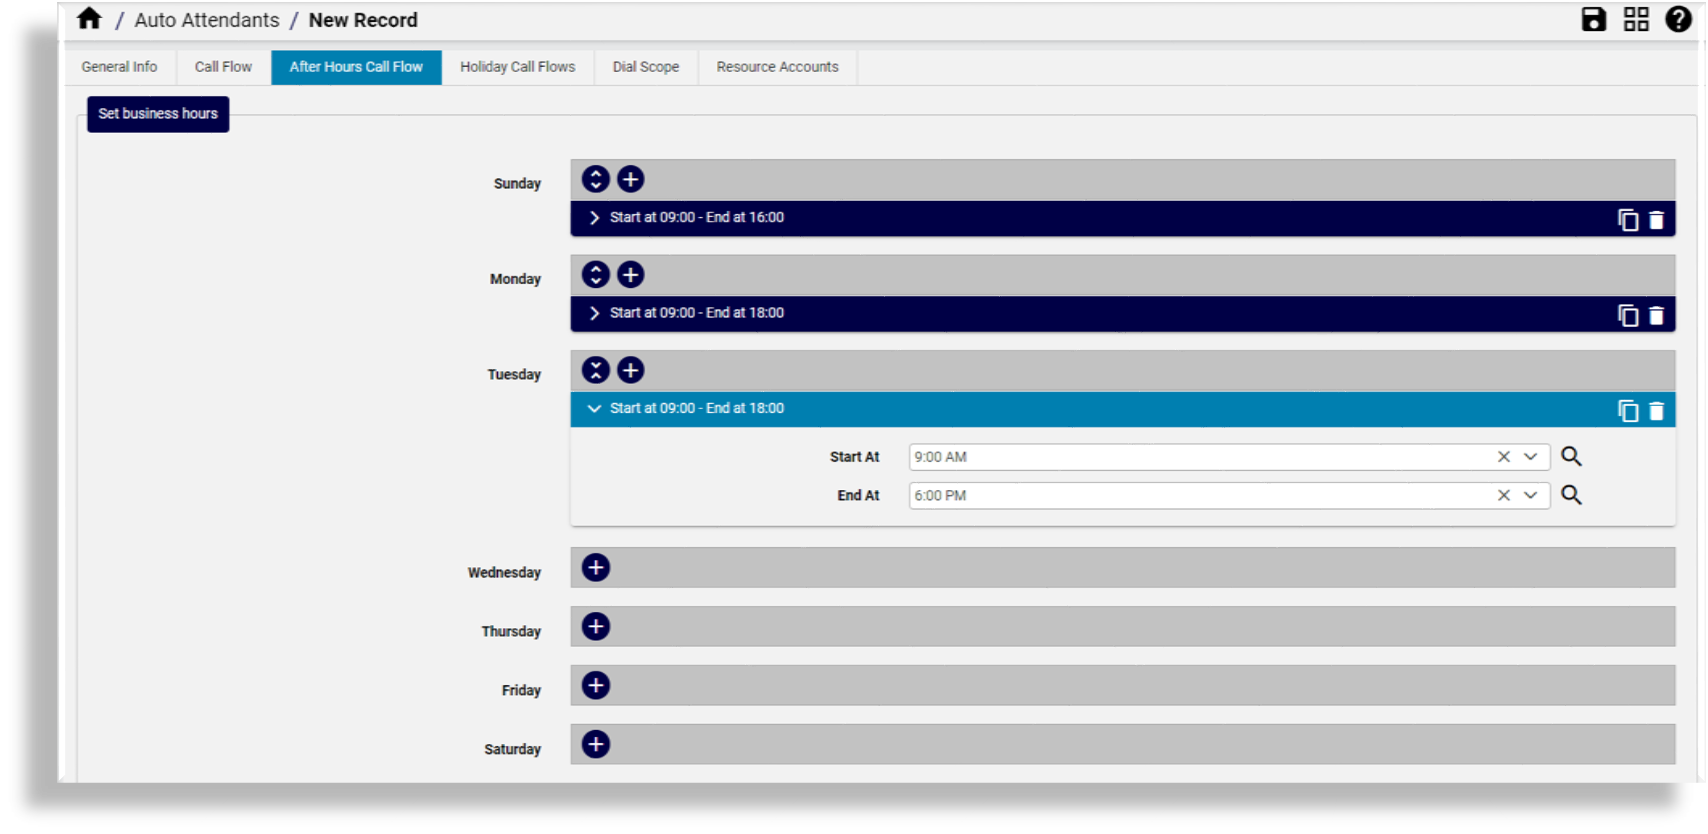
After Hours Call Flow Tab#
This tab defines the call flow for after hours calls for the auto attendant.
On this tab you define the business hours for your organization for each day of the week. You will need to choose a start time and an end time from a drop-down of hours and minutes (in 15 minute increments for a 24 hour period), and then define the system behavior for routing incoming calls outside of the predefined business hours, Monday through Sunday, for example, to set up greeting options and menu options, and define whether calls are disconnected or redirected, and the options for the call flow in each instance.
To set the after hours period to a full day, choose a start time of 12:00 AM. The system automatically sets the end time also to 12:00 AM, representing a full day. Choose None to clear a start or end time.
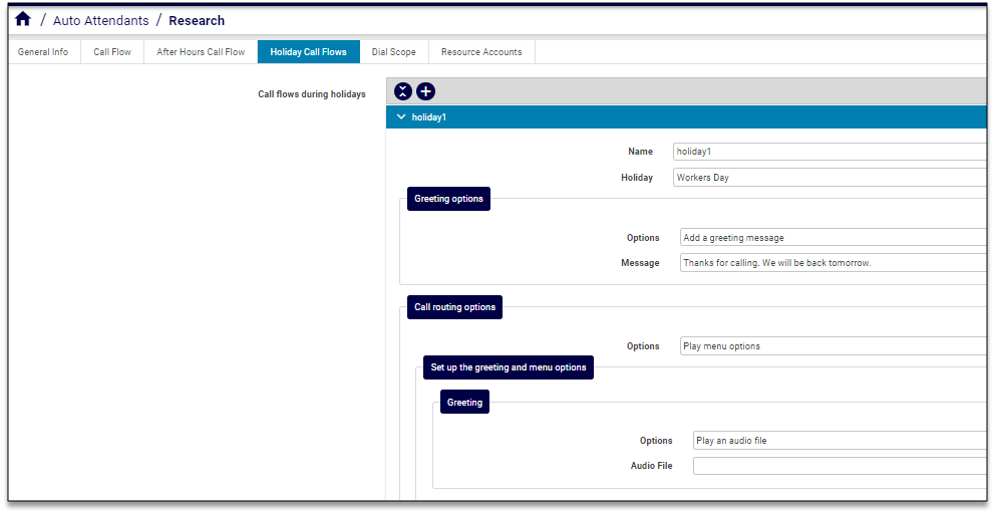
Holiday Call Flows Tab#
On this tab you can set up automated greetings and call routing options for days when your business is closed or operating at less than full capacity due to holidays in your region.
Setting up holidays in your system allows you to automate how calls are answered when the business is closed or operating at less than full capacity. For example, you can choose to play a greeting or message on specific dates, and define how calls are routed. For example, the call may disconnect at the end of a message, or you can present menu options to redirect the call to voicemail, to an announcement, or to a specific person in your organization.
Important
If more than one call flow is added, a selected Holiday of each should not contain days that overlap with a Holiday selected in another call flow. Adding call flows with holidays containing overlapping days will result in a transaction error.
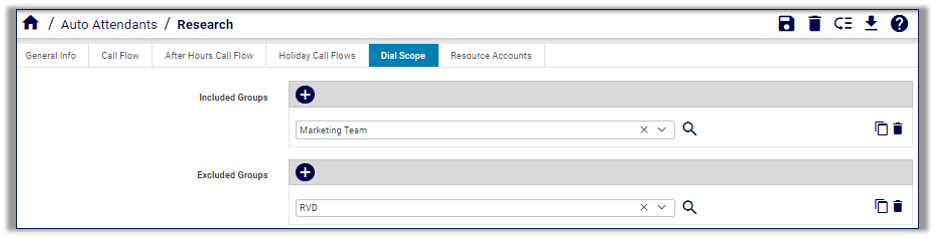
Dial Scope Tab#
This tab configures dial scope for the auto attendant, allowing you to choose the Microsoft groups from Microsoft Entra ID (including Microsoft Exchange), to include or exclude from the dial scope.
Note
Microsoft changed the name of Azure Active Directory to Microsoft Entra ID in August 2023.
Resource Accounts Tab#
This tab adds and edits resource accounts for the auto attendant. When adding a resource account, you choose the resource account, and specify the resource account number.
In VOSS Automate, the application ID is the resource account type in the MS Teams online portal. There are two options for application ID/resource accounts:
Call queues
Auto attendants
Note
MS Teams resource accounts are licensed, non-enabled user accounts, created to assign system resources to voice features such as call queues and auto attendants.
The Resource Account drop-down on this tab displays both licensed and unlicensed resource accounts. Choosing an unlicensed resource account triggers a warning and the transaction will fail in VOSS Automate. The resource account you choose must be Enterprise Voice enabled.
Each resource account has a display name, and is associated with a username, a phone number, and a device.
When resource accounts (resource users) are added to call queues and auto attendants, deleting a call queue or auto attendant triggers a system workflow that first disassociates any associated resource accounts, then deletes the call queue or auto attendant.
