Cisco Webex Service#
This procedure adds the Cisco Webex service (Webex Control Hub instance).
Prerequisites:
A Network Device List (NDL) must be configured for any customer that has the Webex Service created.
See: Network Device Lists (NDLs).To allow VOSS Automate to connect to the Cisco Webex Control Hub, obtain the following from the Cisco Webex page:
The Webex Control Hub Account Organization ID
Important
For users upgrading to release 21.4-PB2, existing access tokens need to be
refreshed in order to update permissions for newly added workspace_locations.
To create the Cisco Webex service:
Log in to the Admin GUI as a provider or reseller administrator.
Select the hierarchy path to the correct customer node.
Select Apps Management > Webex Control Hub Access to display the list view of all the configured Webex Organizations.
Note
Existing accounts added before Automate 21.4-PB3 will show the internal account ID as the Organization Account Number, while accounts added from Automate 21.4-PB3 onwards, show the external account ID.
Click Add (+).
Enter the Webex App Customer Name. The default is the Automate Customer name.
Enter your Webex Control Hub Account Organization ID (external account ID) in the Organization Account Number field. This can be obtained from the Webex Control Hub admin portal under the Account menu.
Enter the Admin Account Email to specify the administrator managing the account. This is an informational field only.
The HTTP Proxy String and HTTPS Proxy String fields are required only if a proxy server is required to connect to the Cisco Webex Control Hub API, for example:
http://[ip address]:portorhttps://[ip address]:port.Note: The Webex organization account details need to be added to Automate first, before Access Tokens can be obtained.
Click Save.
Note
When adding a new Webex Control Hub Access entry for a customer, data syncs and schedules are automatically created. Deleting a customer’s Webex Control Hub Access automatically deletes these data syncs and schedules.
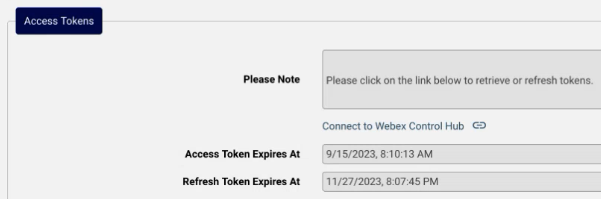
After saving the new Webex organization and returning to the created account, the Access Tokens section contains a Connect to Webex Control Hub link that is used to request the tokens.
Click the Connect to Webex Control Hub link to obtain the access tokens for the Webex Control Hub account. When the link is first used, a Webex admin user, with sufficient privileges, is required to login and accept the API authorization scope needed by Automate for integration.
This action then redirects you to the Transactions page in VOSS Automate, where the progress for the retrieval of the access tokens can be monitored.
Note
The sync of roles and licenses into VOSS Automate are also part of this transaction.
After the transaction completes successfully, the Access Tokens section shows Access Token Expires At and Refresh Token Expires At expiry times.
Note
VOSS Automate automatically refreshes the access tokens every 7 days for 90 days, in other words, until the expiry of the Refresh Token.
The Refresh Token is valid for 90 days. The Connect to Webex Control Hub link can be used to refresh it. VOSS Automate General Settings contain options for the Webex App Tab to send impending expiry notifications and messages. See: Global Settings.
See https://developer.webex.com/docs/integrations for more details on access token management.
Related Topics