
Modify a Call Handler (Auto Attendant) Schedule#
Update a Call Handler Schedule#
In the Admin Portal, go to (default menu) Services > Auto Attendant > Schedule.
In the Schedule list view, click on the schedule you wish to edit.
Update the relevant fields. See Create a Call Handler (Auto Attendant) Schedule
Note
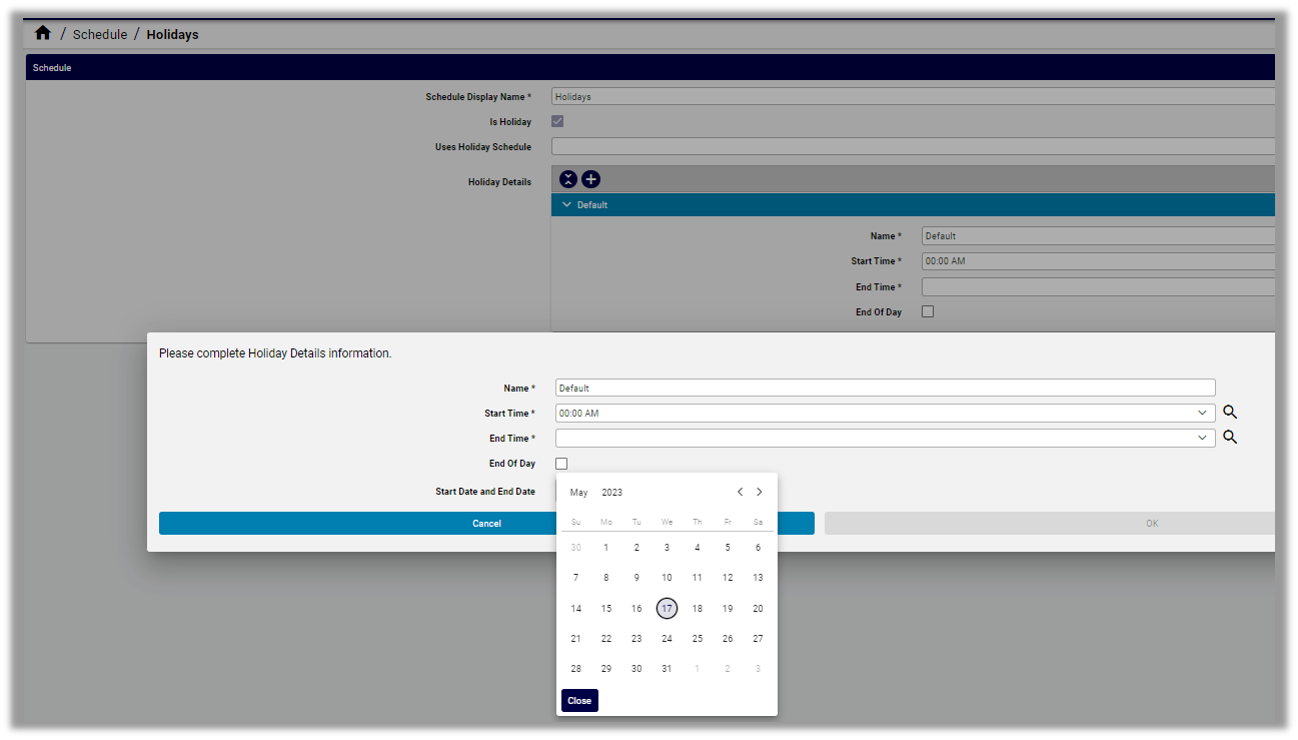
If you’re updating a Holidays schedule, click the Plus icon at Holiday Details, then fill out details for the holiday, including Name, Start Time, End Time, and select End of Day to define whether the schedule becomes inactive at midnight on the day of the holiday. Finally, click in the Start Date and End Date field to select a date for the holiday from the calendar date picker.
Save your changes.
Delete a Call Handler Schedule#
In the Admin Portal, go to (default menu) Services > Auto Attendant > Schedule.
In the Schedule list view, select the checkbox adjacent to the schedule you want to delete. If you want to delete more than one schedule, select multiple checkboxes.
Click the toolbar Delete icon.
In the dialog asking you to confirm the deletion, click Yes.