
Configure Microsoft Tenant Connection Parameters#
Note
References in this section to “PowerShell Proxy” refer to the MS Windows host running PowerShell commands. References to just “Proxy” refer to the HTTP proxy server that the the Windows PowerShell host uses to access the tenant in the cloud.
This procedure configures the following connections:
From VOSS Automate to the PowerShell Proxy
Between the PowerShell Proxy and the tenant
The Graph API connection between VOSS Automate and the tenant
Prerequisites:
You will need:
The FQDN or IP address of a single-node PowerShell Proxy, or the FQDN corresponding to your load balancer’s virtual IP address. See Set up the PowerShell Proxy Server
The credentials for the local service account you created on the PowerShell Proxy
Proxy authentication credentials (if the outbound Internet Proxy requires authentication)
Note
Authenticated proxy is not supported.
The credentials for the Microsoft Teams tenant service account. See Create MS Teams Service Account on Microsoft Cloud.
The Client ID, Tenant ID, and, for authentication for MS Graph, the client secret and/or the certificate created when registering VOSS Automate as an application object with Microsoft Entra ID. See Create Application Registration in Microsoft Cloud Tenant Portal.
If you’re using VOSS Automate to manage Microsoft Exchange online, you will need the certificate authentication thumbprint you generated on the Azure portal for Microsoft Exchange. See Create Application Registration in Microsoft Cloud Tenant Portal.
To add and configure the Microsoft Tenant
Log in to the VOSS Automate Admin Portal as a Provider Administrator.
Note
By default, the Provider administrator role is the only role that has the ability to create Tenant connections).
Add the Microsoft tenant:
Go to (default menus) Apps Management > Microsoft Tenant.
Click Add.
Choose the hierarchy level where you wish to add the tenant. Typically, this is at Customer level.
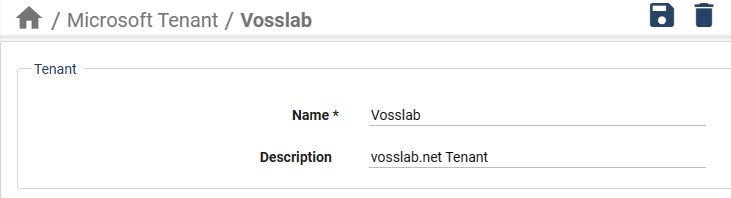
Enter a name and a description for the tenant.
Add the PowerShell Proxy connection parameters:
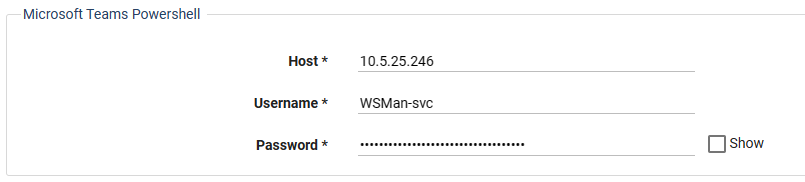
Locate the Microsoft Teams Powershell section.
In the Host field, enter the FQDN or IP address of a single-node PowerShell Proxy, or the FQDN corresponding to your load balancer’s virtual IP address.
Note
For details around the local hosts file and the TrustedHosts WinRM configuration, see Set up the PowerShell Proxy Server.
In the Username field and Password field, enter the credentials for the local service account you created on the PowerShell Proxy.
Configure the outbound internet Proxy:
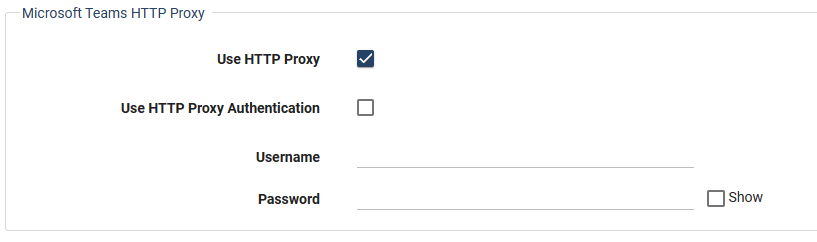
Locate the Microsoft Teams HTTP Proxy fields.
If you have an outbound Internet Proxy deployed between the PowerShell Proxy and the public Internet, select the Use HTTP Proxy checkbox.
Note
If there is no outbound Internet Proxy deployed between the PowerShell and the public internet, leave both checkboxes unchecked, and leave the Username and Password fields blank. Continue to the next step.
Authenticated proxy is supported.
If the outbound Internet proxy requires authentication, select the Use HTTP Proxy Authentication checkbox, and enter the Proxy authentication credentials in the Username / Password fields.
Note
You will have already provisioned the outbound Internet Proxy’s IP address (or FQDN) and port number when you set up the PowerShell Proxy. See Set up the PowerShell Proxy Server, and note the caveat regarding proxy authentication in PowerShell Proxy Deployment Topologies.
Add the Microsoft Teams Tenant service account credentials:
Locate the Microsoft Teams fields.
In the Admin Username and Admin Password fields, enter the credentials for the Microsoft Teams tenant service account.
Note
You created this account earlier. See Create MS Teams Service Account on Microsoft Cloud.
Add Microsoft 365 details to the Microsoft tenant:
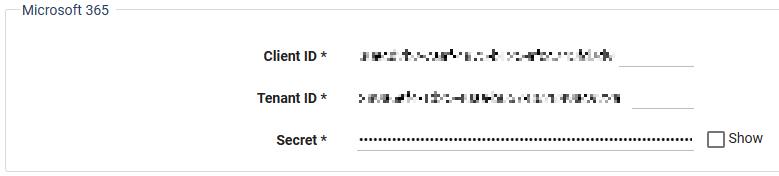
Locate the Microsoft 365 fields.
Enter the Client ID and Tenant ID values recorded earlier during the application registration setup.
If you’re using client secret authentication, copy the secret value into the Secret field.
If you’re using certificate authentication:
Paste the certificate thumbprint obtained from Azure into the Certificate Thumbprint field.
Note
From release 21.4 onwards, this field is no longer a password, but plain text, since it is generated from the public portion of the certificate.
From the Certificate drop-down, choose the certificate previously created in the Admin Portal.
Note
You uploaded the public key for this locally stored certificate to Azure. The thumbprint added in the Microsoft 365 tenant parameter is generated in Azure when the public key file is uploaded to Azure.
Certificate authentication only if a client secret is not provided.
MS 365 proxy / MS 365 secure proxy: These fields allow for setting an outbound internet proxy server if required for traffic outbound to the public Internet. This proxy setup is used to define the route for the MS Graph API communications which the system uses for communication with the MS 365 cloud tenant.
If the Internet Proxy is not authenticated, then use the MS 365 proxy field and the format is:
https://host:port/If the Internet proxy requires authentication, then use the MS 365 secure proxy and the format is:
https://proxyuser:proxypassword@host:port/
In both cases the host can be a FQDN if resolvable via DNS or the IP address of the Internet proxy.
Max page size for MSOLUser / Max page size for Groups: These fields control the paging size for the number of records pulled at a time from the corresponding API.
The MSOLUser setting controls the
device/msgraph/MSOLUserrelated API.The Group setting controls the
device/msgraph/Groupsanddevice/msgraph/Teamsrelated APIs.
When left blank, the default page size is 999, a high number that allows for best performance. It is recommended that you leave this blank and utilize the default value unless you encounter errors on your Microsoft 365 syncs (for example, “Template output exceeded memory limit”). In that case, you can enter a specific value less than 999 in order to try a smaller number of records until the sync no longer has an error.
Note that reducing the value may impact sync performance so it is best to use the largest paging size that does not result in an error.
From release 21.4-PB4 onwards, the memory limit handling of requests has been increased, so that any previous explicit specification of max page size values less than 999 may not be required anymore, or can be increased substantially.
If you’re using VOSS Automate to manage Microsoft Exchange online, provision the Exchange Online application certificate thumbprint.
Note
The certificate authentication thumbprint is generated on the Azure portal for Microsoft Exchange. You would have installed this certificate on the PowerShell proxy server and configured it in the application registration.
The certificate thumbprint is the encrypted password required for an authenticated connection to the Microsoft Cloud Exchange portal. Connecting to Microsoft Exchange is required to sync in the Microsoft Exchange objects (mailboxes, shared mailboxes, rooms, and distribution lists).
Locate the Microsoft Exchange fields.
Select Enable Microsoft Exchange.
In the Certificate Thumbprint field, paste the certificate thumbprint you obtained earlier.
Note
You obtained the certificate thumbprint when logged into the PowerShell proxy to register the VOSS Automate application with Microsoft Entra ID. See Create Application Registration in Microsoft Cloud Tenant Portal.
The certificate thumbprint was created on the proxy and uploaded to the Azure portal. When generating PowerShell scripts to manage Microsoft Exchange Online, VOSS Automate includes this thumbprint so that the PowerShell proxy can use the corresponding certificate to authenticate with Microsoft Exchange Online.

Click Save.
Test your Microsoft tenant connection. You will be prompted to confirm the test.
Note
In this step you will verify that VOSS Automate can connect to the Microsoft Teams tenant using PowerShell, and to Microsoft Entra ID using the Microsoft Graph API.
On the Microsoft Tenant page, choose the relevant tenant.
Click Test Connection.
Next Steps
Verify that no changes are needed in user name mapping macros prior to sync. High level administrators with access to the
data/MultivendorUsernameMappingMacrosmodel instances should carry out this task.Perform a sync from the Microsoft tenant to import Microsoft users, tenant dial plan, licenses, and policies to the customer level. You will be prompted to confirm the syncs.
For Microsoft Exchange, ensure that instances for all 4 device models (User mailboxes, Shared Mailboxes, Room Mailboxes, and Distribution Mailboxes) are synced in at the level were the tenant exists.
Configure the customer-wide site defaults doc (SDD),
CUSTOMER_TEMPLATE. See Site Defaults Doc Templates.Add network device lists (NDLs) with Microsoft 365 and Microsoft Teams tenant details. NDLs are required when adding sites. See Network Device Lists (NDLs).
Create sites.
Run the overbuild. See: Overbuild for Microsoft.
Related Topics