
Customer Dial Plan#
Overview#
For Cisco HCS dial plans, you must create a customer dial plan before you create the site dial plan. You can only add one dial plan per customer.
Cisco HCS dial plan schemas are configured such that the customer-level dial plan elements are not pushed to CUCM until the first site for the customer is deployed. Therefore, you won’t see any dial plan elements provisioned on the CUCM until at least one site is deployed for the customer. See Site Dial Plan.
Once you add a customer dial plan, the only change allowed is to enable CSS filtering.
Add a Cisco HCS Customer Dial Plan#
This procedure adds a new Cisco HCS dial plan for a customer.
Note
The options you choose in this procedure define the type of Cisco HCS dial plan schema (Type 1 to 4) to be used.
To add a new dial plan for a customer:
Log in to the VOSS Automate Admin portal as a Provider administrator or Customer administrator.
Note
For details around tasks that can be performed for each admin level, see Dial Plan Roles and Privileges.
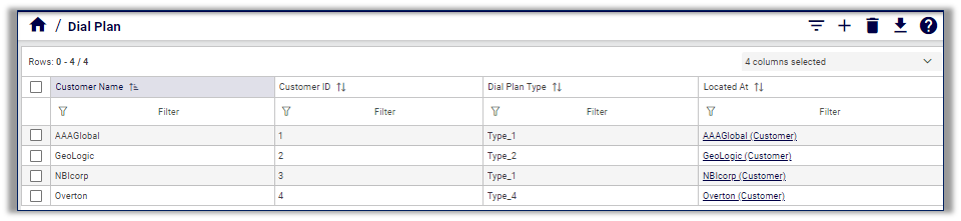
Go to (default menus) Cisco Dial Plan Management > Customer > Dial Plan to view existing dial plans in the list view.
Click the Plus icon (+) to add a new customer dial plan; then, select the customer.
On the Dial Plan / New Record page, choose one of the options in the table to configure the new dial plan, depending on whether a site-location code is required for the customer:
Site-location code required?
Select Site-Location Code (SLC) based dial plan, then:
Define whether to use an extension prefix. If yes, select Use extension prefix, then fill out the extension prefix.
Define whether to use an inter-site prefix for inter-site dialing. If yes, select Inter-Site Prefix required for inter-site dialing, then:
Fill out the inter-site prefix (ISP). The ISP can be just one digit.
Define whether the ISP is included in the directory number. If yes, define whether the ISP is included in the Voice Mail ID.
Define whether to enable CSS filtering. If yes, select Enable CSS filtering.
When enabled, this setting filters the calling search spaces (CSS) available when configuring a subscriber, phone, or line, to Site level Class of Service (CoS) CSSs.
By default, CSS filtering is disabled, which results in all available Cisco Unified Communications Manager (CUCM) CSSs being available when configuring a Subscriber, phone, or line.
No site-location code required
Leave Site-Location Code (SLC) based dial plan unchecked.
Define whether to enable CSS filtering. If yes, select Enable CSS filtering.
When enabled, this setting filters the calling search spaces (CSS) available when configuring a subscriber, phone, or line, to Site level Class of Service (CoS) CSSs.
By default, CSS filtering is disabled, which results in all available Cisco Unified Communications Manager (CUCM) CSSs being available when configuring a Subscriber, phone, or line.
Note
The value in the read-only Customer ID field is a unique, auto-generated number allocated to the customer. Customer ID is particularly useful in shared deployments (where a cluster may be shared across multiple customers) to correlate specific elements to a customer. The customer ID displays in CUCM as a prefix to elements (for example Cu2Si7 identifies Customer 2, Site 7).
Click Save to add the new customer dial plan.
For add, update, or delete, you can view transaction progress and details in the Transaction Logs.
Note
When adding lines (DNs) at the site level, you must define your DNs appropriately (that is, you are responsible for using ISP+SLC+EXT if you deploy a Type 2 dial plan). Otherwise your inter/intra site calls won’t route. For details around defining directory numbers, see Number Range Management.
Related Topics