Probe Configuration#
Overview#
The Probes Configuration panel allows you to assign a group of scripts to an asset that can run on a set interval. These scripts will allow for data collection from many types of devices. The protocols can be API, SNMP or custom CLI scripts. SNMP v3 is also supported.
The return data from the Probes can then be injected into the system for correlation or can be stored in the database to allow for analysis on the Dashboard/Reporting server.
For PRI and SIP Trunk probes for Cisco Voice Gateways, reference:
Arbitrator Cisco PRI and SIP Probe Configuration for instructions.Add a Probe Group#
To create a new Probe Group:
Click the Probe icon from the Menu bar.
Click the “Plus” icon within the Groups pane in the bottom left corner.
Enter the “Group” name and press Enter.
Click the “Save” icon in the upper right corner.
Clone a Probe Group#
To clone an existing Probe Group:
Click the Probe icon from the Menu bar.
Select a Probe group to clone from.
Click the “C” icon within the Groups pane in the bottom left corner.
The cloned “Group” name shows: <source group name> clone. Modify this name to the required name.
Click the “Save” icon to save the added Probe.
The probes contained in this new group can also be modified. Refer to the steps to add, clone and modify probes.
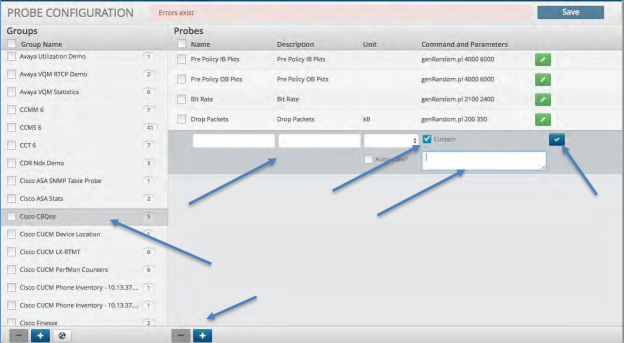
Create a Probe#
To create a new Probe:
Click the group in which you wish to create a new Probe.
Click the Plus icon within the Probes panel.
Enter the name and description of the Probe.
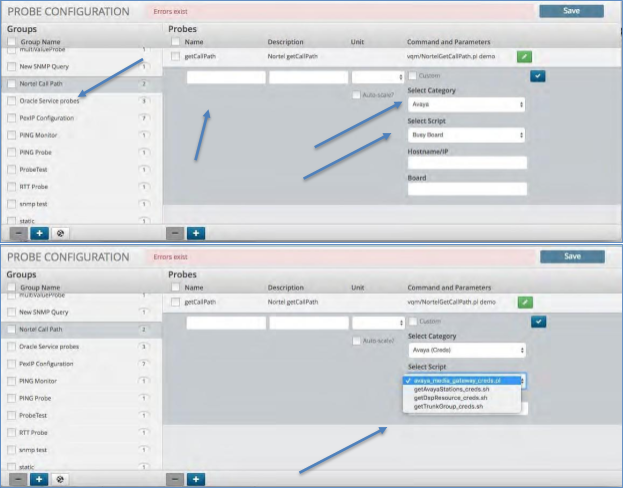
De-select the check icon from the field titled “Custom”. This field is utilized when putting a custom probe in place versus utilizing the ones within the system.
Select the Probe Category from the drop-down list. This will populate the scripts available in that category within the drop-down menu titled “Select Script”.
Select a script from the script drop-down list.
Enter any additional information required by the selected script, such as the hostname, IP, etc.
Click the “Check” icon to close the probe in the far right of the Probe panel.
Click the “Save” icon to save the added Probe.
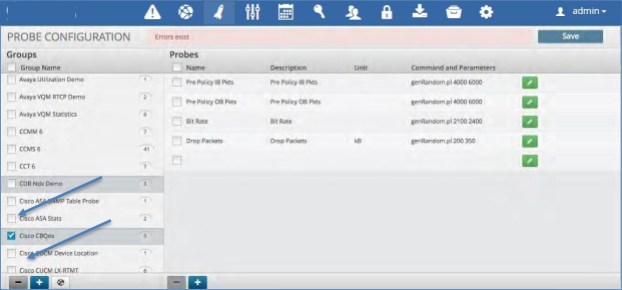
Clone a Probe#
To clone a probe:
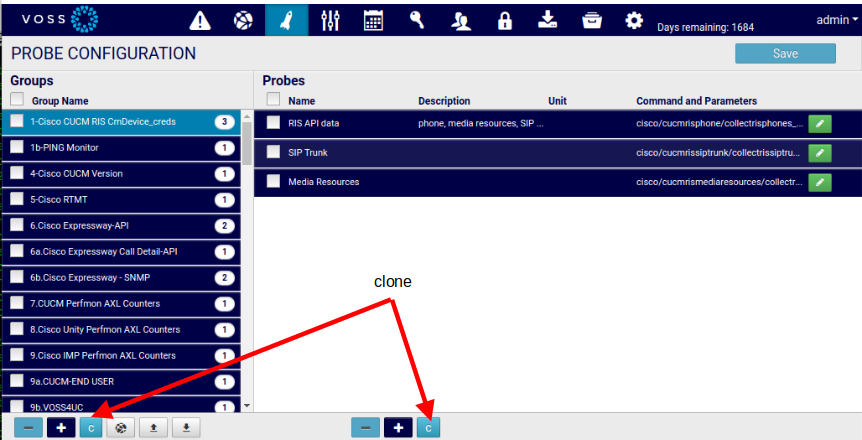
Click the probe which you wish to clone.
Click the “C” icon within the Probes panel.
The cloned “Probe” name shows: <source probe name> clone. Modify this name to the required name as well as any other properties you need to.
Select the Done checkbox before saving.
Click the “Save” icon to save the added probe.
Create a Custom Probe#
To create a new Probe:
Click the group in which you wish to create a new Probe.
Click the Plus icon within the Probes panel.
Enter the name and description of the Probe.
Select and click the check icon from the field titled “Custom”. This field is utilized when putting a custom probe in place versus utilizing the ones within the system.
Enter the path and script that you wish to run.
Click the “Check” icon to close the probe in the far right of the Probe panel.
Click the “Save” icon to save the added Probe.
Delete a Probe Group#
To delete a Probe Group:
Click the check box next to the group name you wish to delete.
Click the Minus icon within the Probe Group panel in the bottom left.
Click the “Save” icon to save the changes.
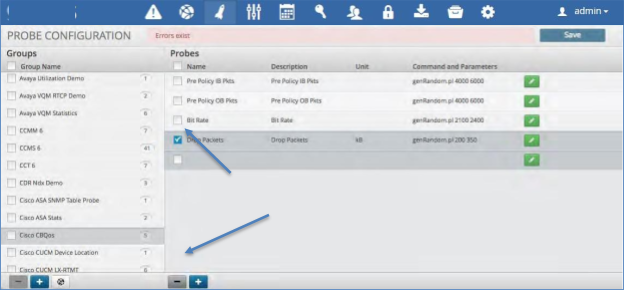
Delete a Probe#
To delete a Probe:
Click the check box next to the Probe name you wish to delete.
Click the Minus icon within the Probe panel in the bottom right.
Click the “Save” icon to save the changes.
Export and Import a Profile#
Important
This import/export is special. Since we do not have a Profile main screen, the import/export profiles are in Probe Configuration; the same as the legacy push button (right next import/export buttons).
Within the PROBE CONFIGURATION section, you can export and import the profiles that you exported from another system.
A new system log table insights_system_log has also been added
to log user actions and a user can create a dashboard to view these actions.
See the:
Log SearchExport a Profile#
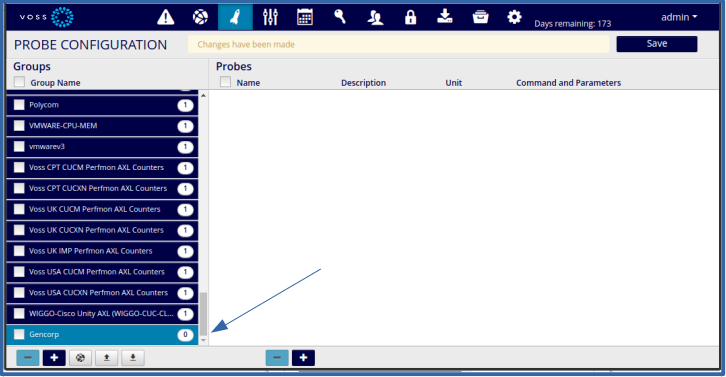
Click the Down arrow button at the bottom of the PROBE CONFIGURATION panel.
Since this is a probe configuration, we cannot select individual profiles, so it will export all profiles in the system.
The Export CSV dialog opens. Enter a CSV file name (You do not have to add the
.csvfile extension) and click Export.The Export finished dialog shows when the export file has been created. Click Download to save the CSV file to your selected download location.
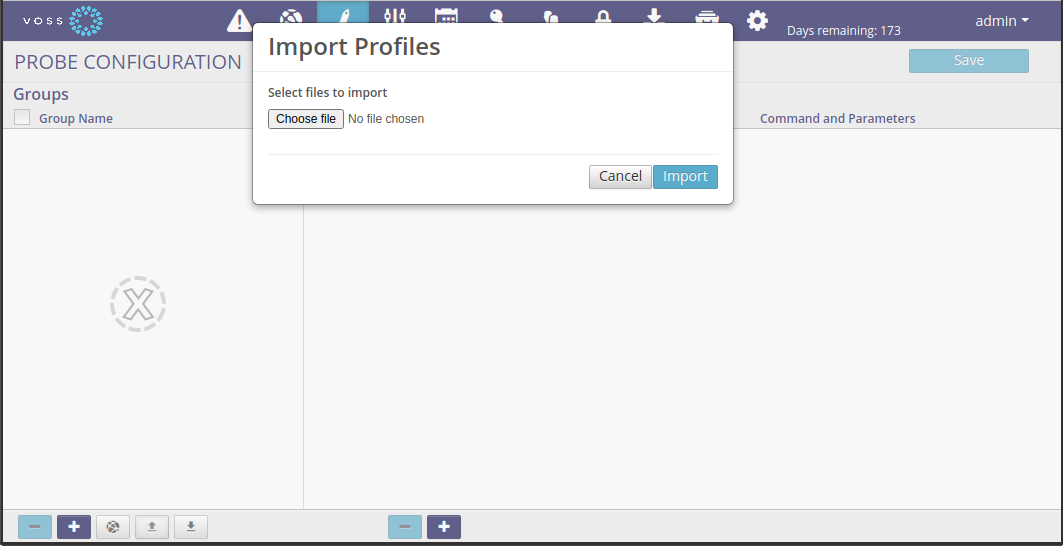
Import a Profile#
Click the Up arrow button at the bottom of the PROBE CONFIGURATION panel.
A pop-up box will appear asking you choose your file.
Click the Choose file button and select the exported CSV file that you have saved to your computer.
Click the Import button.
Profile CSV Format#
The following columns are in an exported CSV file:
"Row Action","Asset Name","IP Address","Customer Name",
"Site Name","Probe Group Name","Credential 1 Name",
"Credential 2 Name","Frequency (s)",Enable
Note
The
"Row Action"column is used when importing and if it contains “delete”, then the row will be deleted upon import.“Probe Group Name” must be unique.
Combination: “IP Address”,”Customer Name”,”Site Name” must to be unique.
“Asset Name” is used as a reference of the asset.
When importing and if an asset and a probe group are found, then a profile will be updated/inserted. If not, nothing to import.
Assign a Probe to an Asset#
A probe group assigned to an asset can be modified using a profile CSV file import by specifying the related “Asset Name” and “Probe Group Name” in the CSV file.
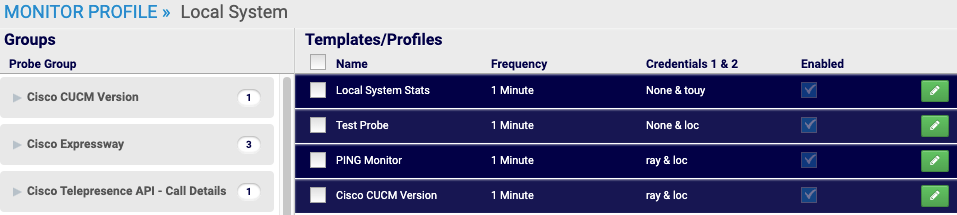
For example, consider an asset “Local System” that has 3 profiles:
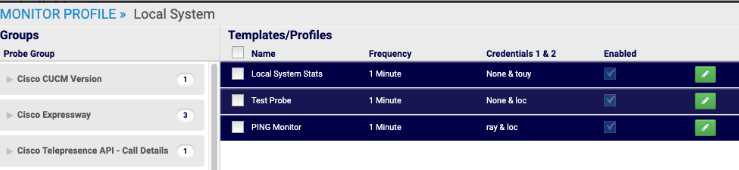
We can assign probe “Cisco CUCM Version” to asset “Local System” as a CSV file import:

After importing, the profile is added to the probe group.