Archive Management#
Overview#
The Archive Management system configuration page provides options on backing up and configuring the Arbitrator correlation platform.
You can select the following tabs on this page:
Configuration Management Tab#
You can select the following tabs on the Archive Management > Configuration Management tab:
Cisco SDL Tab
Data User Tab
Probe Tab
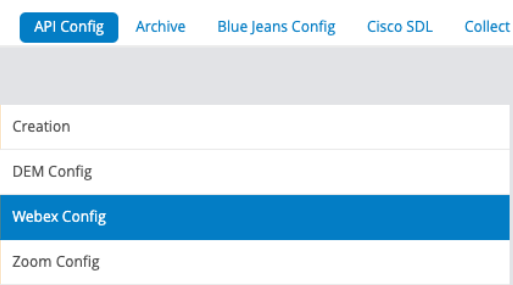
API Config Tab#
This tab allows you to set up a number of API configurations to enable monitoring, for example, of Webex or MS Teams.
Webex Config
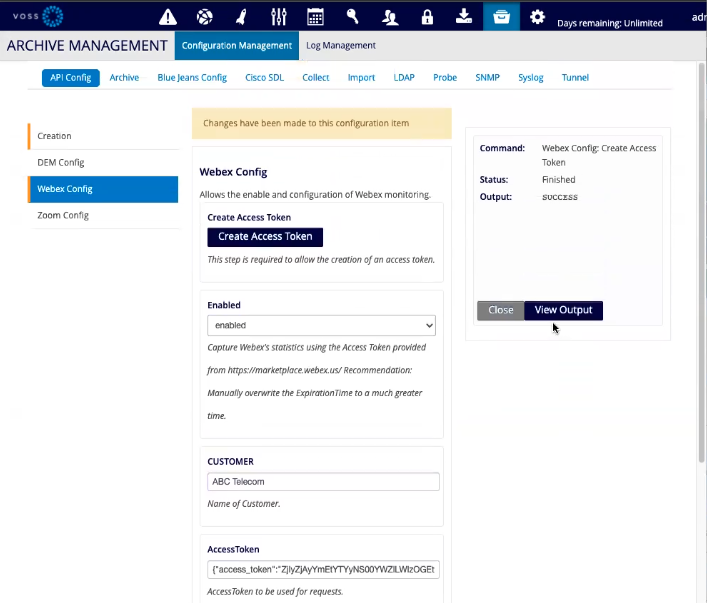
The Webex Config option allows the configuration of Webex monitoring. A dashboard is available to visualize the data.
Note
For Webex API support, your network should be configured to access: https://webexapis.com/v1, port 443.
(Admin menu > LayerX Network Configuration, DNS Settings may need to be configured to reach the external site.)
To configure Webex API:
From the Arbitrator main user interface, click the System Configuration toolbar icon (wrench) to open the Arbitrator Configuration GUI.
Click the toolbar Cabinet icon to open Archive Management.
3. On the Configuration Management tab, select the API Config tab. 3. On the API Config tab, select Webex Config, then configure settings in the right pane:
Click the Create Access Token button, then fill out your account credentials and copy the JSON string that performs OAuth handshake with Webex. You’ll paste this into AccessToken.
At the Enabled drop-down, select
enabled.At CUSTOMER, fill out the customer name (if multi-tenancy is required).
At AccessToken, paste the copied JSON token from step a.
The JSON format is as follows (line breaks here not in string):
{"access_token":"xxxxxxxxxxxxxxxxxxxxxxxxxx",
 "expires_in":nnnnnnn,
 "refresh_token":"xxxxxxxxxxxxxxxxxxxxxxxxx",
 "refresh_token_expires_in":nnnnnnn,
 "token_type":"Bearer"}
Click Verify Access Token and to verify, inspect the output in View Output.
Click Save Access Token, which will create a new Customer-specific “Webex Config - <XYZ>” entry. under the API Config list. (You need to click away and return to Configuration Management to reload with the new entry.)
Created configurations can be deleted or modified. This will be needed for Access Tokens,
as these contain an expires_in value.
MS Teams Config
MS Teams Config settings allow you to configure MS Teams monitoring.
The MS Teams API configuration requires an initial application registration on Microsoft Azure. To set this up:
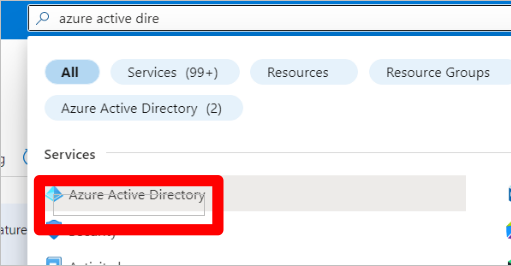
Search for Azure Active Directory:
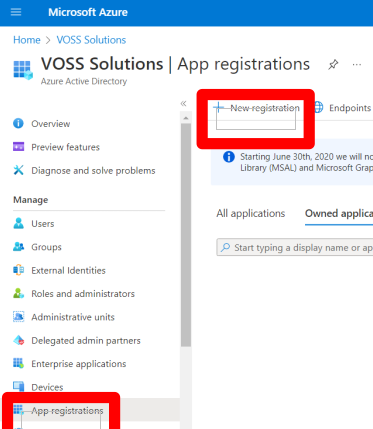
Select Manage > App registrations, then select New Registration
Fill out a meaningful application Name to display to users and under Supported account types, select Accounts in this organization directory and click Register.

When the new application is registered, locate the Application (client) ID and Directory (tenant) ID on the next page and store these values in a secure location.
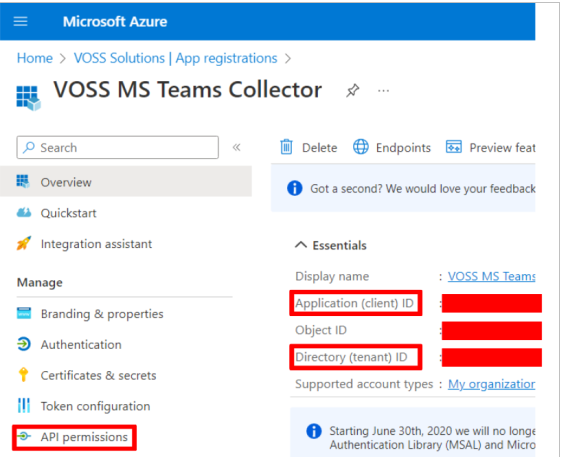
Select the API permissions menu under Manage and then select the following Application permissions:
CallRecords.Read.AllDevice.Read.AllDeviceManagementApps.Read.AllDeviceManagementApps.ReadWrite.AllDeviceManagementConfiguration.Read.AllDeviceManagementConfiguration.ReadWrite.AllDeviceManagementServiceConfig.Read.AllDeviceManagementServiceConfig.ReadWrite.AllDirectory.Read.AllDirectory.ReadWrite.AllUser.Read.AllUser.ReadBasic.AllUser.ReadWrite.AllGroup.Read.AllGroup.ReadWrite.AllGroupMember.Read.AllServiceHealth.Read.AllTeamworkDevice.Read.AllTeamworkDevice.ReadWrite.All
Grant admin consent:

From Certificates & secrets, create authentication from New client secret:
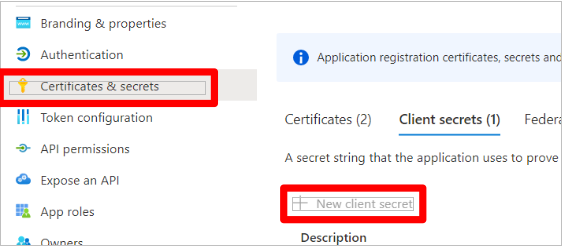
Copy the value and store in a secure location.

The following stored values will be used on the Arbitrator configuration dialog screen:
Application (client) ID
Client secret value
Directory (tenant) ID
Configure the tenant collection from the Arbitrator
Configuration is carried out on the Arbitrator Settings menu via Archive Management > API Config > MS Teams Config.
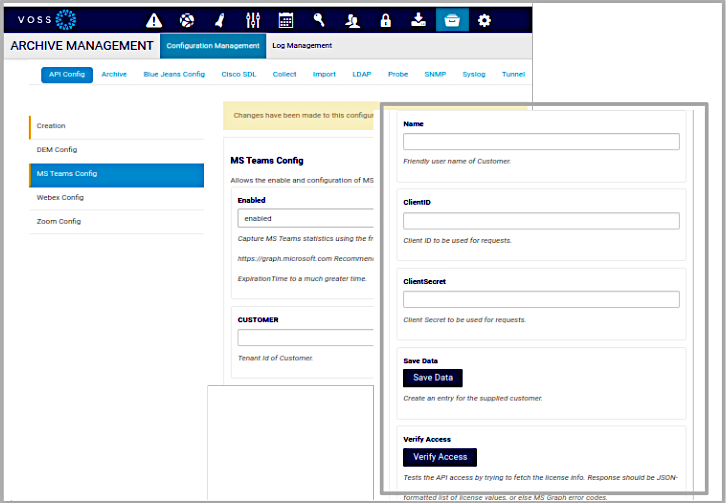
New Tenants can be created with Enabled either enabled or disabled. If disabled, no API requests will be made until it is enabled.
Enter stored values:
Enter the tenant id (Directory (tenant) ID) in the CUSTOMER field
Enter an easily identifiable account name in the Name field.
Enter the client ID (Application (client) ID) in the ClientID field.
Enter the client secret Value in the ClientSecret field.
These values should be for a client that is dedicated to this use and should not be used it to request a token from any other source while the API collector is enabled.
Click Save Data to save the configuration.
Refresh the screen (move away from the configuration screen to another and back) to see the new configuration.
Zoom Config
An access token is required for the configuration of Zoom monitoring.
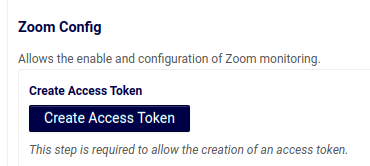
Click the Create Access Token button to be redirected to get an access token.
If Zoom statistics are to be captured, select enabled from the Enabled drop-down.
Enter a Customer name for the associated customer.
Enter the received access token in the AccessToken input box.
Enter a refresh token in the RefreshToken input box.
Click the Verify Access Token button to test the entered access token.
Archive Tab#
The Archive tab provides a number of options based on the specific functions you wish to backup.
Setup
The system does a backup daily. For the most part, there is nothing for the user to configure. All data and configurations that exists on the system are archived automatically on a daily basis.
Archived data are logically grouped together and by default stored into separate archived files locally on the box. There is a separate page for each Archive group. More detailed information about each Archive group can be found on the individual Archive group pages. The user also has the option to mount an NFS drive to the system. All archived files will then get archived to the NFS mounted drive. Note: removing the NFS mount will NOT copy the NFS contents back to local storage. Only NFS v3 mounts are currently supported today.

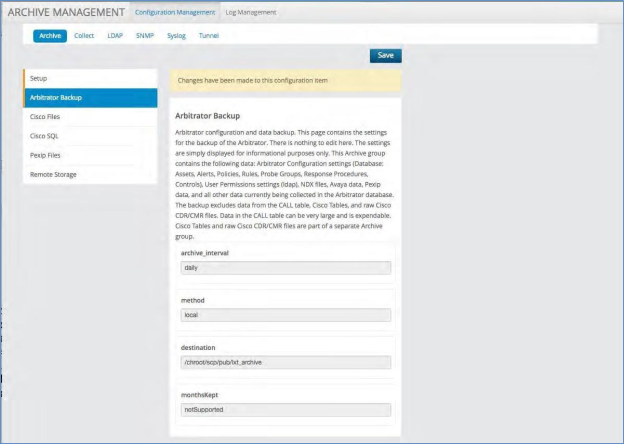
Arbitrator Backup
This page contains the settings for the backup of the Arbitrator. There is nothing to edit here. The settings are simply displayed for informational purposes only. This Archive group contains the following data: Arbitrator Configuration settings (Database: Assets, Alerts, Policies, Rules, Probe Groups, Response Procedures, Controls), User Permissions settings
(ldap), NDX files, Avaya data, Pexip data, and all other data currently being collected in the Arbitrator database.
The backup excludes data from the CALL table, Cisco Tables, and raw Cisco CDR/CMR files. Data in the CALL table can be very large and is expendable. Cisco Tables and raw Cisco CDR/CMR files are part of a separate Archive group.
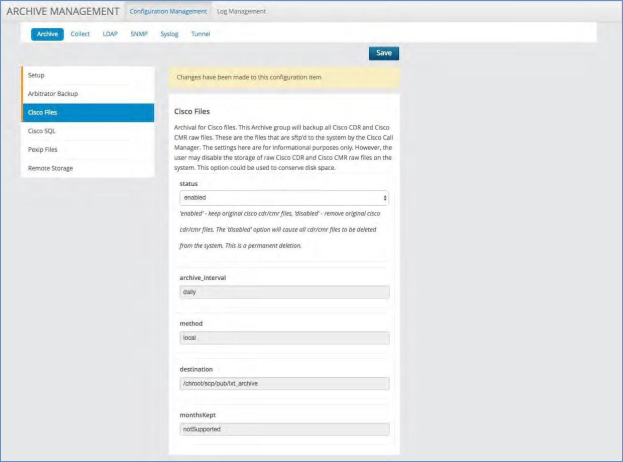
Cisco Files
Archival for Cisco files. This Archive group will back up all Cisco CDR and Cisco CMR raw files. These are the files that are SFTP’d to the system by the Cisco Call Manager. The settings here are for informational purposes only. However, the user may disable the storage of raw Cisco CDR and Cisco CMR raw files on the system. This option could be used to conserve disk space.
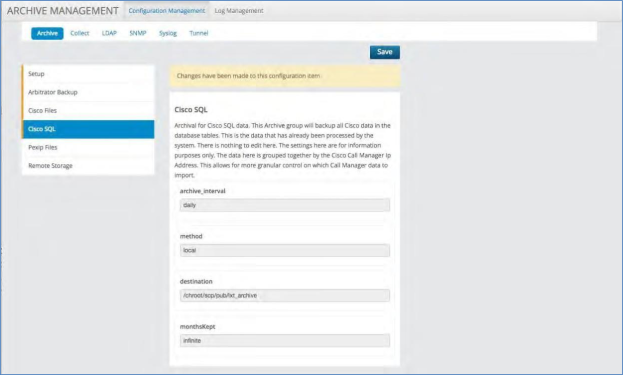
Cisco SQL
Archival for Cisco SQL data. This Archive group will back up all Cisco data in the database tables. This is the data that has already been processed by the system. There is nothing to edit here. The settings here are for information purposes only. The data here is grouped together by the Cisco Call Manager IP Address. This allows for more granular control on which Call Manager data to import.
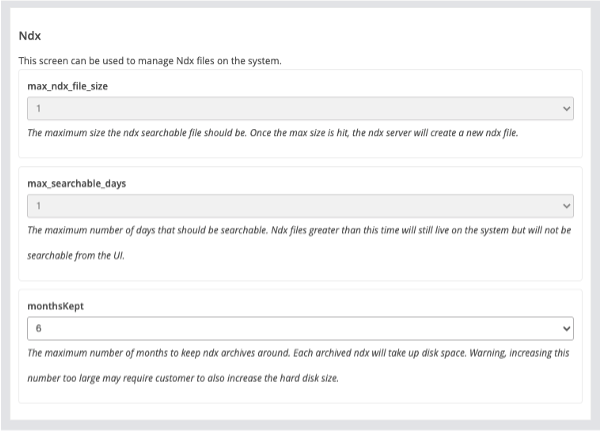
Ndx
This Archive group will manage Ndx files on the system. Default monthsKept is 6 months.
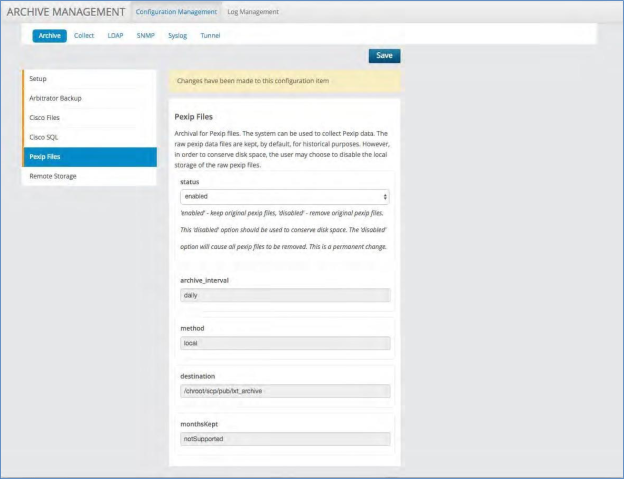
Pexip Files
Archival for Pexip files. The system can be used to collect PEXIP data. The raw PEXIP data files are kept, by default, for historical purposes. However, in order to conserve disk space, the user may choose to disable the local storage of the raw PEXIP files.
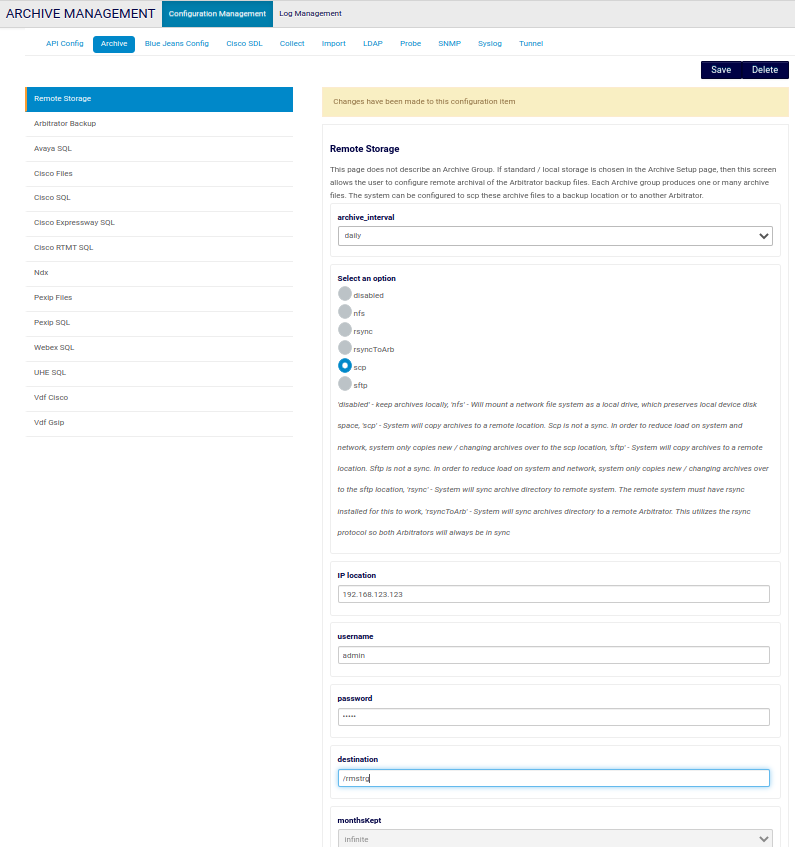
Remote Storage
If standard / local storage is chosen in the Archive Setup page, then this screen allows the user to configure remote archival of the Arbitrator backup files. Each Archive group produces one or many archive files. The system can be configured to SCP these archive files to a backup location or to another Arbitrator.
The archives can be sent to a separate backup location (NFS, SFTP-server, SCP or remote synced to another Arbitrator).
archive_interval
This can be set on a schedule of:
Daily
Weekly
Monthly
Method: Select an option
disable - System will reset storage options, e.g. archives locations are reset to the local system if these were previously on a remote host.
nfs - System will mount the filesystem as a local drive. The system
drop/lxt_archivedirectory is linked with a symbolic link to/mnt/nfsshareon a host, thereby saving space on the system.Selecting this option enables additional controls:
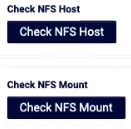
Check NFS Host: Click and use the View Output button to see verification output.
Check NFS Mount: Check the destination location (entered below) after saving the configuration. View Output shows disk usage on the destination of the NFS host.
rsync - System will sync the archive directory to remote system. The remote system must have rsync installed for this to work.
rsyncToArb - System will sync the archives directory to a remote Arbitrator. This utilizes the rsync protocol so both Arbitrators will always be in sync.
scp - System will copy archives to a remote location. Scp is not a sync. To reduce load on system and network, system only copies new / changing archives over to the scp location.
sftp - System will copy archives to a remote location. Sftp is not a sync. To reduce load on system and network, system only copies new / changing archives over to the sftp location.
IP location
IP address. Also add username and password.
destination
The path on the remote server to the folder where backups are to be stored.
See also: Backup and Restore the Arbitrator.
Collect Tab#
The Collect tab defines configuration options for the collection of CDRs.
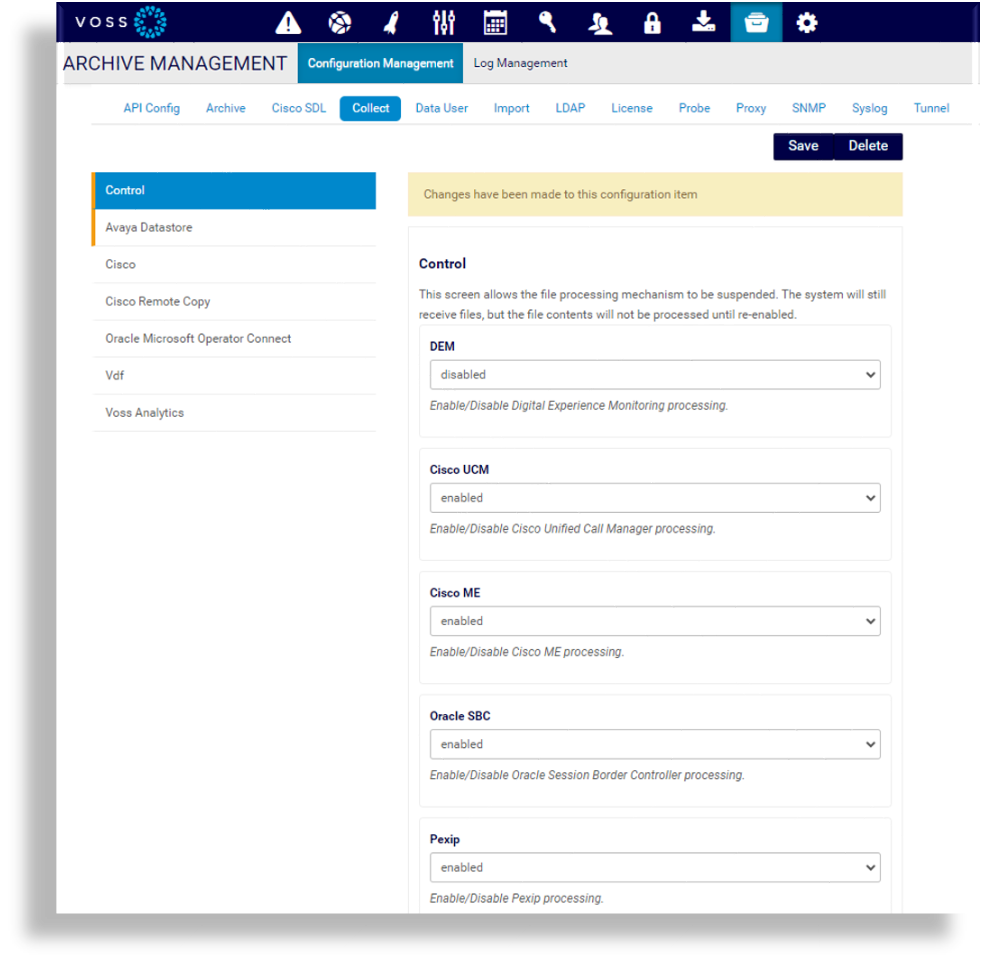
Control
This panel enables and disables the processing of various file types. When a file type is disabled, files of this type are added to a backlog, and are processed when processing is re-enabled.
The table lists the control options you can enable and disable:
DEM |
Enables/disables Digital Experience Monitoring (DEM) collection on the Arbitrator. DEM provides the ability to test connectivity to web-based systems, such as Microsoft Teams, and to deliver metrics for the following:
DEM agents on the Arbitrator provide connectivity and performance statistics to various MS Teams internet endpoints, including Microsoft Graph. When enabled, the job runs every 5 minutes, and policies (rules) imported to Arbitrator fire incident alerts when any of the DEM-collected metrics are out of the permitted thresholds. To verify that the Arbitrator policies are firing alerts and to view the logs, you can search in Arbitrator for either “dem_connectivity” or “dem_web_performance”. |
Cisco UCM |
|
Oracle SBC |
|
Pexip |
|
NGIN |
Enables/disables NGIN-XML processing |
Palladion |
|
NMR |
|
Infovista GSIP |
|
Infovista IPSLA |
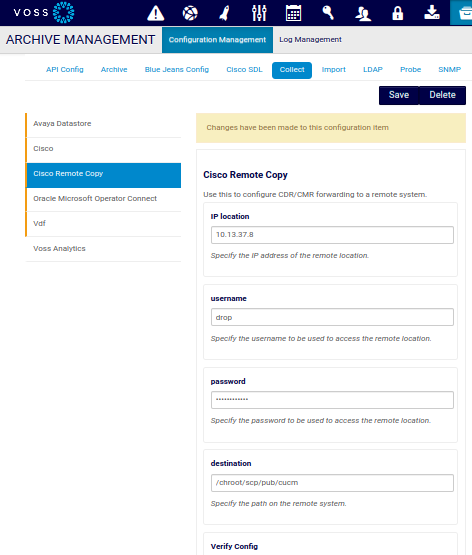
Cisco Remote Copy
This panel defines the storage location of collected Cisco CDR/CMR files.
The default location is “local”, which is the local Arbitrator Correlation platform. Choose “remote arbitrator” and the processed Cisco CDR/CMR files will be stored to the database of a remote arbitrator. This is useful if the data of multiple arbitrators needs to be stored to a centralized arbitrator. The “remote_ip” needs to be filled in with the IP address of the “remote arbitrator”, if configured.
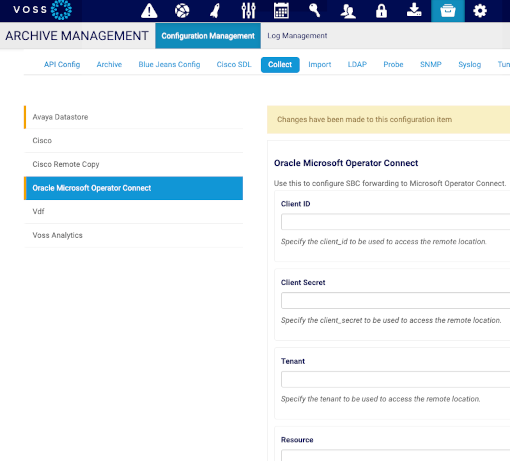
Oracle Microsoft Operator Connect
If customer CDR folders for Oracle Call Manager were set up during Arbitrator setup, then parsing CDRs and using API calls to create the call record in the MS Tenant via the Operator Connect API is configured from the setup up on the Oracle Microsoft Operator Connect screen.
Import Tab#
This tab allows you to import configuration data to a server from a csv file.
Note
Only csv file imports are supported.
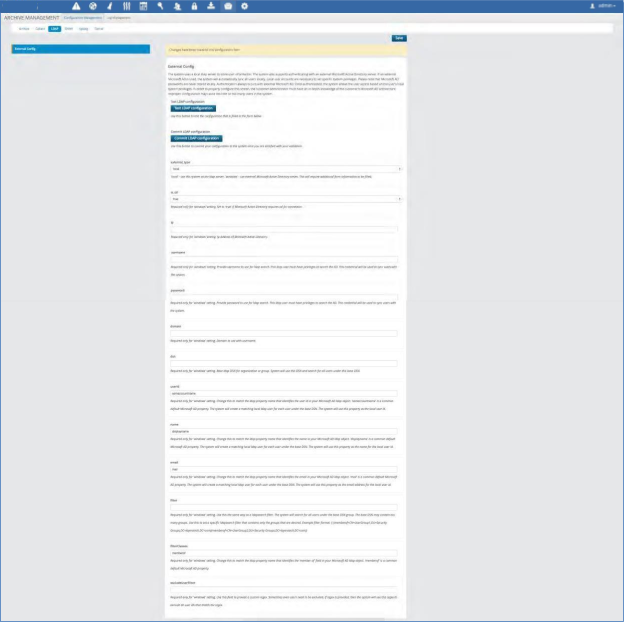
LDAP Tab#
The system uses a local LDAP server to store user information. The system also supports authenticating with an external Microsoft Active Directory server. If an external Microsoft AD is used, the system will automatically sync all users locally. Local user accounts are necessary to set specific system privileges. Note that Microsoft AD passwords are never stored locally. Authentication always occurs with external Microsoft AD. Once authenticated, the system allows the user access based on the user’s local system privileges. In order to properly configure this screen, the customer administrator must have an in-depth knowledge of the customer’s Microsoft AD architecture. Improper configuration may cause too little or too many users in the system.
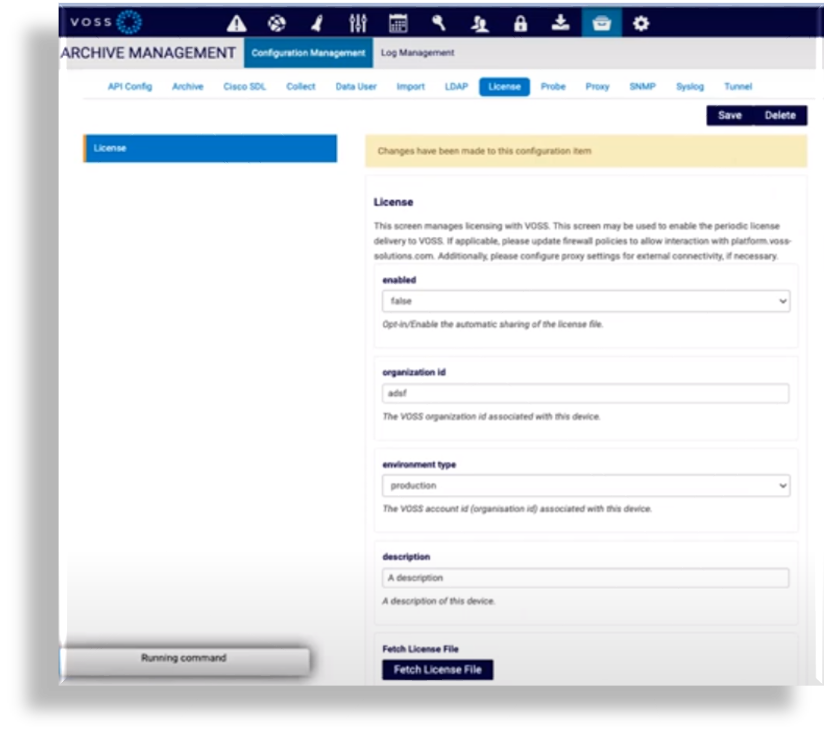
License Tab#
This tab registers your system for integration with the VOSS Cloud License service for user license count auditing, and allows the licensed user counts files to be sent to VOSS automatically.
You can also view and download license files on this tab, and upload license files to VOSS.
Related Topics
Proxy Tab#
To allow for cloud services access, proxy configuration (both authenticated and unauthenticated) is supported.
You can configure the Proxy on the Arbitrator Settings menu from ARCHIVE MANAGEMENT > Configuration Management > Proxy.
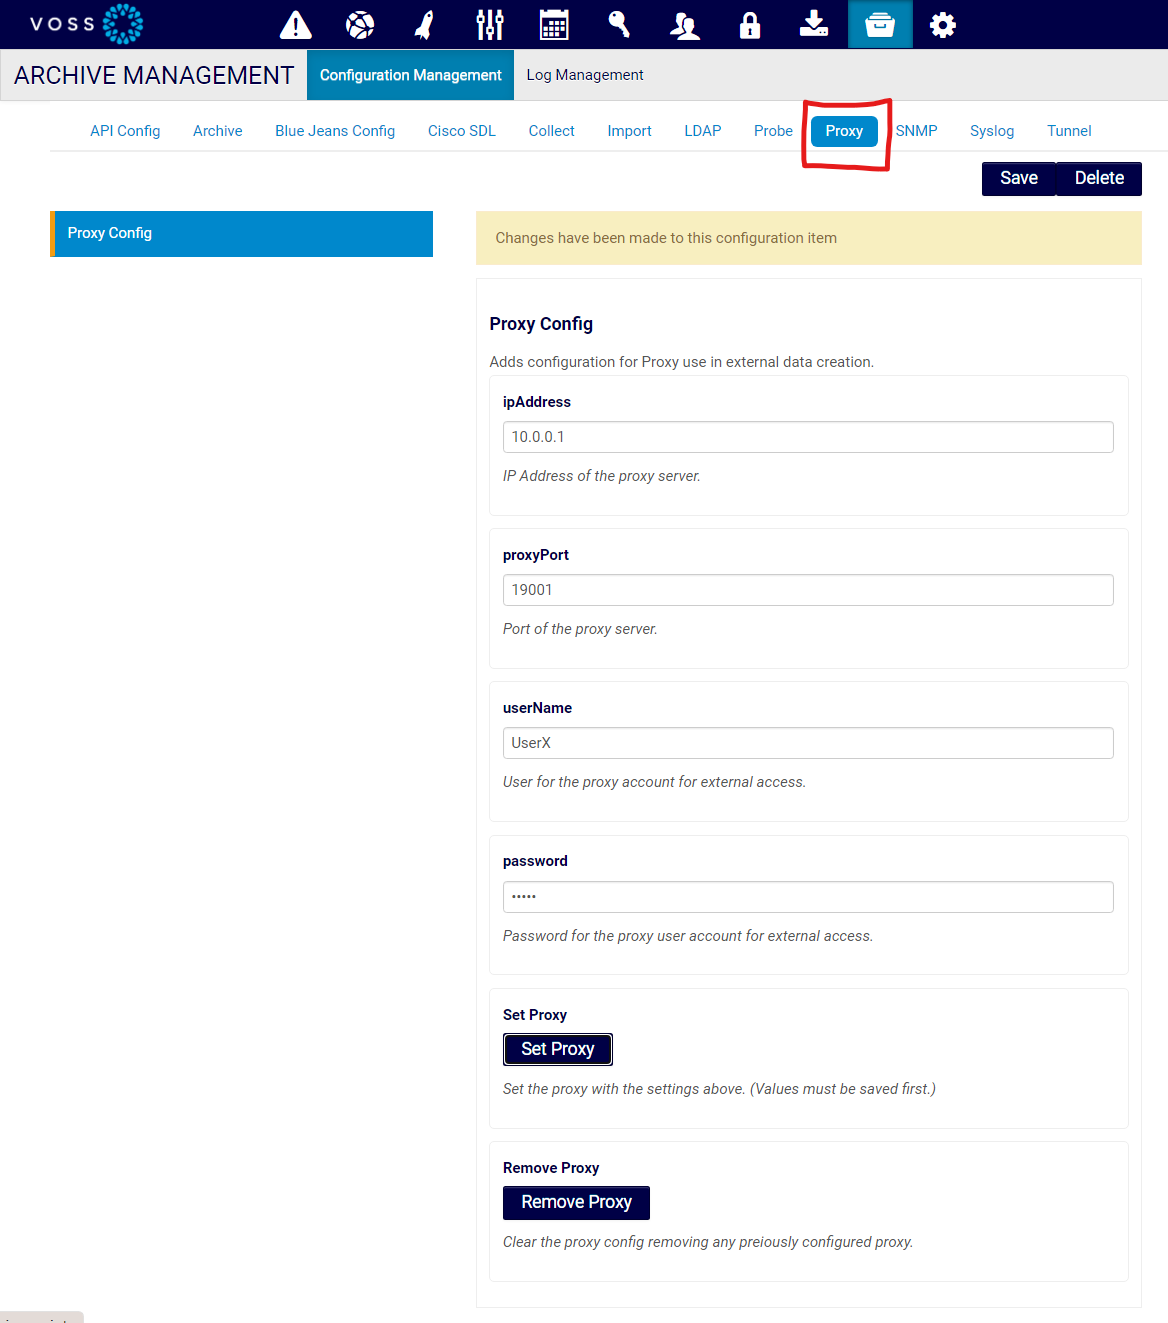
Fill out the required Proxy Config values: ipAddress, proxyPort, userName password.
Click Save.
To enable the saved values, click Set Proxy.
Important
The proxy is used only by services that use APIs for their data, and are set up in Archive Management > Configuration Management > API Config: Webex, Teams and Zoom.
If it is necessary to remove the proxy configuration, click Remove Proxy. This will reset the configuration to empty settings from the system. In order to clear the configuration screen, you will then need to click Delete at the top of the form. This will remove any confusion as to the proxy settings in the future.
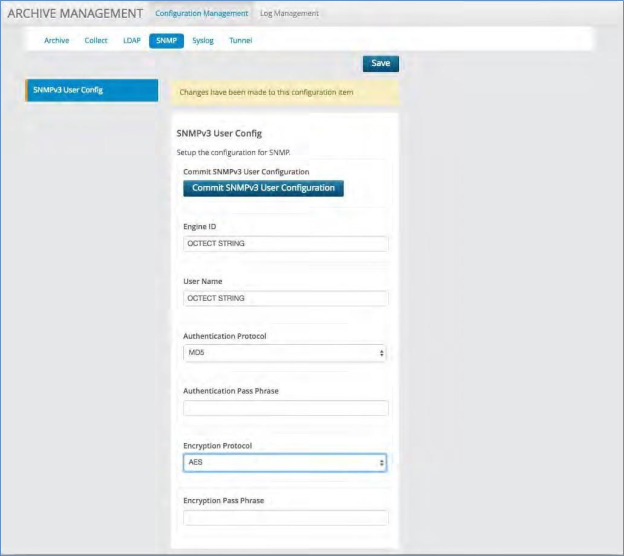
SNMP Tab#
This tab configures SNMP v3 user config, which allows the system to be configured to work with SNMP v3. It allows you to select the specific authentication and encryption methods to be used.
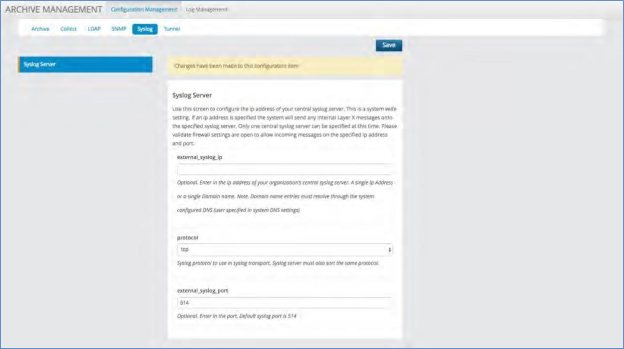
Syslog Tab#
This tab configures the IP address of your central syslog server.
Note
This is a system-wide setting.
The system can send out syslog messages about several of the internal functions, including backup and archival success. If an IP address is specified, the system will send any internal VOSS Insights messages onto the specified syslog server.
Only one central syslog server can be specified at this time. Please validate firewall settings are open to allow incoming messages on the specified IP address and port.
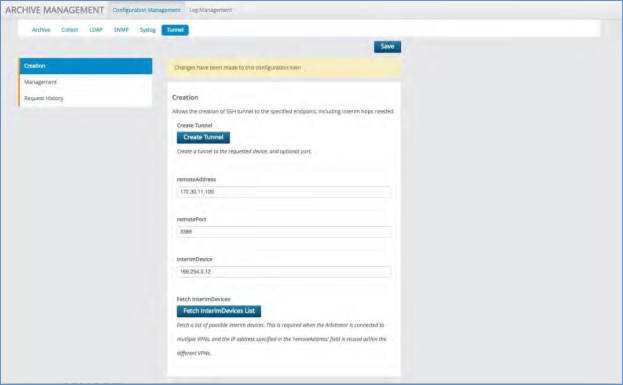
Tunnel Tab#
This tab allows you to create VPN tunnels between Arbitrator platforms. Three options are available:
Creation - allows creation of SSH tunnel to the specified endpoint, including the interim hops needed.
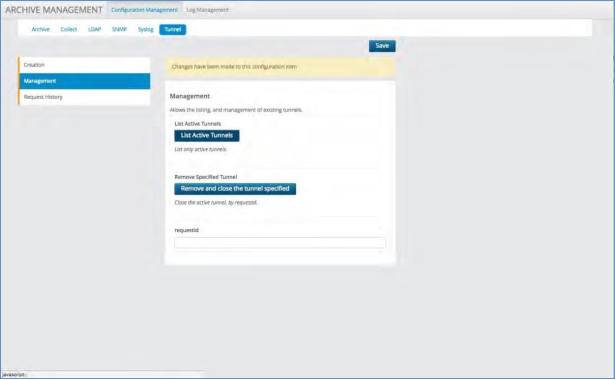
Management - used for listing and managing all of the existing tunnels.
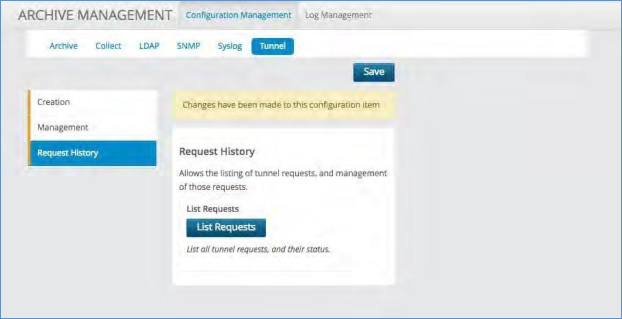
Request History - allows listing of tunnel requests and management of those requests.
Log Management Tab#
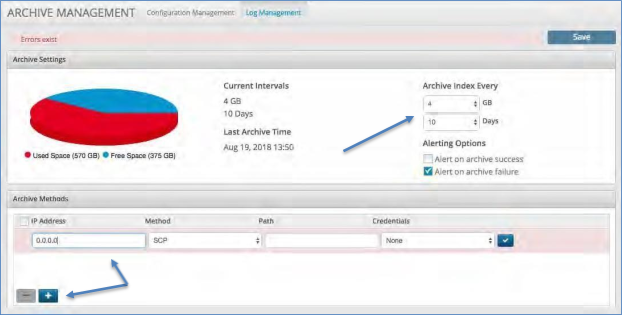
The Log Management tab (in Archive Management) allows you to customize the archival of the index data store. It can be performed based on Size, Time or a combination of both.
Set the archival process#
This procedure sets up the archival process.
Click on the Log Management tab.
Select the file size at which to start the archive.
Select the time interval at which to start the archive.
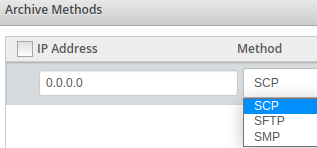
Add the location to where the archive file will be sent.
Set the IP Address, Choose the Method of transport (e.g. SFTP), give it a Path and input any Credentials required.