Enable MS Exchange Management in Microsoft Cloud#
Overview#
This task is optional, and needs to be performed only if you’re using Exchange Online.
This task enables Microsoft Exchange management in the Microsoft Cloud (Microsoft Entra) tenant portal, and involves the following steps:
Note
Microsoft changed the name of Azure Active Directory to Microsoft Entra ID in August 2023. In this documentation, references to the Microsoft Cloud portal also refer to Microsoft Entra ID.
Related Topics
Step 1: Configure the manifest and update API permissions#
This step is optional, and only needs to be performed if you’re using Exchange Online.
Sign into the Microsoft Cloud (Microsoft Entra) portal , then go to All services > Microsoft Entra ID > Manage > App registrations.
On the Owned applications tab, choose your application.
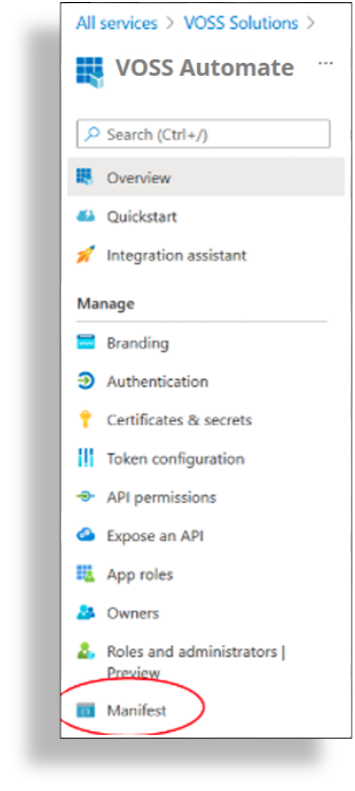
Go to Manage > Manifest to open the Manifest page.
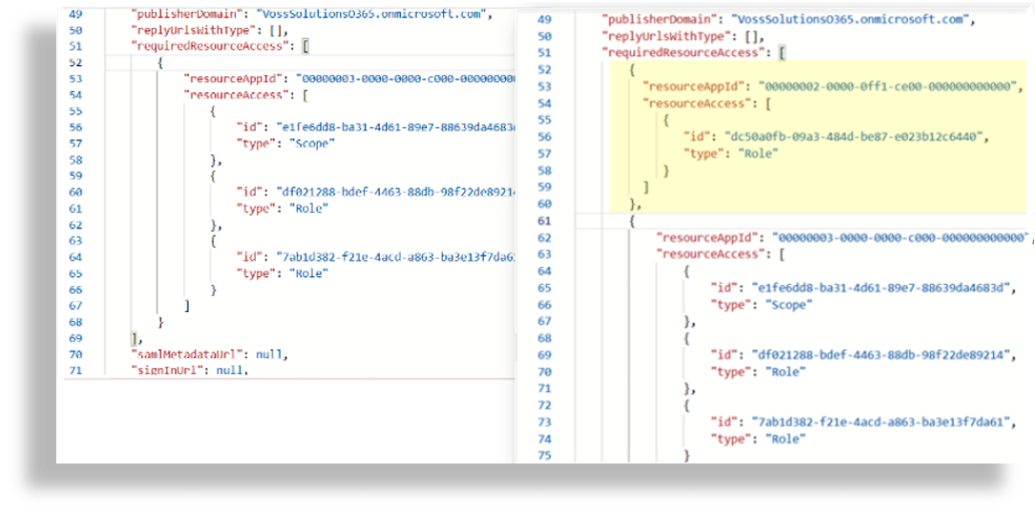
On the Manifest page, scroll down until you locate the line containing the following text:
requiredResourceAccess.Place your cursor at the beginning of the next line, then paste the following text at that location, and save your changes:
{
         "resourceAppId": "00000002-0000-0ff1-ce00-000000000000",
         "resourceAccess": [
                {
                   "id": "dc50a0fb-09a3-484d-be87-e023b12c6440",
                   "type": "Role"
                }
         ]
},
The image shows the change after you paste the text:
Verify and update API permissions:
Go to Manage > API permissions, then verify the following:
Check that the Microsoft Graph permissions you configured are still present.
Check that Exchange.ManageAsApp now appears.
Note that the status of Exchange.ManageAsApp is Not granted for…
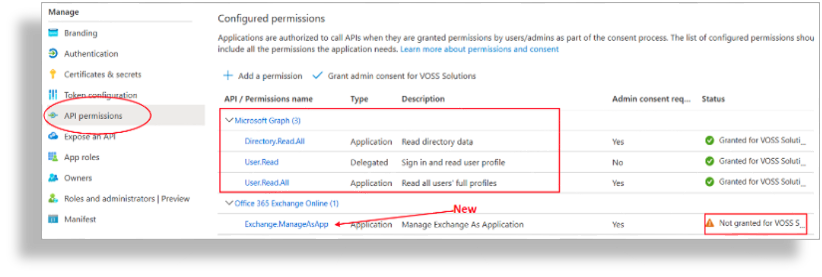
Select Grant admin consent for <your tenant>, then click Yes, and confirm that the status of Exchange.ManageAsApp has changed to Granted for…”.

Next steps
Step 2: Upload certificate and add the application to the Exchange administrator role#
This step is optional, and only needs to be performed if you’re using Exchange Online.
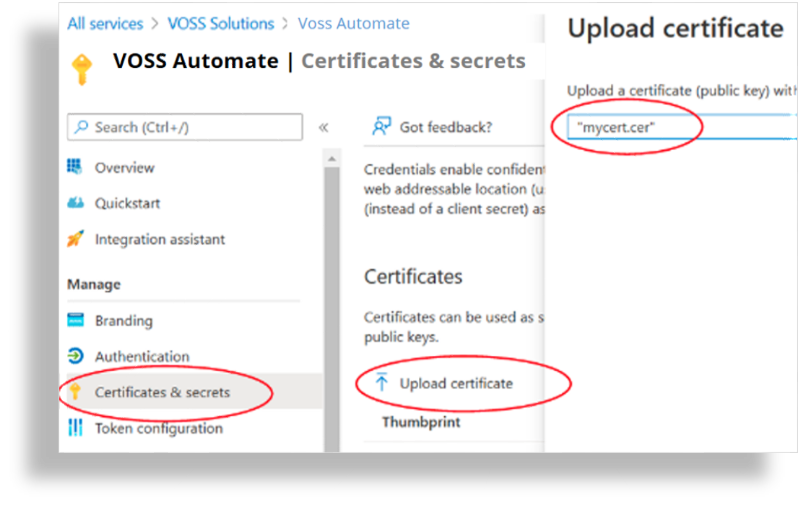
This procedure uploads the certificate you exported previously, to the Microsoft Cloud (Microsoft Entra) portal, and adds the VOSS Automate application to the Exchange administrator role.
On the Microsoft Cloud portal, ensure the the
.cerfile you created is accessible, then go to Microsoft Entra ID > Manage.Upload the certificate:
Select Certificates & secrets > Certificates, then select Upload certificate.
On the Upload certificate page, navigate to your exported certificate, and click Add.
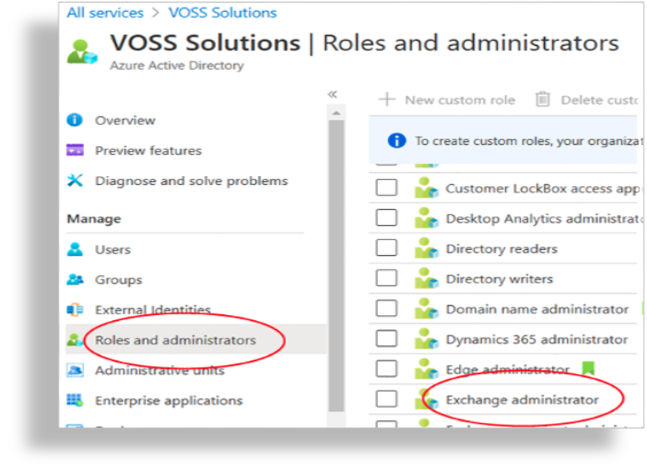
Add the Exchange administrator role to the app registration:
Go to All services > Microsoft Entra ID to open the Overview page.
Under Manage, select Roles and administrators.
From the list of roles, click on the Exchange administrator role name.
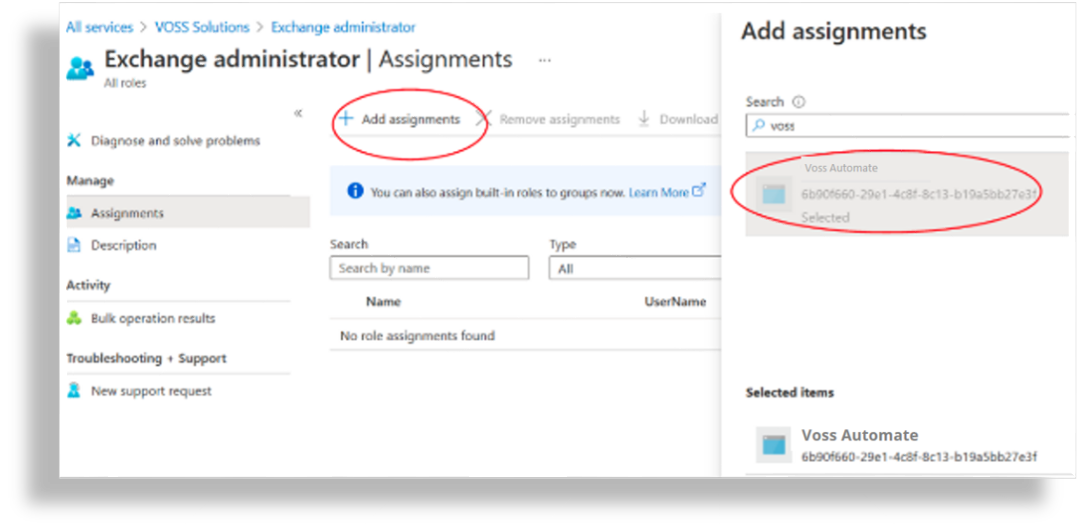
On the Assignments page, select Add assignments.
On the Add assignments page, select your application (VOSS Automate), then click Add.