
Deploy and VM installation#
Deploy the installation on the VM#
See: Supported virtualization and hypervisor platforms
Select virtualization platform:
Run the VM#
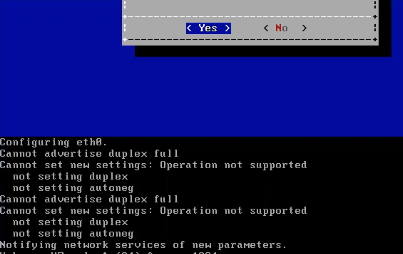
Run the VM, and monitor installation of the packages (this may take some time).
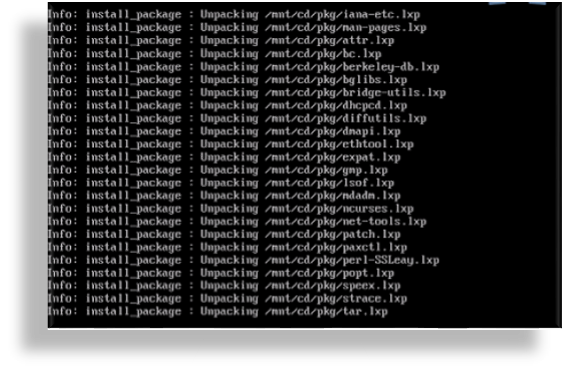
Once all packages are installed, the VM is automatically powered off, confirmed via the
auto-poweroffmessage on the console.
The system reboots. Wait until you see the About console, which displays placeholder values for hostname, version, license, days licensed and remaining, and so on.
                    About
===============================================
      Hostname:  <hostname>
       Version:  <version>
         Theme:  <theme>
        Flavor:
       License:  NNNNN-NNNNN-NNNNN-NNNNN-NNNNN
 Days Licensed:  nnnnn
Days Remaining:  nnnnn
   Product Key:
       Website:  <website>
        Kernel:  Linux n.nn.nn-lxt-3 x86_64 GNU/Linux

<hostname> login:
Log in to the Administration console#
Once the system reboots, you’ll need to provide admin user credentials to log in.
On the About console, at <hostname> login:, fill out username
admin.For the password, use the last 10 characters of the value at License, excluding the dash.
Important
The License key value displays only on the About console. When you ssh in, it is not visible. For this reason, copy the admin password from the About console.
For security purposes, it is recommended that you update this admin password prior to configuring the VMs networking address.
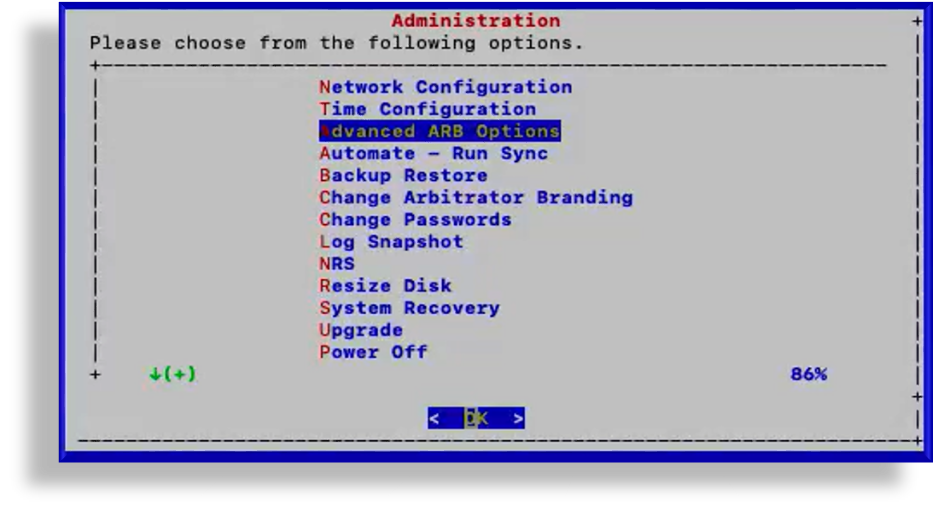
View the Administration menu, which displays once you’re logged in.
Change the admin user password#
This procedure updates the admin password that is set during the installation process, using the last 10 digits of your license key.
Note
The admin password will need to be updated for all Insights products you install. For security purposes, it is recommended that you update this admin password prior to configuring the VM networking address.
Once you update the password, it is strongly recommended that you make a written or digital copy of any system passwords and share the copies with trusted team members or store them in a secure location from where they may be retrieved if needed.
On the Administration menu, select Change Passwords.
Select Change Admin Password.
Fill out a new password.
Save your changes.
Important
It is strongly recommended that you make a written or digital copy of any system passwords and share the copies with trusted team members or store them in a secure location from where they may be retrieved if needed.
Configure network settings#
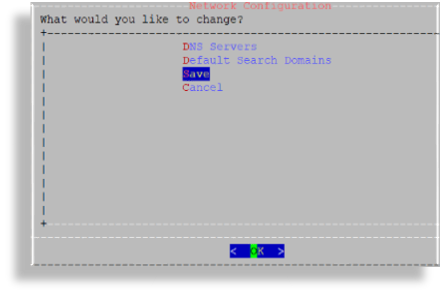
On the Administration menu, select Network Configuration.

Configure interface settings:
Select Interface Settings.
Select the relevant interface.
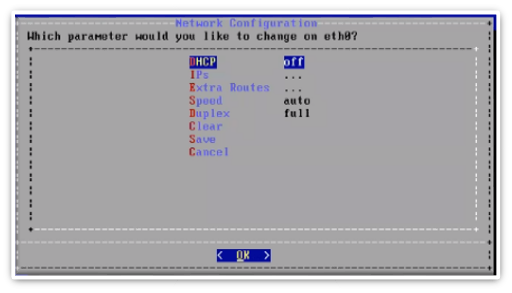
Select IPs. Set the IP address and netmask in the format
nn.nn.nn.nn/24. Click OK.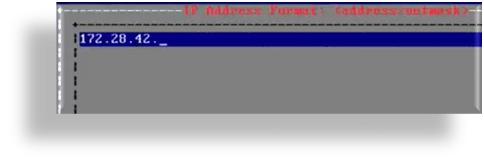
Select Extra Routes to configure the default gateway.
Use the following format for the entry: default <gateway IP address>
The word default is required. For additional route entries use the <subnet> < gateway> format. Similar to what would be done on a Linux system at the CLI.
Save your changes.
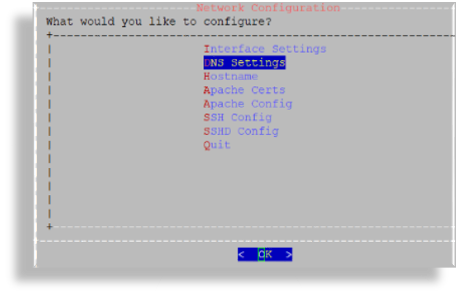
Configure DNS settings:
Select DNS Settings
Select DNS Servers.
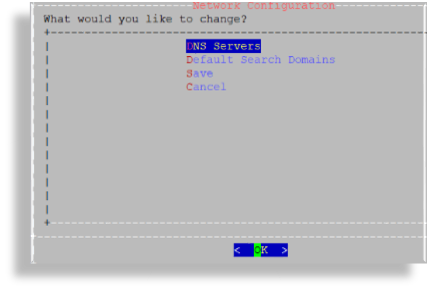
Add the IP address for each DNS server, one per line, then click OK.
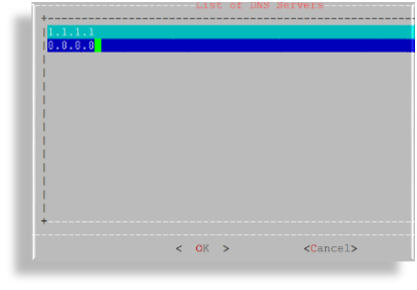
Click Save.
Configure the hostname:
Select Hostname.
Save to trigger the update.
The console displays a message, Updating hosts. This setup may take a few minutes.
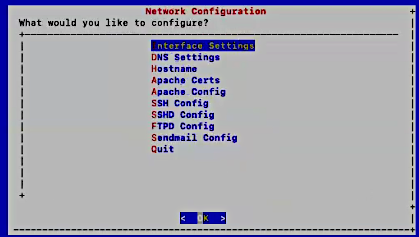
Update SSL ciphers.
Select Apache Config.
SSLCipherSuite HIGH: !MEDIUM: !ADH: !LOW
Note
SSLCipherSuitedefaults toHIGHencryption.For
SSLProtocol, only TLSv1.2 is supported.OpenLDAP defaults to
HIGHencryption.OpenSSH does not support weak ciphers.
On system upgrade, if the contents of this configuration are no longer valid, then the contents will be will be reset to an empty state.
Configure SSH settings:
Select SSH Config.
Custom entries can be added, if required. The following entries have been added:
kexalgorithms
diffie-hellman-group14-sha1
diffie-hellman-group-exchange-sha1
hostkeyalgorithms
ssh-rsa
Note
On system upgrade, if the contents of this configuration are no longer valid, the contents will be reset to an empty state.
Configure SSHD:
Select SSHD Config.
Note
Multi-line entries can be added, if required. For example, for CUCM v11.5 support, see: Configure multi-line CUCM cipher support.
This step is relevant only to an Insights Assurance solution and its integration with Cisco UC systems. This step is not relevant to the DS9 and Insights NetFlow solution.
On system upgrade, if the contents of this configuration are no longer valid, then the contents will be will be reset to an empty state.
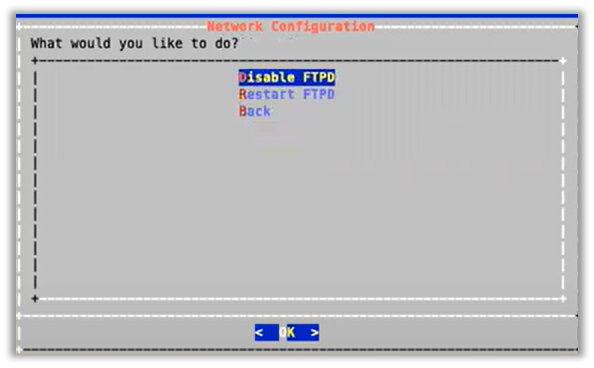
Enable/disable FTPD or restart the FTPD daemon:
Select FTPD Config.
Important
On new installs, the FTPD daemon is disabled by default. It is strongly recommended that the FTPD daemon remains disabled, unless there is a good reason you need to use it. It has been seen that enabling the FTPD daemon may introduce a system vulnerability. FTPD is typically only required in rare situations, where FTP is the only way to transfer files to the server. Instead of using FTPD, it is recommended that you use the drop account with SCP or SFTP. The drop account username is “drop”. You can set the password via the Administration menu.
Enable/disable Sendmail or restart Sendmail on port 25:
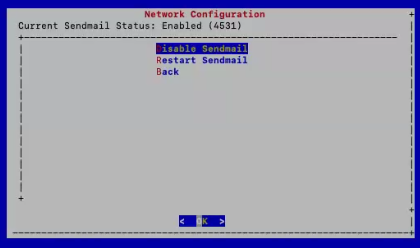
Select Sendmail Config. The current status of the service displays on the menu.
Choose to enable, disable, or restart the service as required.
Base system installation is now complete. Select Quit to exit the Administration menu on the console.
Next steps
Create GUI admin password for Arbitrator and Dashboard#
This procedure creates the GUI admin password, which is the password you will need to log in to Arbitrator or Dashboard via the browser.
The default credentials will not allow browser access, so the GUI admin password must be set up for the Arbitrator and Dashboard systems. The procedure is the same for both Arbitrator and Dashboard.
Important
It is strongly recommended that you make a written or digital copy of any system passwords and share the copies with trusted team members or store them in a secure location from where they may be retrieved if needed.
The steps to create the GUI admin password for Arbitrator and Dashboard are the same.
Log in via the CLI, then from the Administration menu, select Change Passwords.
Select Reset GUI admin user (local LDAP only).
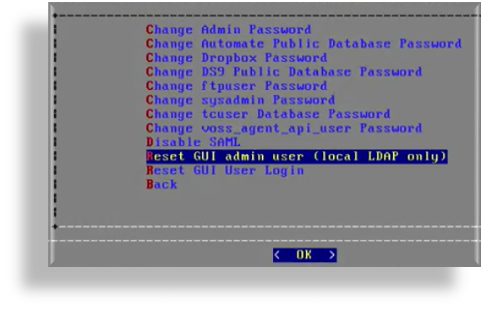
Fill out a new GUI admin password.
The GUI admin password cannot start with a number and must not contain the dollar ($) symbol.

Log in to the Arbitrator / Dashboard via the browser, using the GUI admin user password created in this procedure.
Next steps
Product registration and system configuration#
Once you’ve installed and configured initial settings via the Administration console, you can continue with product registration, and with the configuration of your system through the GUI:
Insights Arbitrator (relevant only to an Insights Assurance solution and its integration with Cisco UC systems)
Insights DS9
Note
Prior to opening the DS9 GUI, reboot the system.
See: DS9 Product Registration and DS9 Configuration on the Dashboard
Configure multi-line CUCM cipher support#
This section provides details for the use of the SSHD Config menu option.
Note
This section is not relevant to the DS9 and Insights NetFlow solution. This solution is relevant only to an Insights Assurance solution and its integration with Cisco UC systems.
You can copy the keys into the screen in a comma separated list (without spaces).
For CUCM v11.5 support:
kexalgorithms diffie-hellman-group1-sha1,diffie-hellman-group14-sha1,diffie-hellman-group-exchange-sha1
ciphers aes128-cbc,3des-cbc,aes128-ctr,aes192-ctr,aes256-ctr,aes128-gcm@openssh.com,aes256-gcm@openssh.com
macs hmac-md5,hmac-sha1,hmac-sha2-256,hmac-sha1-96,hmac-md5-96
hostkeyalgorithms ssh-rsa,ssh-dss