Access Control#
Overview#
The Access Controls Configuration panel allows for specific Role Based Access Controls to be enabled. These controls are based on the role of the user and the customer to which they belong.
You can select the following tabs on this page:
Permission Groups Tab#
The first tab under the Access Controls is the Permission Groups. This allows the admin to define a group that has specific capabilities/rights and subsequently add users to these groups.
Create a Permission Group#
To create a Permission Group:
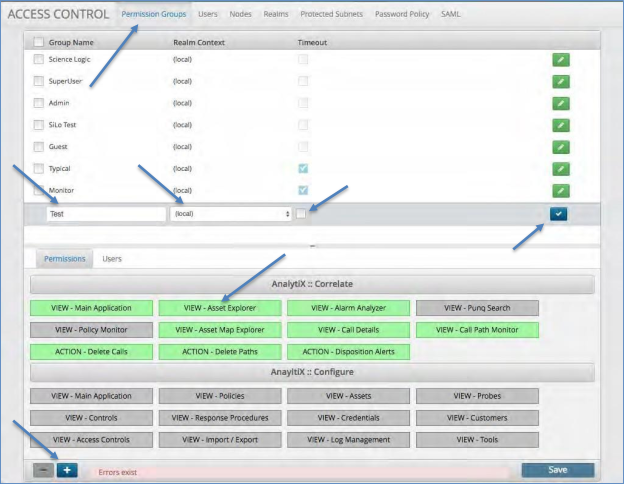
Click the Permission Group tab under the Access Control panel. A list of defined groups will be displayed.
Click the blue plus icon at the bottom of the panel.
Fill in the name of the group and select Realm Context drop-down button. This will always be local for a single Arbitrator deployment.
Click the Timeout box if you wish this user group to have their session timeout for non- use and require them to log back into the UI.
Select each system screen name tab that you wish to grant access to this group. As you select each tab it will turn green indicating that this system screen will be available to this group.
Click the blue check icon when complete.
Click Save to complete the addition of the group.
Assign and remove users to/from a permission group
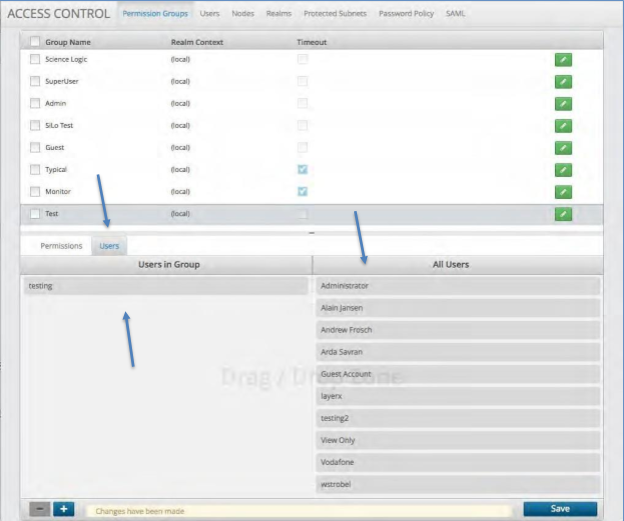
Assign a User to a Permission Group#
Note
From release 24.1, a permission group API has been added for the new voss_agent_api_user.
This group has no permissions. Refer to the Users Tab for details on the new user in
this group.
Click User next to the Permission tab. A list of All Users and Users in Groups will be displayed.
Click the Group to which you wish to add a User.
Drag the desired user(s) from the “All Users” section to the drop zone under “Users in Group”.
To remove a User from a Permission Group simply drag the user from the “Users in Group” section over to the “All Users” section
Click Save to complete the action.
Users Tab#
The Users tab allows you to create a new user or modify an existing one. The users can be set up as “Super Users” or assigned roles in the permission groups. Once the user is added and saved then they will be available to add to the Permission Groups per the last section.
Note
From release 24.1, a new user voss_agent_api_user has been added that is specifically
used by the VOSS Insights Forwarder - an agent that collects statistics such as latency and response times
on various cloud endpoints, along with system CPU statistics, which is sent by means of the API
back to the Arbitrator (this user is restricted to these agent routes). The user has no
permissions and is the single member of the new API permission group that similarly
has no permissions.
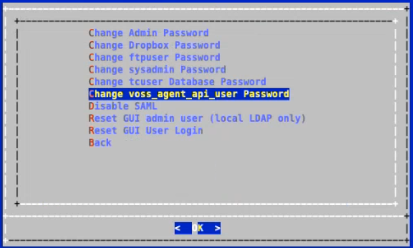
In order for this user is to be used, the user password needs to be updated after upgrade, either by:
Editing the user on the Users form.
or
Using the administrator console menu: Administration > Change Passwords.
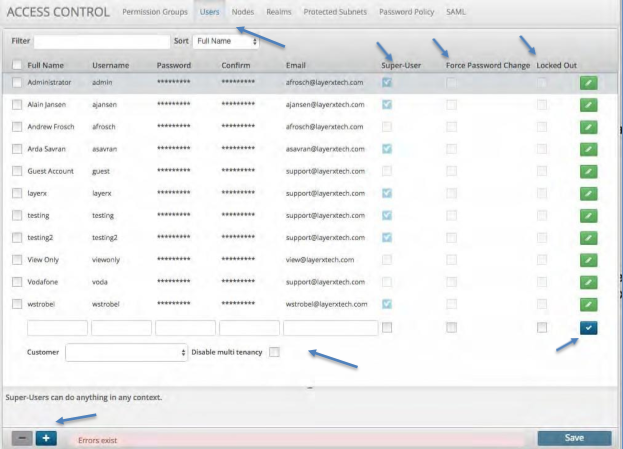
Add a new user#
To create a new User:
Click the User tab at the top of the screen next to Permission Groups.
Click the blue plus icon at the bottom of the screen.
Fill in the required fields. (Full Name, Username, Password, Confirm and Email).
Check the Super-User box if applicable.
Check the Force Password Change if you want this user to follow the Password Policy.
Click the Locked Out box if you want this user to time on inactivity on the UI.
Select the Customer drop-down box and assign the user to a customer.
Check the Disable multi-tenancy if this is a single customer and multi-tenancy does not apply.
Click the Blue check icon to set the user.
Click the Save button to save the user.
Delete a user#
To delete a User:
Click the check box next to the User name that you wish to delete.
Click the minus icon at the bottom of the screen.
Click the Save button to save your changes.
Nodes Tab#
The Nodes tab allows you to create a new Arbitrator Correlation or Dashboard/Reporting node. Once it is added and saved then the node can be added to a Realm with other nodes.
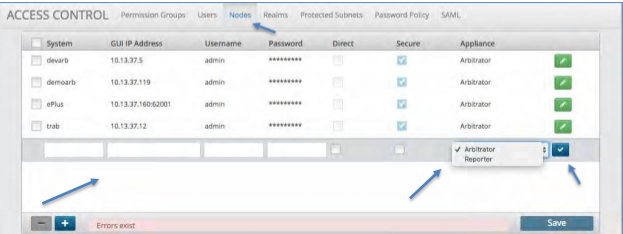
Create a node#
To create a Node:
Click the Node tab at the top of the screen next to Users.
Click the blue plus icon at the bottom of the screen.
Fill in the required fields. (System, GUI IP Address, Username and Password).
Check the either the Direct box (http) or the Secure box (https) to select the communication method.
Select the Appliance drop-down box and choose the type of system you are adding.
Click the Blue check icon to set the Node.
Click the Save button to save the Node.
Delete a node#
To delete a Node:
Click the check box next to the Node name that you wish to delete.
Click the minus icon at the bottom of the screen.
Click the Save button to save your changes.
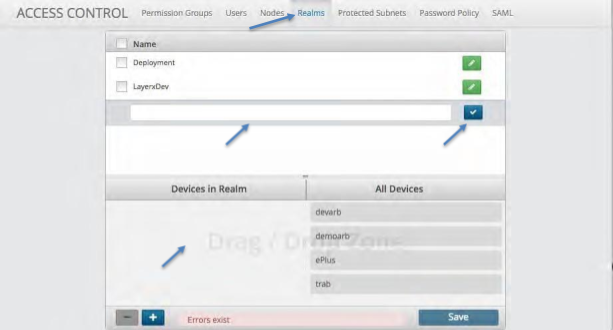
Realms Tab#
The Realm tab allows you to create a new Realm where VOSS Insights systems can be grouped to communicate with each other. Once it is added and saved then Nodes can be added to the Realm.
Create a realm#
To create a Realm:
Click the Realm tab at the top of the screen next to Nodes.
Click the blue plus icon at the bottom of the screen.
Fill in the Realm name that you desire.
Click the Blue check icon to set the Realm.
Drag the systems that you want in the Realm into the drop zone.
Click the Save button to save the Realm.
Delete a realm#
To delete a Realm:
Click the check box next to the Realm name that you wish to delete.
Click the minus icon at the bottom of the screen.
Click the Save button to save your changes.
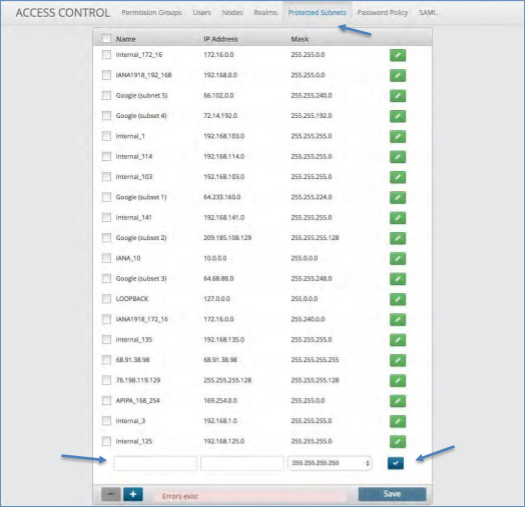
Protected Subnets Tab#
The Protected Subnets tab allows you to input the IP addresses of subnets that will be protected from a control running against them. The Control will check this list prior to running and will not run a script against a device that is within a protected subnet.
Create a protected subnet#
To create a Protected Subnet:
Click the Protected Subnet tab at the top of the screen next to Realms.
Click the blue plus icon at the bottom of the screen.
Fill in the Name, IP Address and Mask of the Protected Subnet.
Click the Blue check icon to set the Protected Subnet.
Click the Save button to save your changes.
Delete a protected subnet#
To delete a Protected Subnet:
Click the check box next to the Protected Subnet name that you wish to delete.
Click the minus icon at the bottom of the screen.
Click the Save button to save your changes.
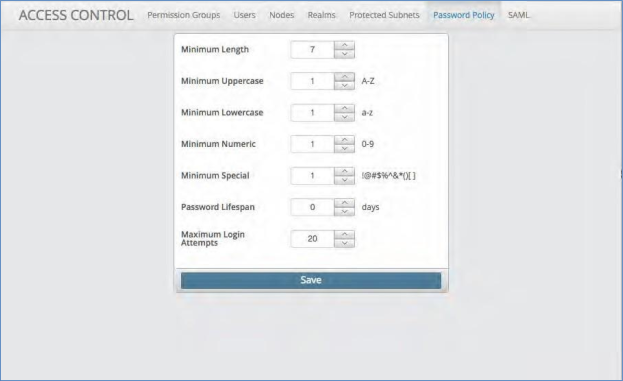
Password Policy Tab#
The Password Policy tab allows you to set and enforce password rules to access the system. Each field is optional thus the user can choose the best policy to enforce.
Create a password policy#
To create a Password Policy:
Click the Password Policy tab at the top of the screen next to Protected Subnets.
Within the box you have an option of Minimum Length, Minimum Uppercase, Minimum Lowercase, Minimum Numeric, Minimum Special, Password Lifespan and Maximum Login Attempts.
Fill in the desired inputs into each of these fields.
Click the Save button to save your changes.
SAML Tab#
The SAML tab allows you to configure single sign-on (SSO) to other user management platforms via the Security Assertion Markup Language (SAML). This is an open standard for exchanging authentication and authorization data between systems.
Note
SAML is an open standard for exchanging authentication and authorization data between parties, in particular, between an identity provider and a service provider. SAML is an XML-based markup language for security assertions (statements that service providers use to make access-control decisions).
VOSS Insights supports SSO for authentication via the SAML v2.0 standard for SSO. When SAML is enabled for your system, the Sign Out menu option (accessible via the admin menu) is not required or available as the Insights system does not initiate the termination in this case.
SAML is enabled/disabled on the SAML tab of the Configuration screen in Arbitrator. To bypass
SAML authentication, you can set nosaml=true in the URL.
Set up SSO via SAML#
To create single sign-on via SAML:
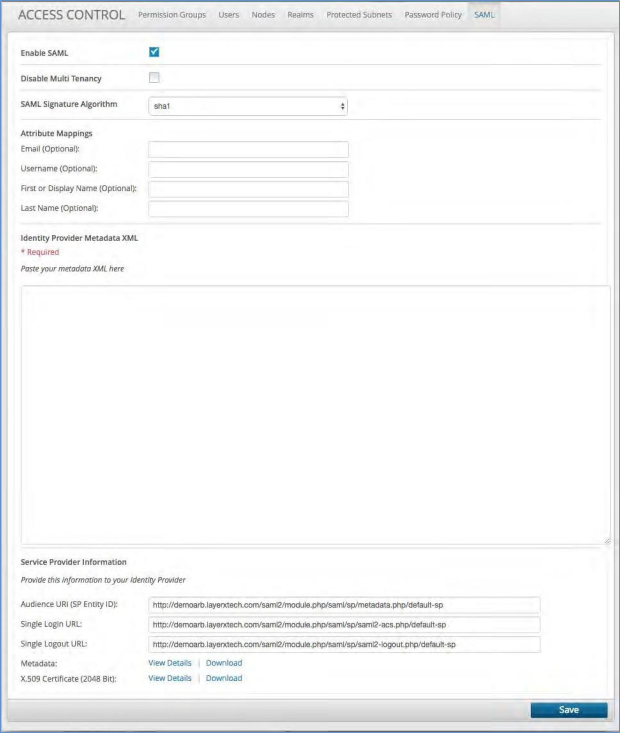
Click the SAML tab at the top of the screen (adjacent to Password Policy). The attributes on this page require you to interact with your administrator of allowed users.
Click the box next to Enable SAML.
Note
The Sign Out option is removed from the Profile menu when SAML is enabled.
If the system is supporting a single customer, then click the Disable Multi-Tenancy.
Fill in the optional principal attributes.
From your administrator obtain the Identity Provider Metadata XML and paste it into the box provided.
From the following boxes provide each of the following to your Identity Provider:
Audience URL (SP Entity ID)
Single Login URL
Single Logout URL
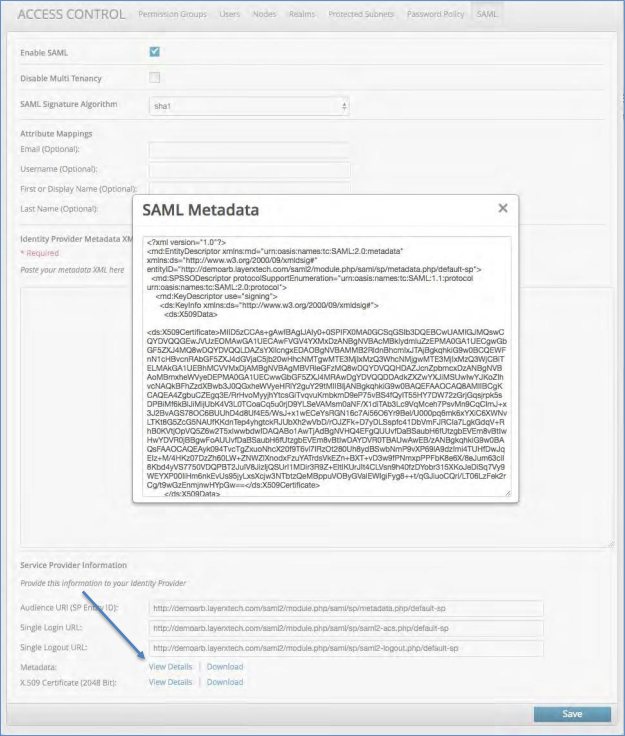
Click to view or download the platform SAML Metadata
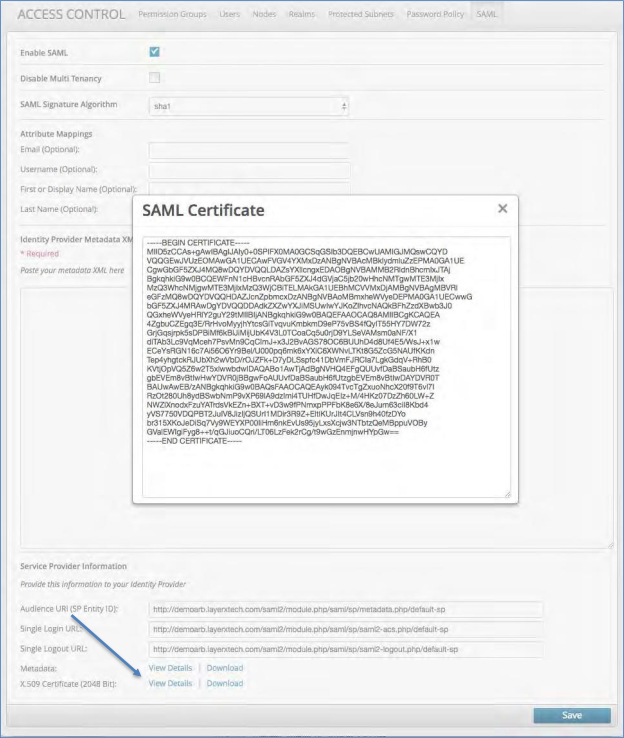
Click to view or download the platform X.509 Certificate (2048 Bit)
Click the Save button to commit the SAML configuration.
(See Figures on the next few pages.)