
Asset Configuration#
Overview#
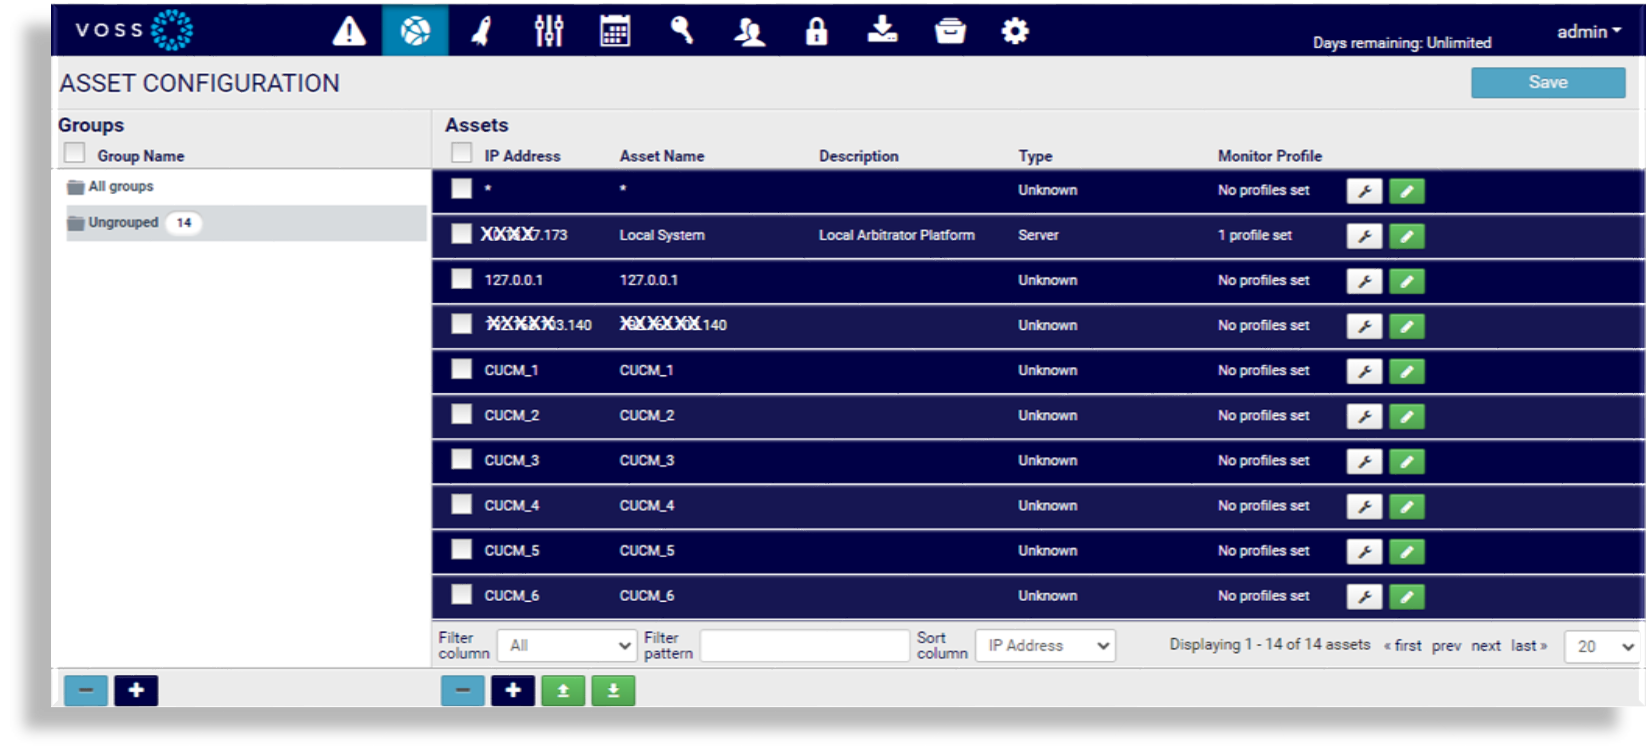
On the Asset Configuration tab you can add, edit, and remove assets and asset groups, import or export assets, and configure monitor profiles.
Assets can be any devices that are either sending data or from which data is being retrieved. Each asset can be assigned to a specific customer to create a multi-tenant environment.
Note
A system log table (insights_system_log) logs user actions, and a user can create a
dashboard to view these actions.
Related Topics
Log SearchAdd an Asset Group#
To add a new asset group:
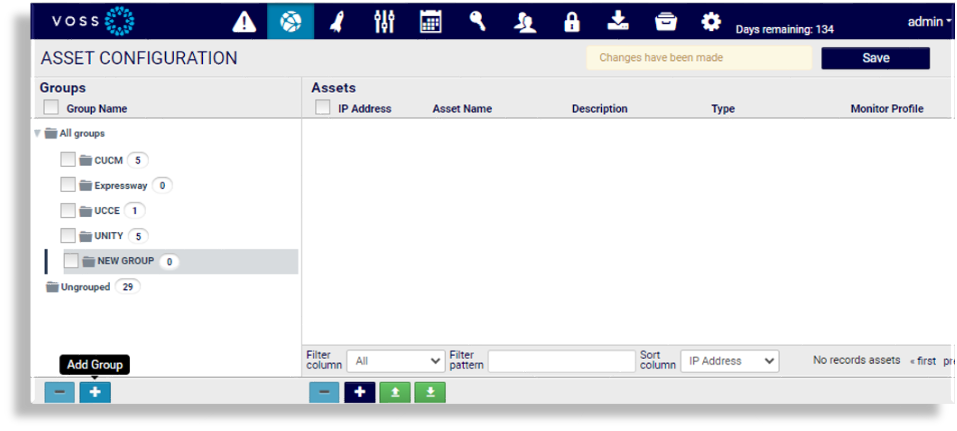
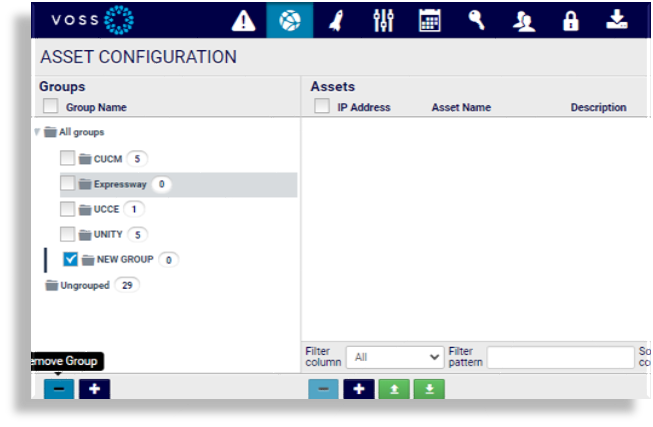
On the Asset Configuration tab, click the Plus icon (+) at the bottom left corner of the Groups panel.
Click in the new folder created in the panel, fill out a group name, and press Enter.
Save your changes.
Add an Asset to a Group#
To add a new asset to a group:
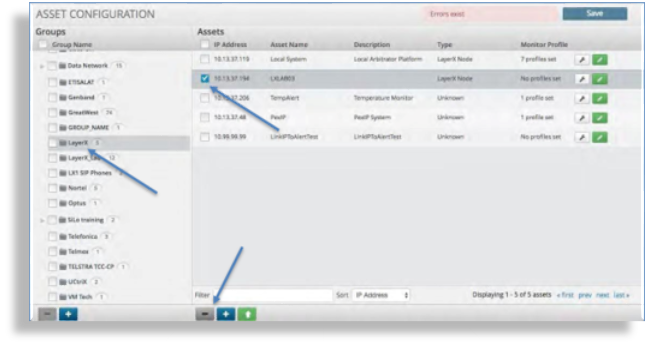
On the Asset Configuration tab, select the asset group where you want to add an asset.
Click the Plus icon (+) at the bottom of the Assets panel.
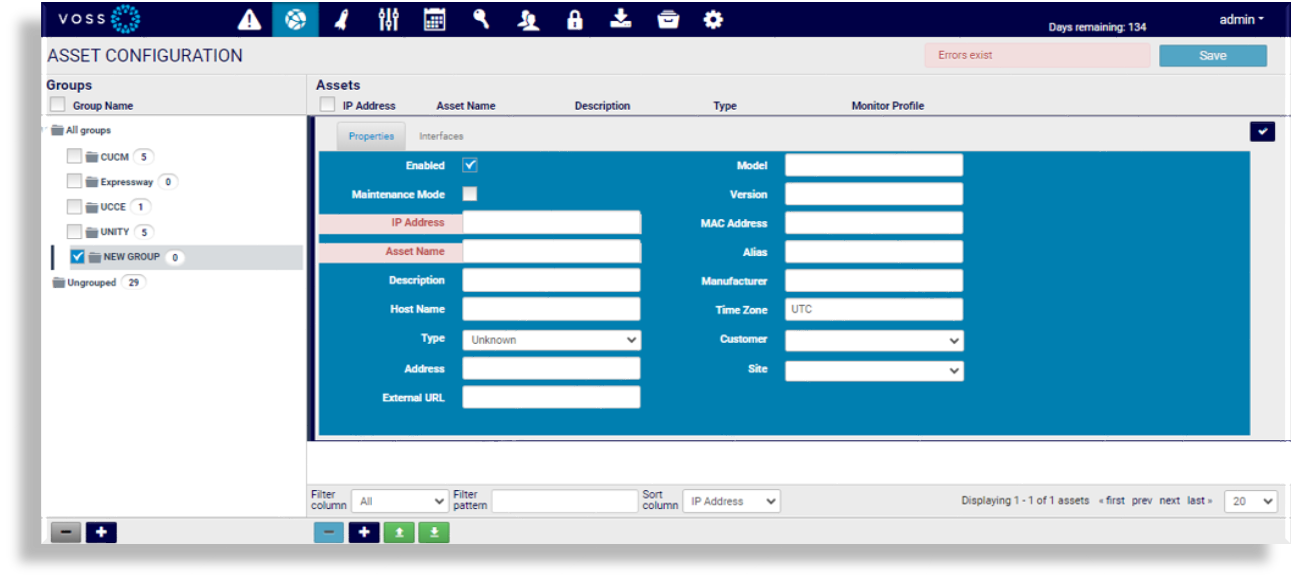
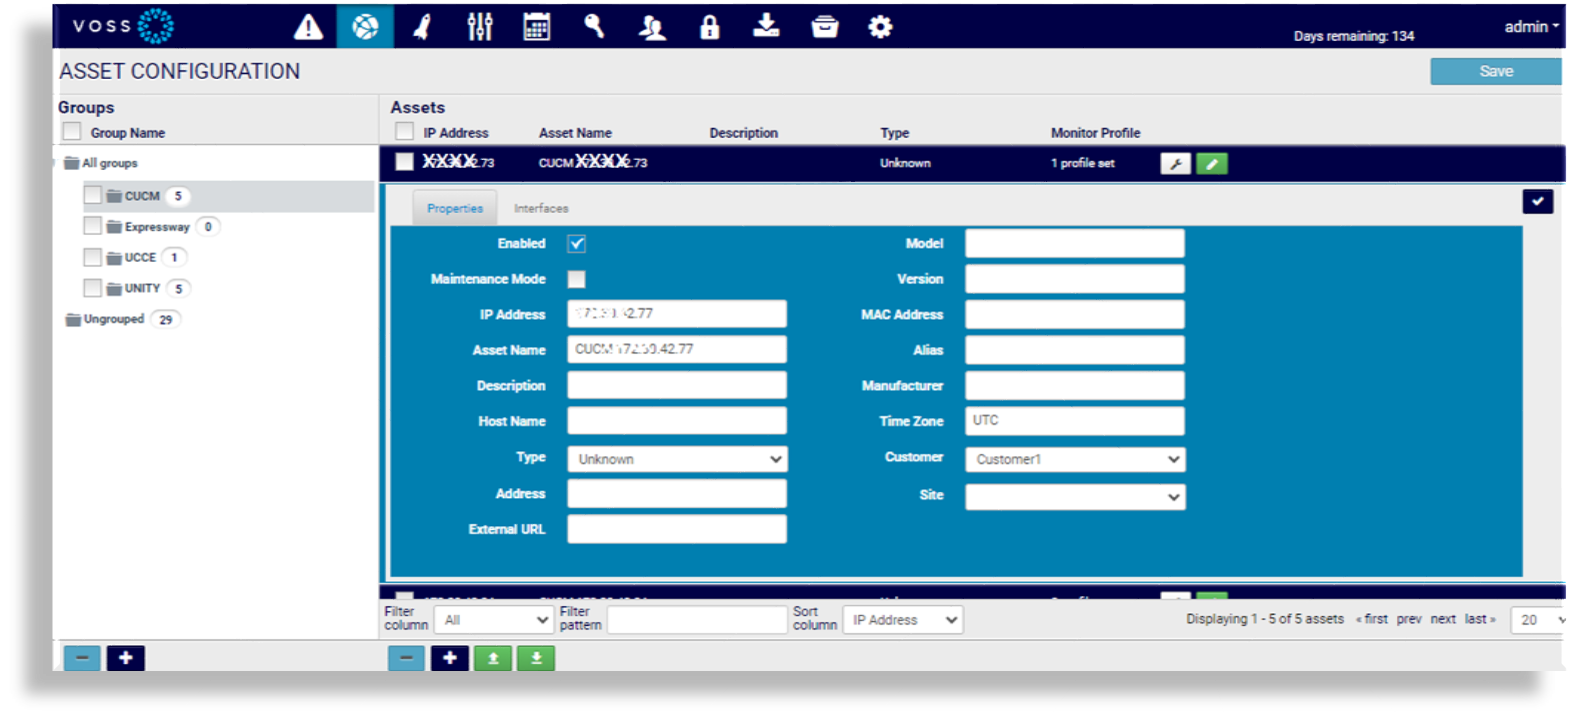
On the Properties tab for the new asset, fill out at least the mandatory fields, IP Address and Asset Name, then select an asset type, if know, for example, group, router, firewall switch, or one of the other asset types listed in the drop-down.
On the Interfaces tab for the new asset, add new interfaces, one or more.
Click the Check icon to the right of the asset details panel to add the new asset.
Save your changes.
Note
Modification: If present, then more than one asset in more than one group can be modified when modifying assets. Change bars are displayed next to each asset and group when the assets or groups modified, for example:
Delete Assets#
To delete assets in an asset group:
On the Asset Configuration tab, select the relevant group to display its assets.
From the Assets panel, select the checkbox for each asset in the group that you wish to remove (one or more).
Click the Minus icon (-) at the bottom of the Assets panel.
Click Save.
Delete an Asset Group#
To delete an asset group:
On the Asset Configuration tab, select the asset group you wish to delete (one or more).
Click the Minus icon (-) at the bottom of the Groups panel.
Click Save.
Assign a Probe to an Asset#
A probe is a script or set of commands that are saved in the system and can be used to gather data, to issue commands to systems, and to auto repair or send data.
Assigning a probe to an asset is typically done to retrieve data from that asset.
Commands such as an SNMP GET or an API call are used to retrieve data from a particular asset.
To assign a probe to an asset:
On the Asset Configuration tab, select the relevant asset group to display its assets.
In the Assets panel, select the relevant asset in the group that the probe will run against, then click the Wrench icon for the asset to open the Monitor Profile screen, where you can add a monitor profile to the asset.
On the Monitor Profile screen, view available saved probes.
From the Probe Group pane, select and then drag the probe you want to assign to the asset to the Template/Profiles panel.
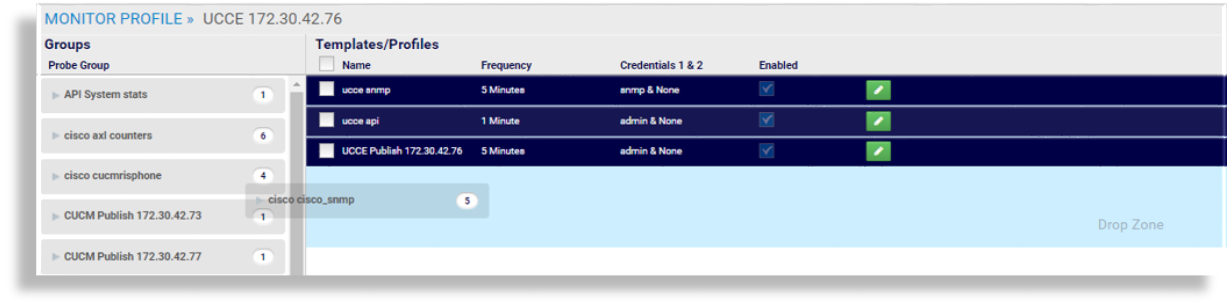
Click the Edit icon (Green Pencil) at the relevant profile entry in the Template/Profiles panel (the probe group you dragged to the panel).
Edit the profile to define the frequency the probe runs, the credentials needed for the probe to run, the schedule for the probe to run. You can also choose to start it immediately.
Note
For SP25, the frequency for Polycom devices is set at 5 minutes.
Click Update to save your changes and to return to the Asset Configuration tab.
Bulk Assign Probes to an Asset#
In the Arbitrator System Configuration Gui, select the Probes icon to open the PROBE CONFIGURATION tab.
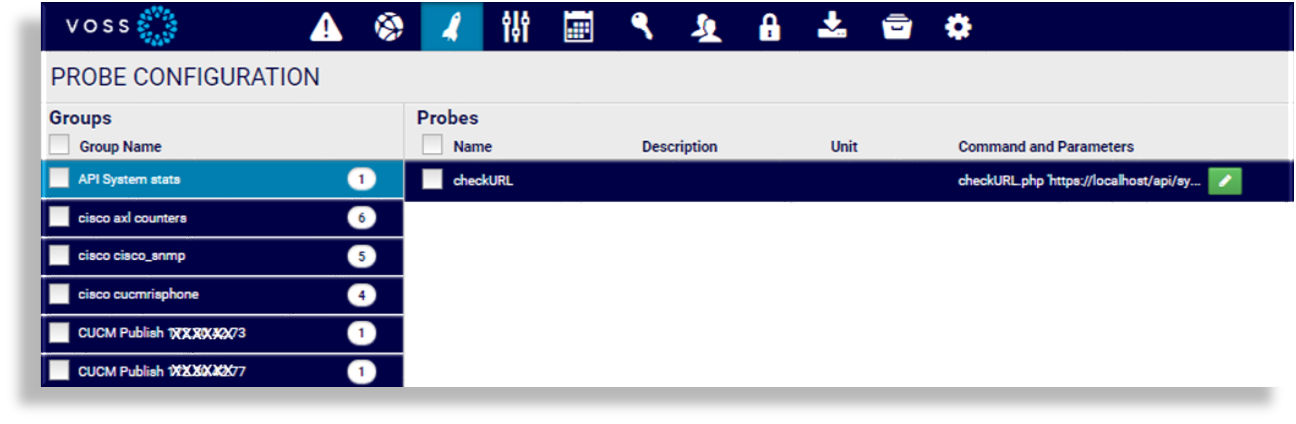
Click the Globe icon at the bottom of the Groups panel to open the ASSIGN PROBES TO ASSETS page.
From the Probe Group drop-down in the Configure panel, select a probe group.
From the Assets panel, expand the tree and select the checkbox for each asset where you want to to assign the selected probe group.
Note
A green check mark adjacent to any asset indicates an existing assignment.
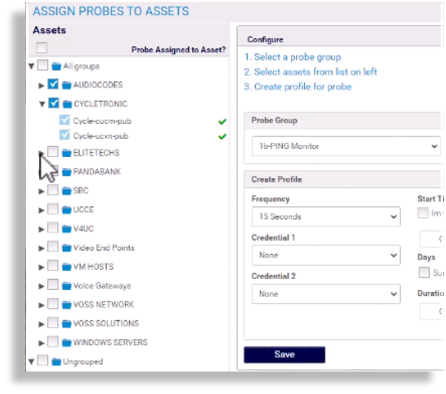
In the Configure panel, at Create Profile, configure frequency and credentials.
Click Save to assign the probe to all the assets you selected.
Assign a Customer to an Asset#
Arbitrator ships with multi-tenancy, which allows different customers to see correlated or collected results of only their data.
Within the configuration of assets, you can assign each asset to a specific customer.
To assign a customer to an asset:
On the Asset Configuration tab, click the relevant asset group to display its assets.
In the Assets panel, click the Edit icon (pencil) for the relevant asset to open it’s configuration screen.
On the Properties tab, click the down-pointing arrow at the Customer drop-down to view available customers.
Select the customer that the asset belongs to, then click the Blue Check Mark icon at the top right of the panel to update the configuration.
Click Save.
Place an Asset in Maintenance Mode#
Arbitrator allows any asset to be placed into maintenance mode. Placing an asset in maintenance mode stops Arbitrator from responding with alerts until the asset is removed from maintenance mode. Data is still collected, but no alerts are sent when an asset is in maintenance mode.
On the Asset Configuration tab, select the asset group to display its assets.
Select the asset you wish to place into maintenance mode.
Click the Pencil icon for the selected asset to open its configuration screen.
On the Properties tab, select the Maintenance Mode checkbox, then select the Blue Check Mark at the top right of the panel to update the configuration.
Click Save to save the maintenance mode settings.
Note
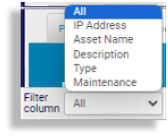
You can filter the Assets panel to display any assets in maintenance mode by selecting Maintenance from the Filter column drop-down at the bottom of the Assets panel.
Export and Import Assets#
On the ASSET CONFIGURATION tab you can export and import an asset that you exported from another system.
When selecting asset groups, all assets belonging to those groups are selected (selecting individual assets will not take effect).
If the Group Name checkbox is selected, all assets are included - both All groups and Ungrouped.
Export Assets#
On the Asset Configuration tab, select a group to display its assets, and select relevant assets for the group. Alternatively, select Group Name at the top of the Groups pane to select all assets in all groups.
Click the Export Assets button (green down arrow at the bottom of the Assets panel) to launch the Export CSV dialog.
Fill out a CSV filename. You won’t need to fill out the file extension,
.csv.Click Export to create the export file, then view progress until the Export finished dialog displays.
Click Download. The CSV file is saved to a download location you choose.
Import Assets#
On the Asset Configuration tab, click the Import Assets button (green up arrow at the bottom of the Assets panel) to launch the Import Assets dialog.
Click Choose File, then browse to an exported (and optionally modified) CSV file on your local computer.
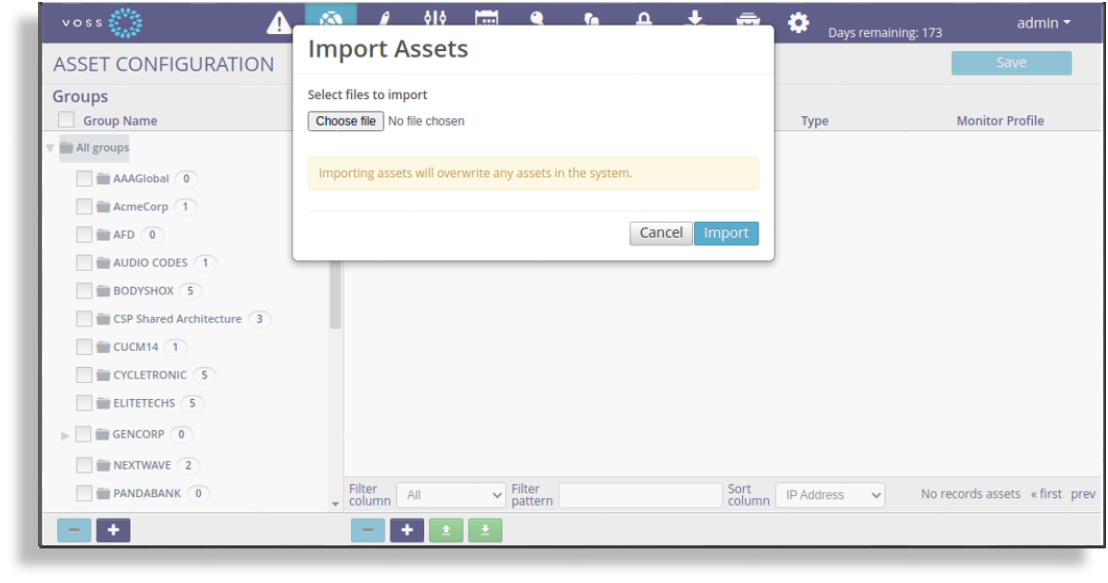
Click Import.
Next steps
Assign probes to the imported assets - see Assign a Probe to an Asset in this guide.
Asset CSV Format#
The following columns are in an exported CSV file:
"Asset Name",Description,"IP Addres","MAC Address",Vendor,
Model,Version,"Host Name",Alias,"Asset Group Name",
"Type of Device(see below)","Device’s Timezone",Comments,
"Physical Address","Customer Name","Site Name","Row Action"
Note
Mandatory fields are:
Asset Name,IP Addres.The
"Row Action"column is used when importing and if it contains “delete”, then the row will be deleted upon import.Row uniqueness is the combination of: “IP Address”, “Customer Name”, “Site Name”. If an asset found, its data will be updated. if not, new asset will be inserted under the asset group indicated in column “Asset Group Name”.
The column “Asset Group Name” has to be unique. if an asset group is found, its data will be updated. If not, a new asset group will be inserted.
There are 2 entries in the import CSV:
An asset with data in all columns. Most important is the very first column “Asset Name”.
An interface is a property of an asset. An interface only has data in from column “Description” to “Host Name”. Most important is that it does not have data on the very first column “Asset Name”. All CSV interface row(s) will be under an asset just right above it(them).