
Deploy and VM Installation Steps
Download the OVA for your system to a directory accessible by the VM client.
Deploy the OVA:
Select the downloaded OVA file and choose a VM name.
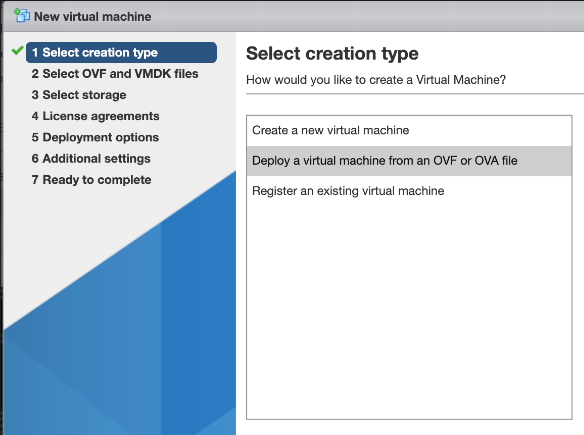
Select storage according to the recommended hardware specifications for the required configuration. See the VMWare Specification and Requirements for your system.
Select network mappings according to the recommended hardware specifications for the required configuration. See the VMWare Specification and Requirements for your system.
When you run the VM, you will see
.lxppackages being installed. This takes a while.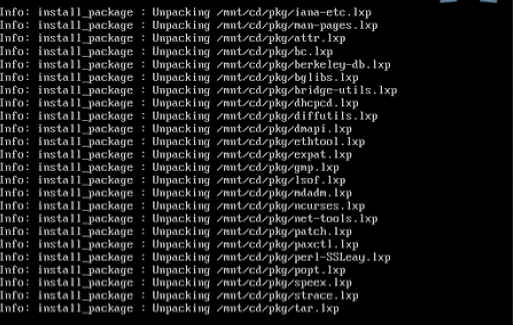
After all the packages are installed, the VM is automatically powered off.
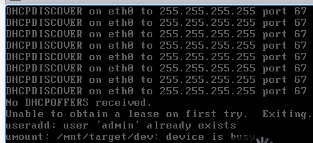
You will see the
auto-poweroffmessage on the console.After the system boots, wait at the
login:prompt until a banner with anAboutconsole display shows displaying values for the placeholders below:About =============================================== Hostname: <hostname> Version: <version> Theme: <theme> Flavor: License: NNNNN-NNNNN-NNNNN-NNNNN-NNNNN Days Licensed: nnnnn Days Remaining: nnnnn Product Key: Website: <website> Kernel: Linux n.nn.nn-lxt-3 x86_64 GNU/Linux <hostname> login:
At the
login:prompt, log in asadminwith password as the last 10 characters of theLicense:value, excluding the dash.Note
Since the Licence key value is only displayed here. When you ssh in it will not be seen. Be sure to copy out your admin password from this console.
Changing the admin password is possible via the Change Passwords menu option.
After login, the Administration menu shows, as in the example below for DS9:
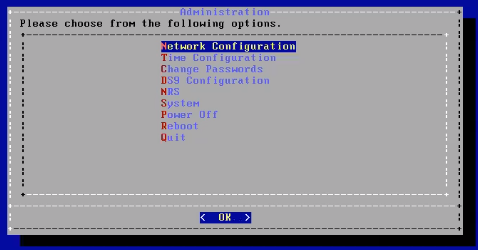
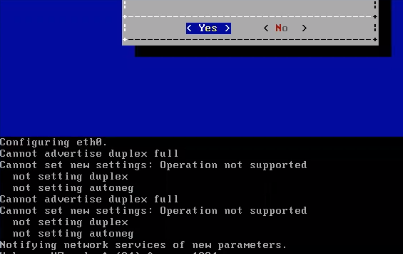
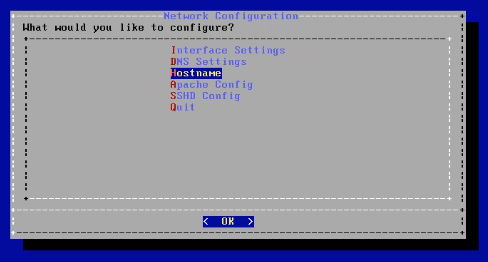
Under Network Configuration, provide ip/netmask, default gateway and hostname.
Under Interface Settings, select the interface to configure.
Select IPs and set the IP Address and netmask in the format
nn.nn.nn.nn/24and save.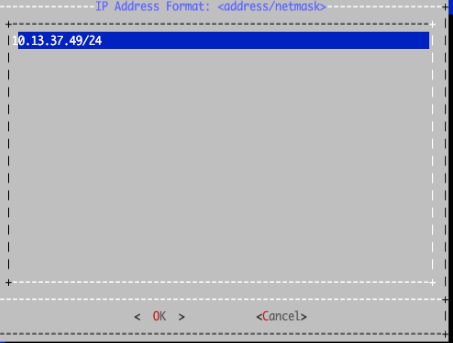
Modify the parameters for the selected interface:
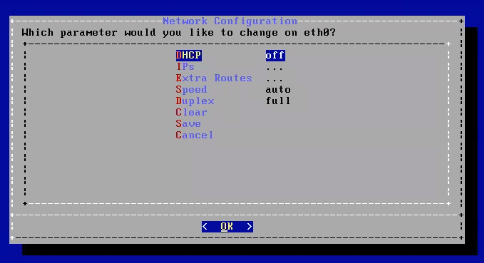
Set up the default gateway under the Extra Routes menu.
Be sure to use the format default <gateway IP address> for the entry. The word default is required. For additional route entries use the <subnet> < gateway> format. Similar to what would be done on a Linux system at the CLI.
Set hostname
The console will show the
Updating hosts:message. Note that this setup takes a few minutes.For SSHD Config, multi-line entries can be added if needed - for example for CUCM v11.5 support. See: Multi-line CUCM Cipher support.
Note
This step is not relevant to the DS9 and Insights NetFlow solution. This step is relevant only to an Insights Assurance solution and its integration with Cisco UC systems.
Base system installation is now complete. Select Quit to exit the Administration menu on the console and continue with product registration and with the configuration of your system through the GUI:
Insights Dashboard
Insights Arbitrator (relevant only to an Insights Assurance solution and its integration with Cisco UC systems)
Insights DS9
Note
Prior to opening the DS9 GUI, reboot the system.
See: DS9 Product Registration and DS9 Configuration on the Dashboard
Multi-line CUCM Cipher support
This section provides details for the use of the SSHD Config menu option.
Note
This section is not relevant to the DS9 and Insights NetFlow solution. This solution is relevant only to an Insights Assurance solution and its integration with Cisco UC systems.
For CUCM v11.5 support:
kexalgorithms diffie-hellman-group1-sha1,diffie-hellman-group14-sha1,diffie-hellman-group-exchange-sha1
ciphers aes128-cbc,3des-cbc,aes128-ctr,aes192-ctr,aes256-ctr,aes128-gcm@openssh.com,aes256-gcm@openssh.com
macs hmac-md5,hmac-sha1,hmac-sha2-256,hmac-sha1-96,hmac-md5-96
hostkeyalgorithms ssh-rsa,ssh-dss