
Setting up a Data Source Name (DNS)
Setting up a Data Source Name (DNS)
This section describes how to set up a data source name (DSN) to execute database queries via the VOSS Insights Windows Forwarder.
The Forwarder uses a DSN connection mechanism in order to connect to an external database and collect information periodically.
Requirements for the environment:
The following assumptions are made for the environment:
The Forwarder is installed on the same host machine as the database.
The target database type is MS-SQL 2XXX.
The Host machine’s operating system is Windows 64-bit.
The Host machine is part of a windows domain.
The domain (admin/local/system) account that is used to run the Forwarder as a service has at least read-only access to the database that is supposed to be queried periodically.
Perform these steps to set up a DSN:
Use Windows Explorer to go to the following directory:
C:\Windows\SysWOW64Locate and then execute the following file:
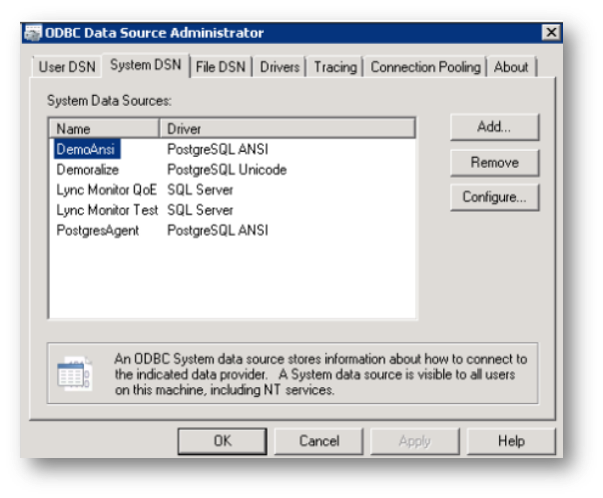
odbcad32.exeSelect the System DSN tab.
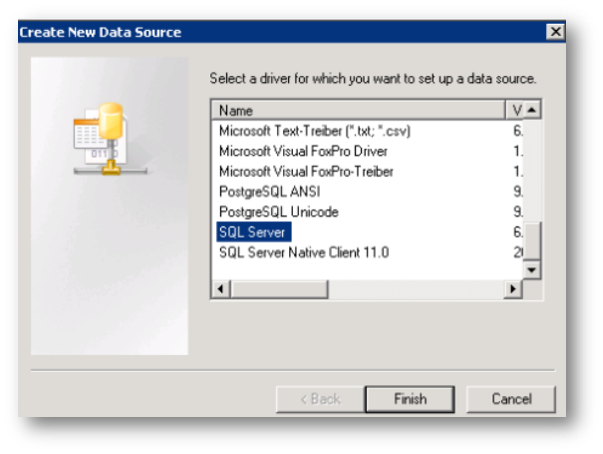
Click Add, then select SQL Server from the list, and click Finish.
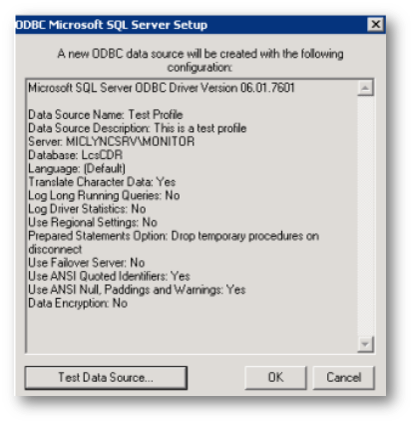
On the Create a New Data Source to SQL Server dialog:
Fill out the Name and Description fields.
Select the down-arrow at the Server drop-down, then let the system discover all the database instances available in your sub-network. Choose the appropriate “database hostnameinstance name” to connect to.
Click Next.

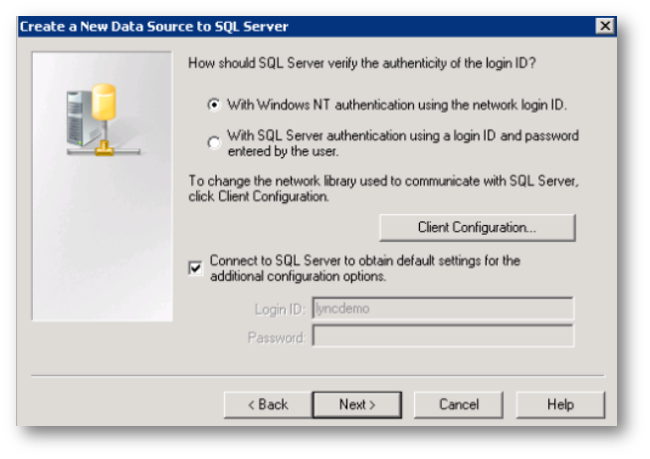
Do not change any settings on the authentication page. Click Next.
Note
Before proceeding, review the prerequisites for this procedure, which describe the assumptions around your environment setup.
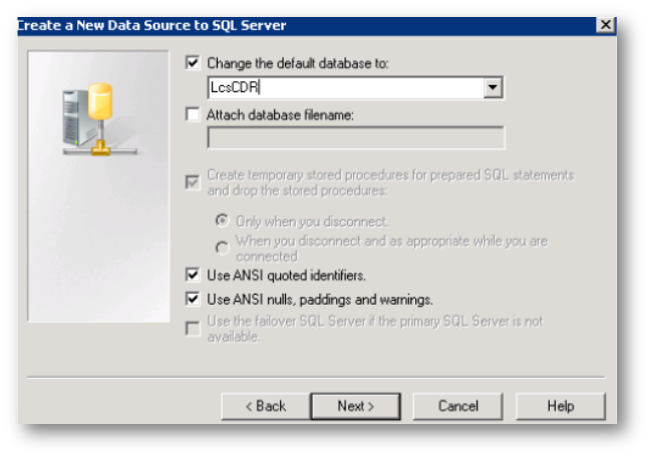
If your credentials are correct, you will be able to connect to the database instance and set a default database name on the next screen. Choose the appropriate database name that you would like to query and click Next, then click Finish.
Click Test Data Source….
If the test passes, you will see the following message:
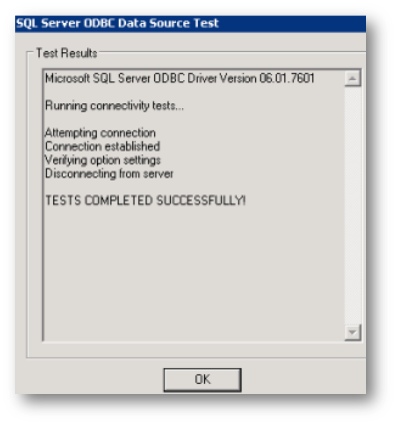
Click OK to exit setup.
The next time you try to add a “Db query” on Forwarder (see section Database Queries) where you will see your DSN name listed in the ODBC Data Source List.