Agent Configuration#
Overview#
Insights Arbitrator agents are Linux service testing bots that enable synthetic connectivity and performance testing of a range of UC and business applications for greater visibility of the user experience in your environment.
The agents test connectivity to UC resources, such as Teams and Zoom, and perform synthetic testing to validate that the infrastructure can reach the application resource or a specified URL. For example, you may want to monitor the route and connectivity across a WAN link for mission-critical applications to verify jitter and per hop latency. Alerts can be set up to notify you immediately when your systems experience connectivity or performance issues. This is especially important for systems where it’s important that they’re up and running at all times.
Each agent makes regular (5 minute interval) API calls to the Arbitrator for updates.
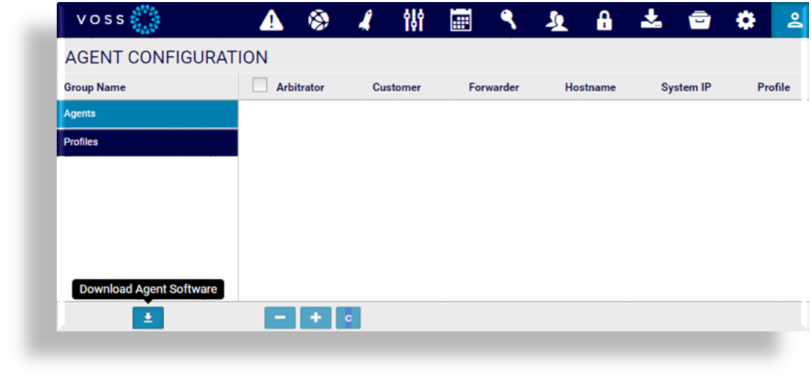
You can view and configure registered Insights agents and agent profiles via the Agent Configuration tab in Arbitrator’s System Configuration interface.
Note
One profile is assigned per agent.

Install Insights Agent#
This procedure installs and registers an Insights agent with the Arbitrator.
System Requirements
Minimal Linux installation on your network that can install .deb files on any of: VM, (mini)computer, Raspberry PI
Linux should have installed: jq, curl, sysstat, mtr-tiny, util-linux
Minimal space required: .deb file size less than 17KB
Download the installation package via the Arbitrator GUI or directly via the Arbitrator IP address:
https://[Arbitrator IP Address]/insights-agent/insights-agent-[release version]-all.debNote
You can verify the file against the sha value, also available at the download location:
insights-agent-[release version]-all.deb.sha256
Install the software:
$ sudo apt-get install ./insights-agent-24.2-all.debEnter the IP address or FQDN of the Arbitrator where you’re deploying the agent.
Fill out credentials, user and password, and wait for authentication.
Note
Typically, these are the VOSS Agent API credentials - user can be the default,
voss_agent_api_user. You can also use the admin, or your own user. Once the credentials are set up for the agent, they’re not exposed again. The credentials are centrally managed on Arbitrator’s Credential Configuration page, so that you can share them between the profiles. Users and their passwords can be added and configured in Arbitrator’s Access Control page.Fill out the customer name.
Fill out a name for the agent.
The agent registers with the Arbitrator. A UUID is required to be able to register so that the Arbitrator can identify the agent in its interactions.
Confirm that the agent status is “registered”.
At the prompt, restart services.
Verify that the agent has been added:
Log in to Arbitrator.
Click the toolbar Wrench icon to open the System Configuration GUI.
Click the Agents icon to open the Agent Configuration page.
Select the Agents tab to view the agent you added.
Note
If you need to upgrade the agent for a new version of Arbitrator, you can re-run the Agent installation package.
View and Configure Agents and Profiles#
Agents#
The Agent Configuration page provides a centralized management interface for agents and their profiles, where you can:
Add or delete agents and their profiles
Note
It is expected that an organization will have just one agent per site (location).
Add tests for the agent to run and specify test attributes (destination, ports, protocol)
Note
Credentials for connecting to a destination can be configured via Arbitrator’s Credential Configuration page.
Manage the tests the agent runs, for example, to remove or disable existing tests
Manage the agent code, for example, to view agents and their description or purpose, their versions, and their enabled tests, and to update one or more agents
Enable or disable agents
Note
When disabling an agent on the Arbitrator, the agent still runs all its jobs (5 minute intervals), but it won’t run its tests or report to the Arbitrator until it’s enabled again.
Select a profile for the agent, and update the agent or its profile - for example, you can change the customer name or the hostname, and enable or disable collection
Note
The system IP is a read-only value as it’s assigned by the system.

Assign a profile to an agent
On the Agents group, click the green Pencil icon to edit the agent.
In the Profile drop-down for the relevant agent, choose a profile.
Save your changes.
Profiles#
You can add one or more profiles. An agent can only have one profile assigned to it. One profile may be assigned to one or more agents.
Add a custom profile
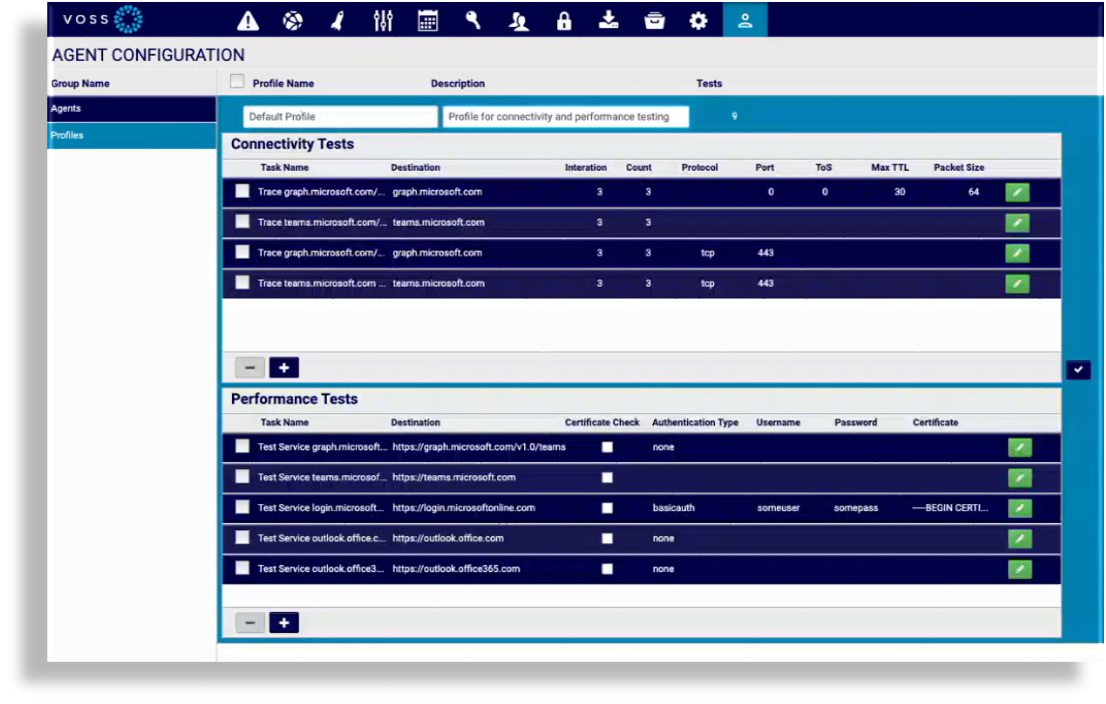
Insights ships with a default profile, which is assigned to an agent on install. The default can be cloned and customized in Arbitrator.
To clone a profile:
On the Profiles group, select the checkbox at the profile name.
Click the taskbar Clone Profile button (C)
Give the profile a new name and description.
Add or remove tasks for the connectivity tests and/or the performance tests. You can also clone existing tasks then customize the clone for your requirements - for example, change the task name, specify a destination and port. Save your changes.
Configure profile
Click the green Edit icon (Pencil) to edit a profile.

You can edit the various connectivity and performance tests for the profile. Once the profile is updated, the next time the agent checks for changes, the new settings are retrieved from the Arbitrator and the agent runs the profile with these settings against the Arbitrator.

View Agent Data on the Dashboards#
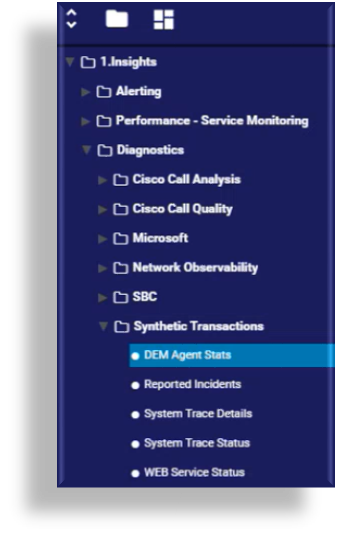
You can view the results of agent tests on the collection of Synthetic Transactions dashboards.
When adding the agent, the system provides a unique ID (UID) to the agent, which remains associated to the agent if you uninstall and reinstall the agent. The UID comes from the Linux system, which has a unique ID. You can identify the agent data on the dashboard from the UID.
Log in to Insights Dashboard.
In the Dashboard folders, navigate to Diagnostics > Synthetic Transactions.

Note
See Synthetic Transactions Dashboards in the Dashboard Admin Guide.
Select a dashboard to view and inspect agent data.
Related Topics
