Self-service Theme Customization
This section provides steps to customize and add a Self-Service theme.
To customize an existing Self-service theme:
Choose the hierarchy level at which the theme will be applied. Note that themes can only be customized by a Provider Administrator (or higher).
Choose Role Management > Themes to open the Themes list view.
Click the Self-service theme that you want to download.
Click Action > Download on the button bar to download the theme. The exported file is a .zip archive with the name of the theme. The archive contains a folder and a
.cssfile with the theme name in it, for examplevoss_selfservice.zipcontainsvoss_selfservice/voss_selfservice.css.Modify the
.cssfile, for examplevoss_selfservice.css. Use your browser to inspect the elements of the theme on the GUI that you wish to customize.When editing is complete, make sure the directory folder name is the same as your theme name. Compress the folder and save the file with the theme name and a
.zipfile extension.An error message will display on the user interface if the file does not have a valid file extension.
Return to Role Management > Themes:
For an update, select the theme name and click Browse next to Import File, and then open the same theme name. Optionally select the Backup Enabled check box to create a backup of the current theme on the server. Click Save to complete the import process.
If a theme update does not require an updated CSS in a zip file but only updates the text of the theme, then no file upload is required. For information about the other fields on this form, refer to Add a Theme on the Legacy Admin Portal.
The preferred method to add a new Self-service theme is to downloading an existing theme to maintain directory structure and file naming conventions.
To add a new Self-service theme to the system:
- Choose the hierarchy level at which the theme will be created.
- Choose Role Management > Themes to open the Themes list view.
- Click Add on the button bar to open the Themes input form. Note that themes can only be customized by a Provider Administrator (or higher).
- Enter the Theme Name (same as the file name created above).
- Enter an appropriate Site Title if required. The site title entered here is the title displayed in the browser tab.
- Click the Browse button to import the created theme zip file. Wait until the system displays the file chosen in the Import File field.
- If the theme must also apply to the login page, select the Use this Theme to style Login page check box.
- To set login banner text and notices on the login page, refer to Set the Login Page Theme. The Use this Theme to style Login page check box does not have to be enabled for banner text to show.
- Click Save on the button bar when complete.
Self-service Banner Style
To customize the Self-service banner style, find the element .banner-text
in the CSS file and customize it, for example:
.banner-text {
    background-color: #515150;
    color: #FFFFFF;
}
Minimal Theme Customization
In order to customize the Self-service theme to support the minimal mode, the elements below are available.
Important
If your theme uses a dark colors, the minimal theme may need to be modified to provide a contrasting text and background display.
The examples below are minimal mode image snippets and theme settings:
.minimal-mode-container {color: white;}
.minimal-mode-container .overlay {background-color: #2e2e2e!important;}
- resized logo (
<number>variable) - resized tagline (
<number>variable)
.logo-holder-header {padding: <number>px <number>px;}
.ss-tagline {height: <number>px; width: <number>px;}
- contrasting drop-down menu items and text
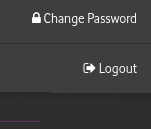
.minimal-mode-menu ul {background: #3e3e3e;}
.minimal-mode-menu ul li {border-bottom: 1px solid #2e2e2e;}
.minimal-mode-menu ul li > a {color: white;}