Exchange Online
Choose Exchange Online from the Device Management menu.
Choose Exchange Online Server and click Add.
Exchange Online Configuration Page
Enter the following values on the Base tab:
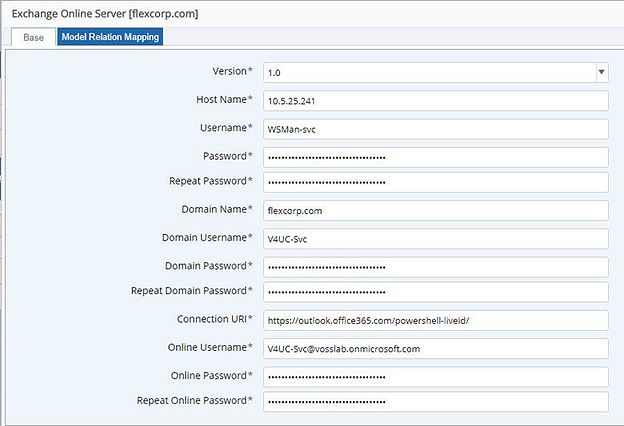
Sample Exchange Online Configuration Parameters
Parameter Example Value Comments Version 1.0This is the only version currently supported Host Name 10.5.25.241The IP address of the PS Proxy handling Exchange Online connections. We could have also entered psproxy02.flexcorp.com, which is the FQDN of that proxy.Username WSMan-svcThe local service account that we created in the Remote Management Service Account section. [1] Password / Repeat The local service account’s password. Domain Name flexcorp.comThe domain portion of the domain service account’s account name. We created this account in the Create the Domain Service Account section. [2] Domain Username V4UC-SvcThe user name portion of the domain service account’s account name. We created this account in the Create the Domain Service Account section. [3] Domain Password / Repeat The domain service account’s password. Connection URI https://outlook.office365.com/powershell-liveid/Use this URI literally - it is the same for all Office 365 tenants. Online Username V4UC-Svc@vosslab.onmicrosoft.comThe username of the domain service account as it appears in the Office 365 Admin Center. Online Password / Repeat The password for the online service account. This will be the same as “Domain Password”, above. Choose Test Connection from the Action menu.
Check the transaction log and confirm that the test was successful.
| [1] | See: Remote Management Service Account |
| [2] | See: Create the Domain Service Account |
| [3] | See: Create the Domain Service Account |